
The Walkthrough: Part 1
Mewgenics is a game about tactics, cats, breeding and poo. An excessive amount of poo.
This guide is for newcomers to the game who may be struggling and need a structured step-by-step approach.
Getting Started
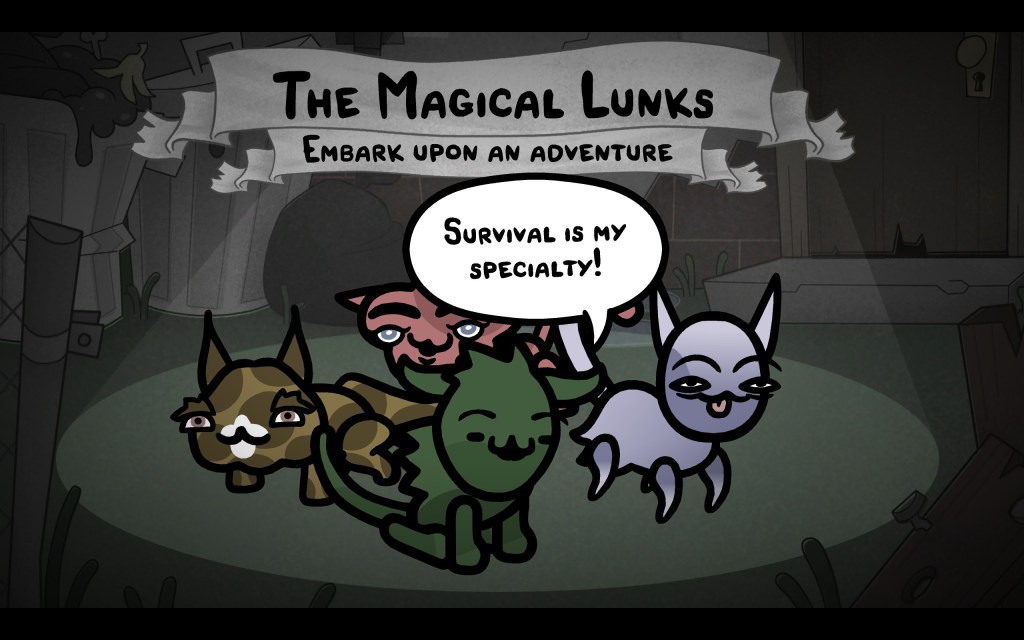
The game will start you out with the Tutorial. This section holds your hand and introduces the battle interface. You don’t need my help here, Butch is your guide for this one!
One important thing the tutorial does not teach you is Tactical View. By default this is the Left Control button, or the middle mouse button. Holding this hides scenery and gives you a clear view of everybody’s position on the field. This will be very handy when fighting giant bosses, which tend to obscure the action.
When you get to your House, you will need four cats to set out on your first Adventure. Note that this is a one-off requirement. You can actually send out any number of cats between one and four on subsequent Adventures. But to begin with, you will need to get enough kittens or strays to make four adult cats.
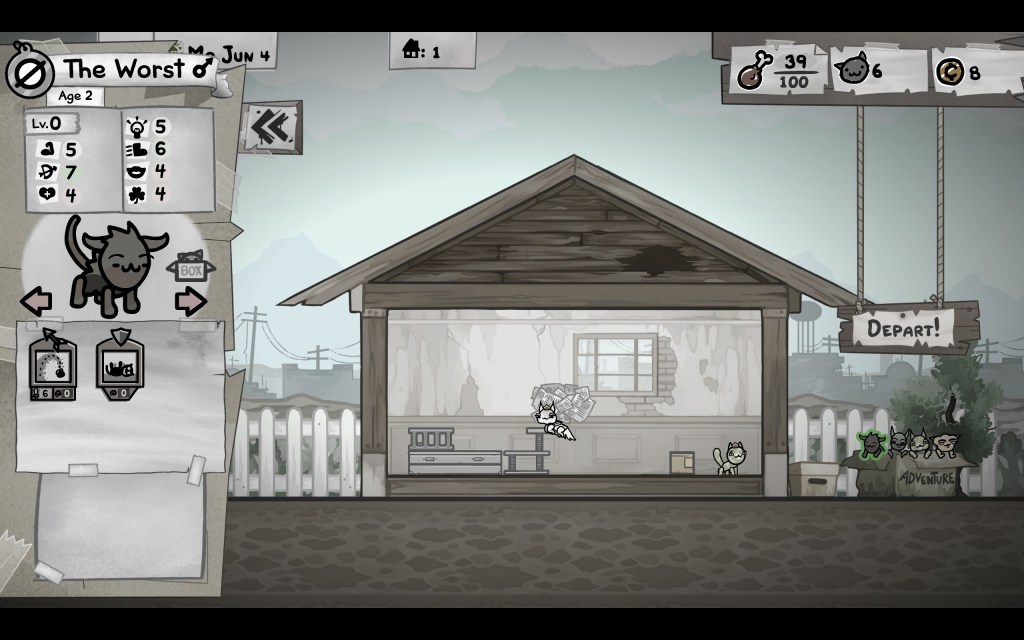
A stray will turn up every morning. Cats in the house will breed overnight, if conditions allow. Currently you have no means of controlling this. In the future, you will be exercising more care over your cat breeding programme. It takes one day for any kittens to become adults.
You first Adventure takes you to the Alley. You have no control over your cat’s traits and stats at this point, so you will be working with whatever the game has given you. This does mean you might end up with an extremely unsuitable party, through no fault of your own. Don’t be discouraged if you fail. You will acquire more options and tools as we progress.
Your game will be different to mine, so I can’t tell you exactly what to do. Instead I will be explaining the flow of battle, the things I pay attention to, the decisions I make and why I made them. Mewgenics is all about randomness, but good decision making has a structure to it.
Here are the four cats I was given:
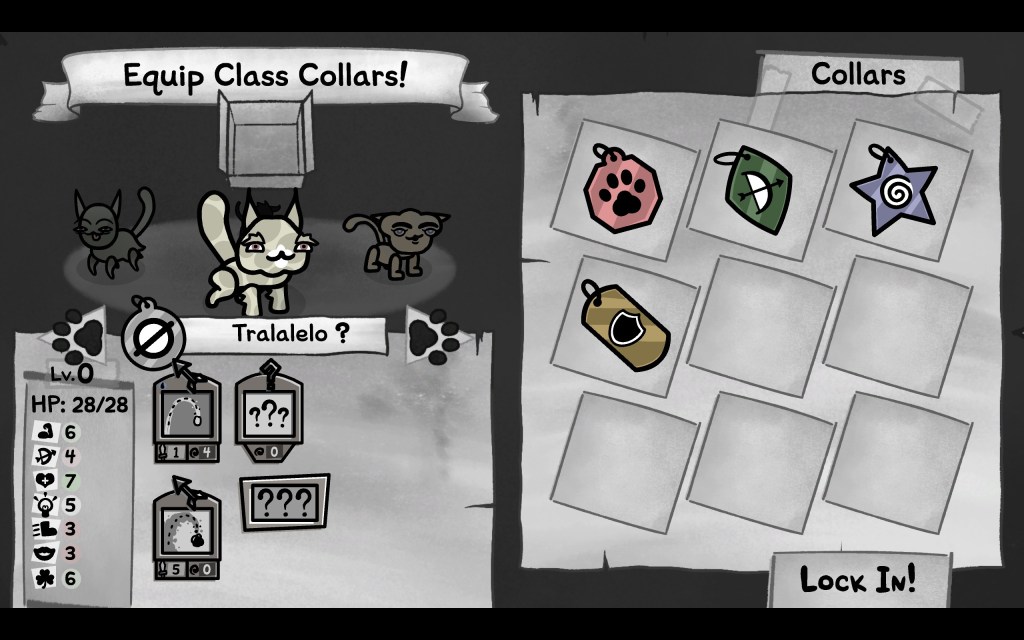
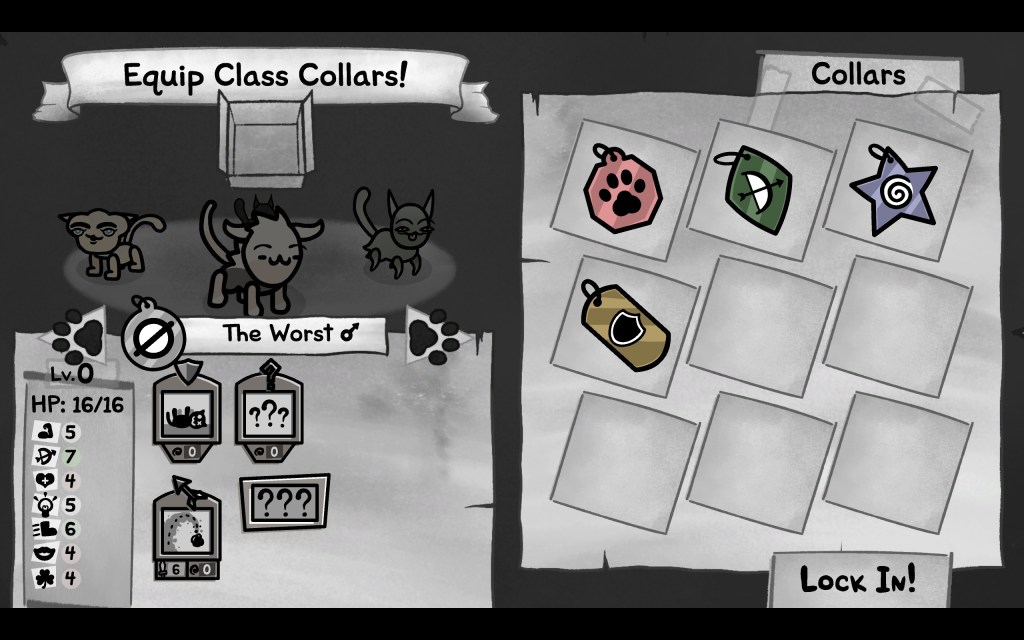
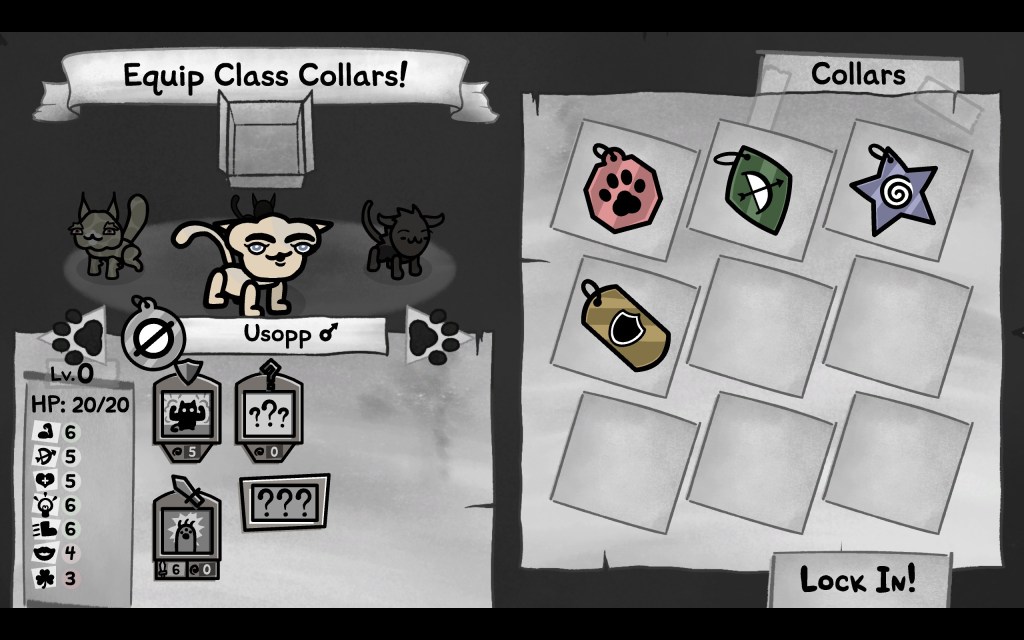
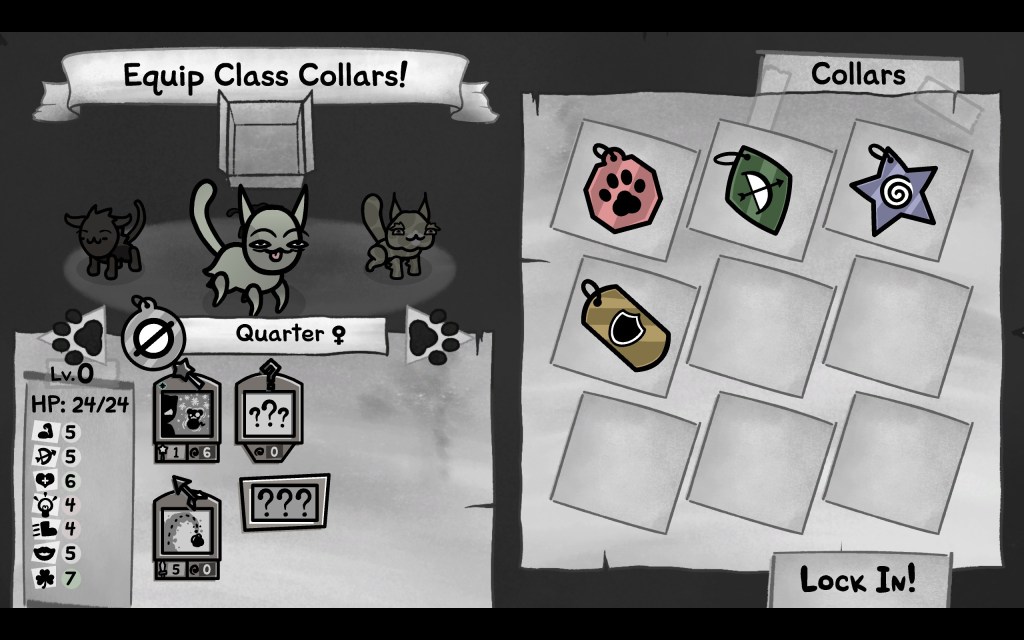
I need to assign them classes. There are four starting Classes at your disposal, represented by collar tags. These are Fighter, Hunter, Mage and Tank. The class you assign a cat will modify their base stats. Make sure to observe the difference when you assign a collar. I will explain their roles and my reasoning behind which cat I picked.
Class: Tank
Tanks are about surviving damage, protecting the party, and dishing damage back out. It’s a versatile class. You will be able to choose whether your Tank focuses on taking damage, or giving it, through your choices in perks as the cat levels up. Tanks are melee fighters, so they should have high Strength. They also need high Constitution if they are taking the role of absorbing incoming damage. Beware a low Speed stat. Because Tanks are melee attackers, they have to get up close and personal, which they will struggle to do if they lack mobility.
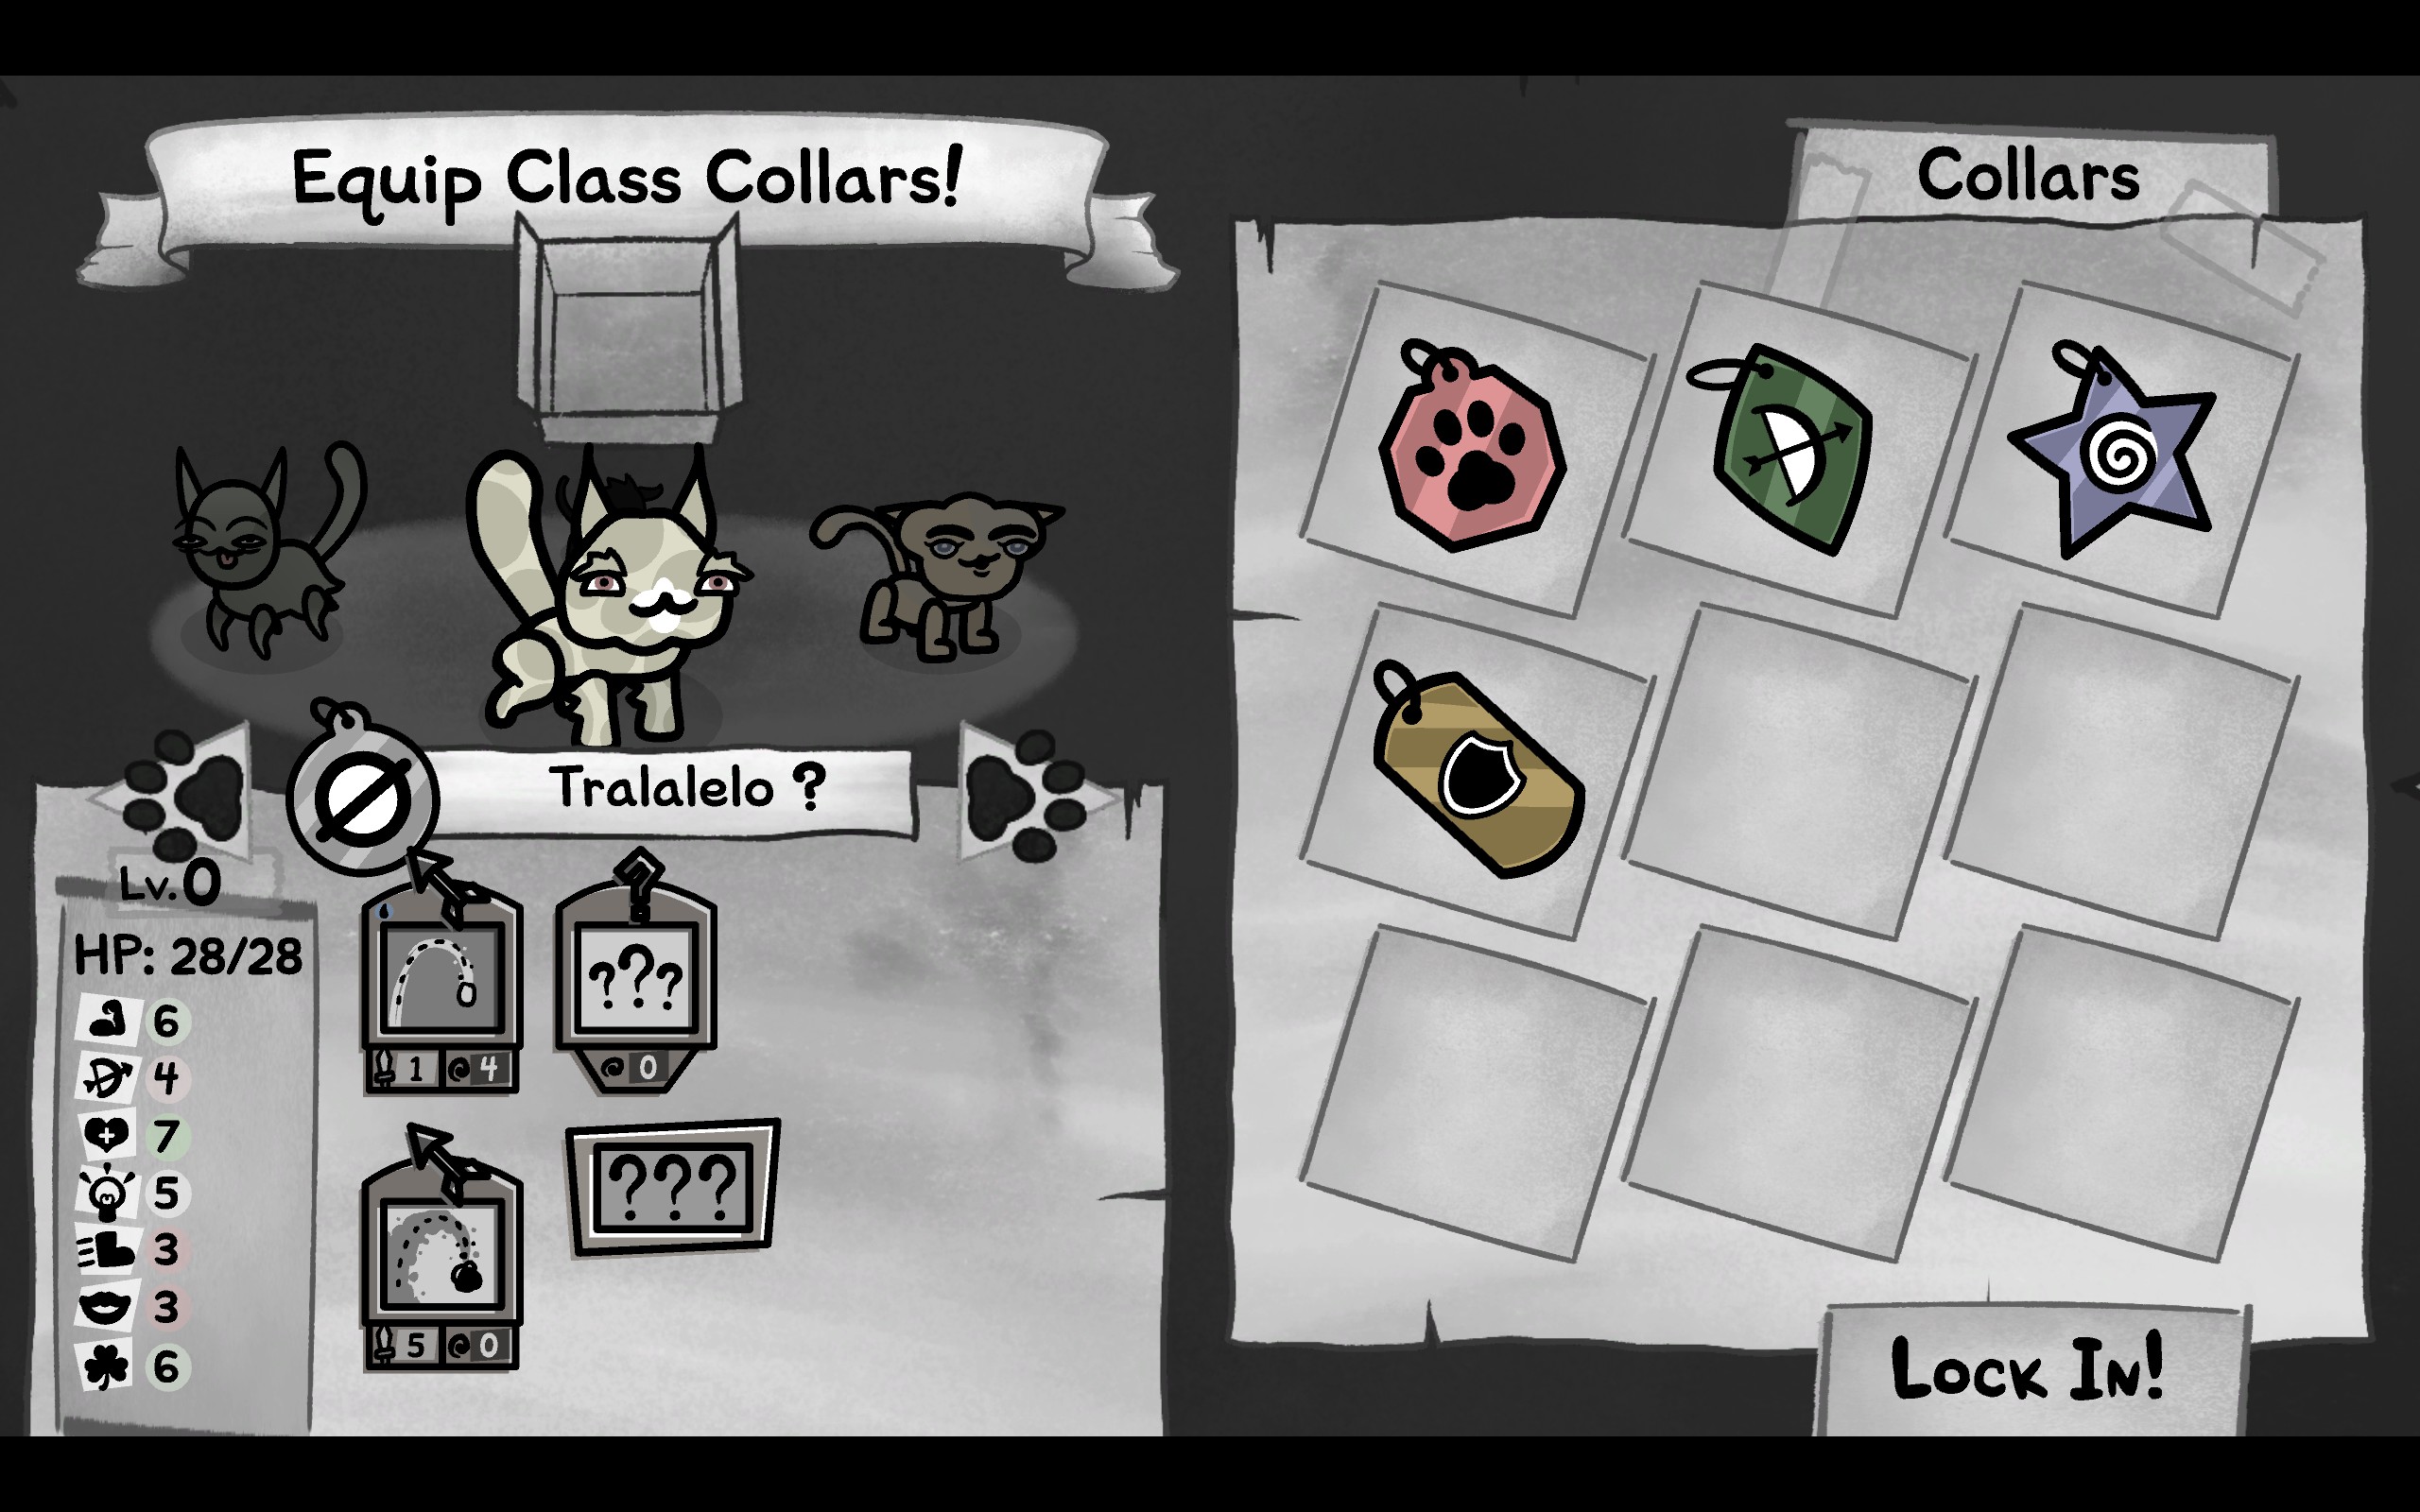
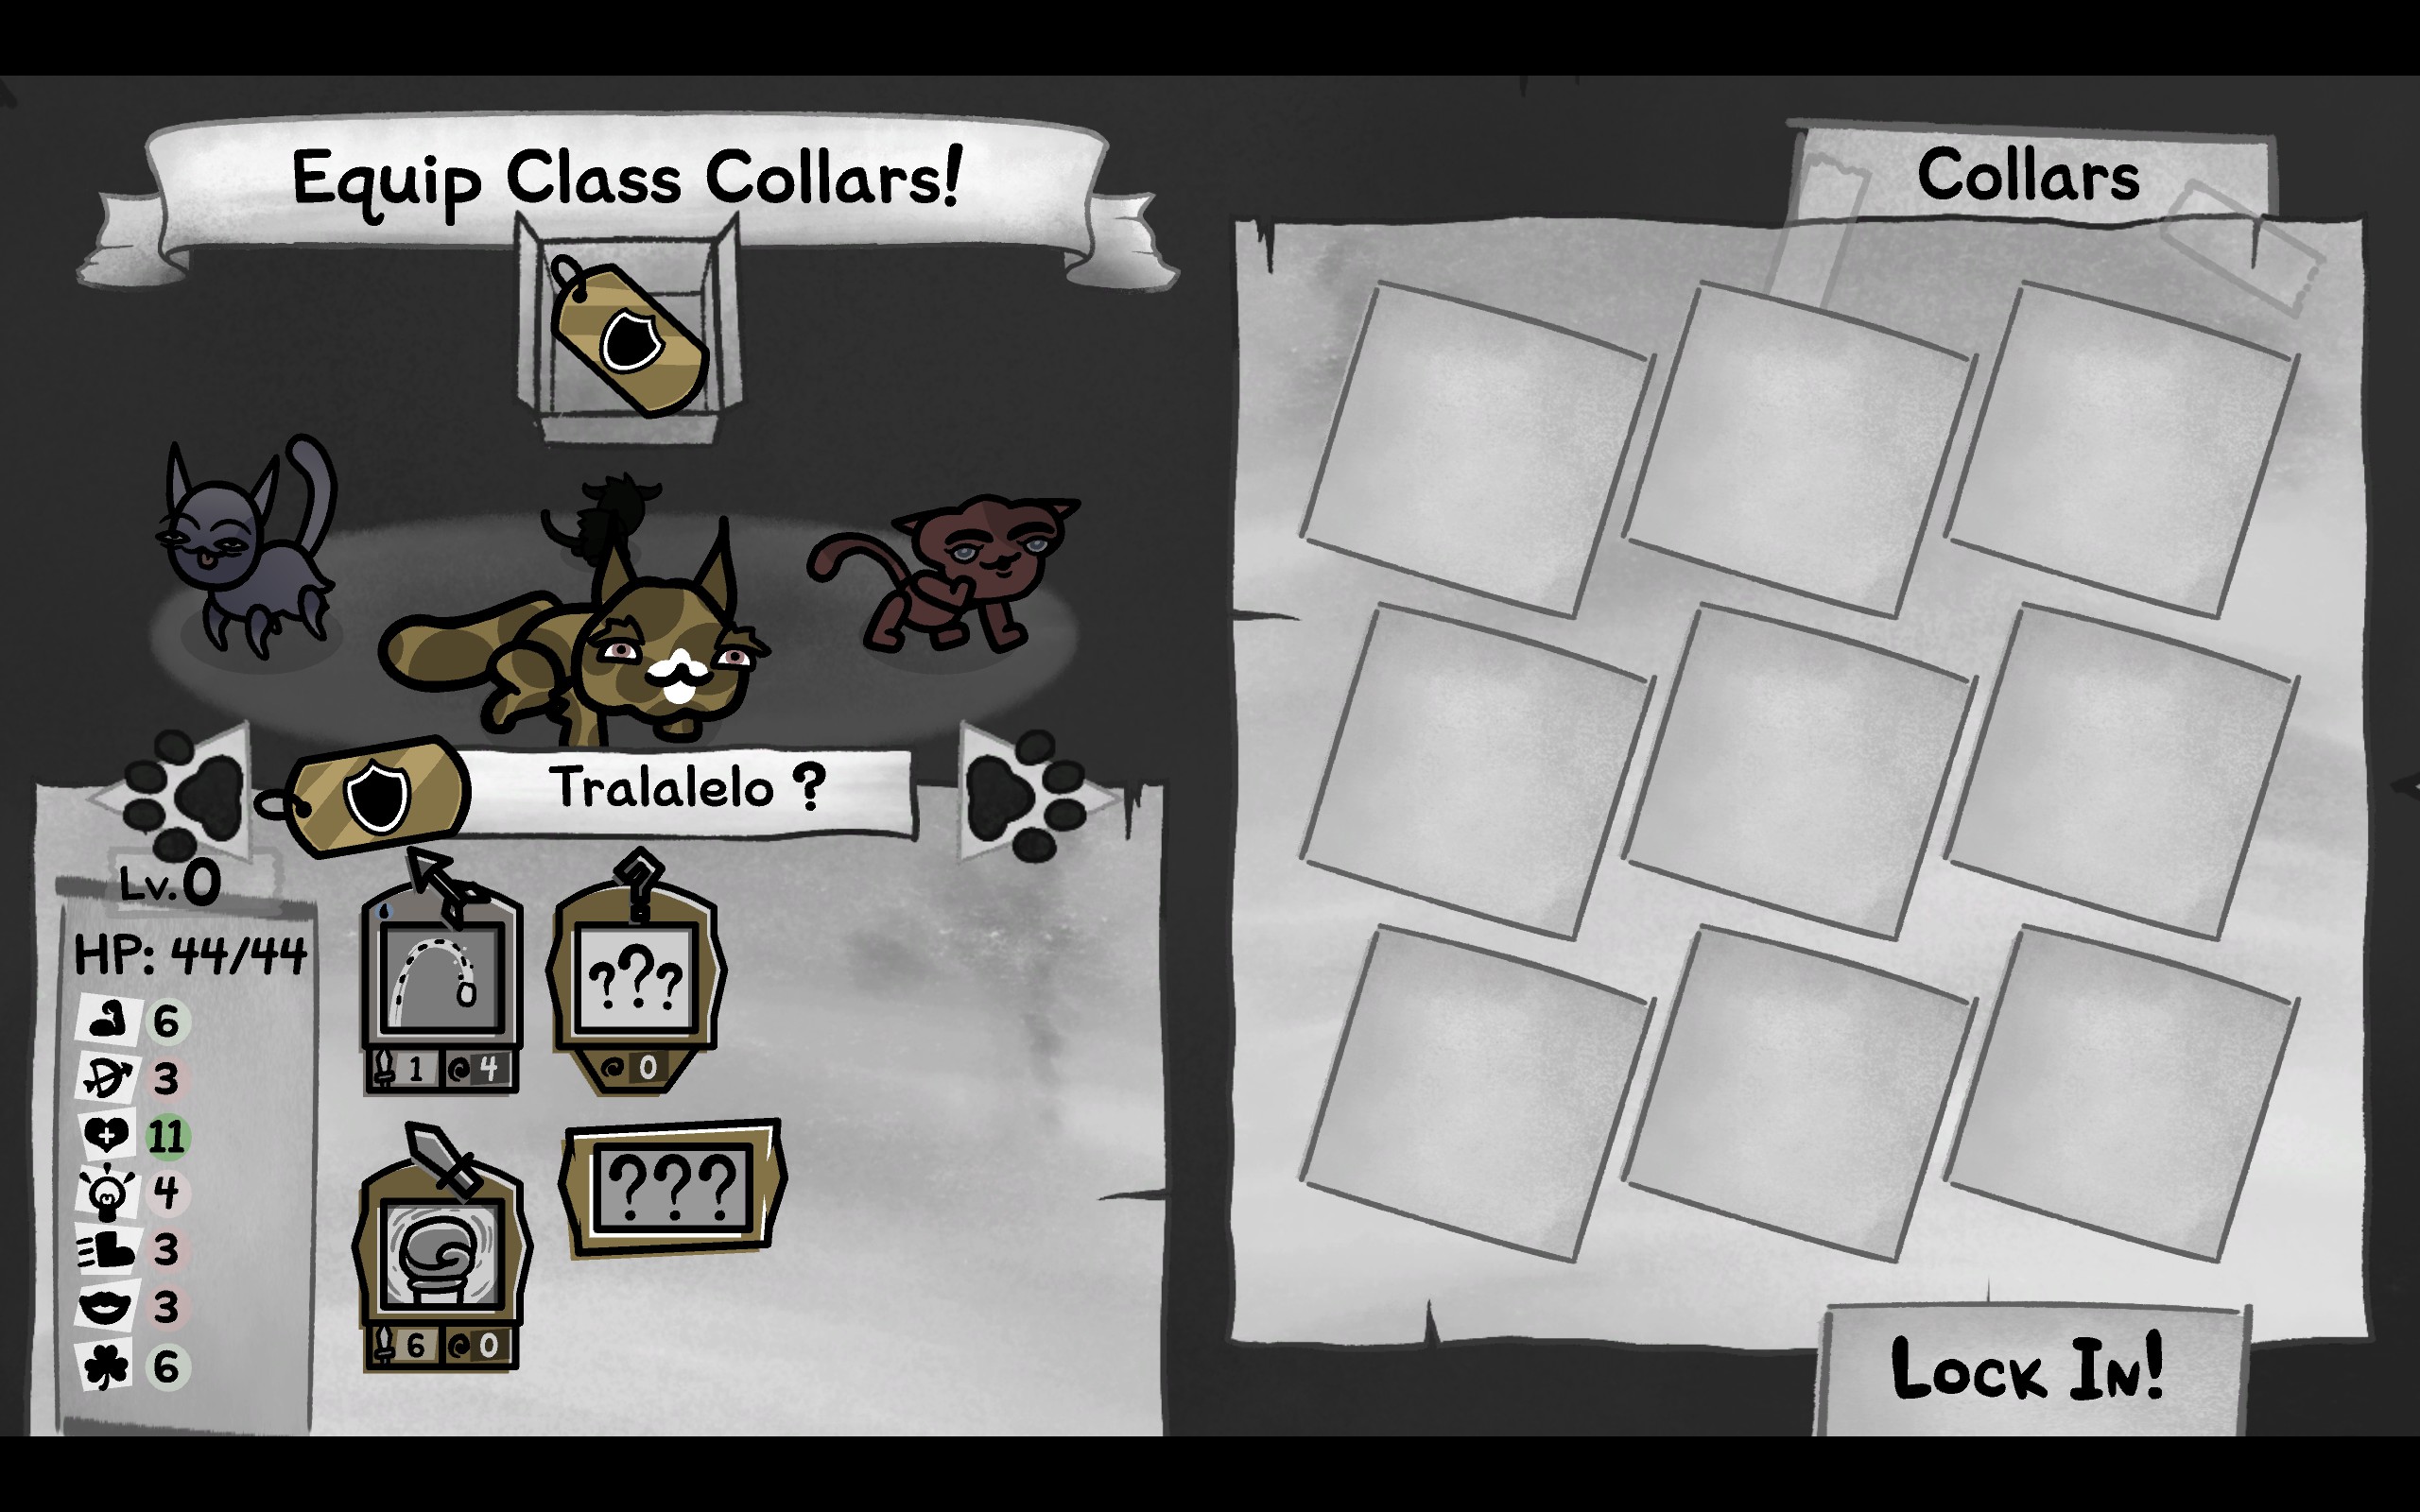
I picked “Tralalelo” to be my Tank thanks to having the best Strength and Constitution combo. However, that leaves their Speed at a measly three, which may cause issues.
Class: Hunter
Hunters are ranged fighters and excel in this role. Hunters can shoot over obstacles, so smart players usually have their Hunters behind cover. Dexterity is the main stat for a Hunter and is essential. Also look out for Luck. You will notice that a lot of the perks for Hunters have a luck component. Because of this, avoid assigning the Hunter class to a cat with low Luck, or you will suffer for it. Hunters are often glass cannons with low Constitution. Protecting a low health or exposed Hunter should be a priority for your other team members.
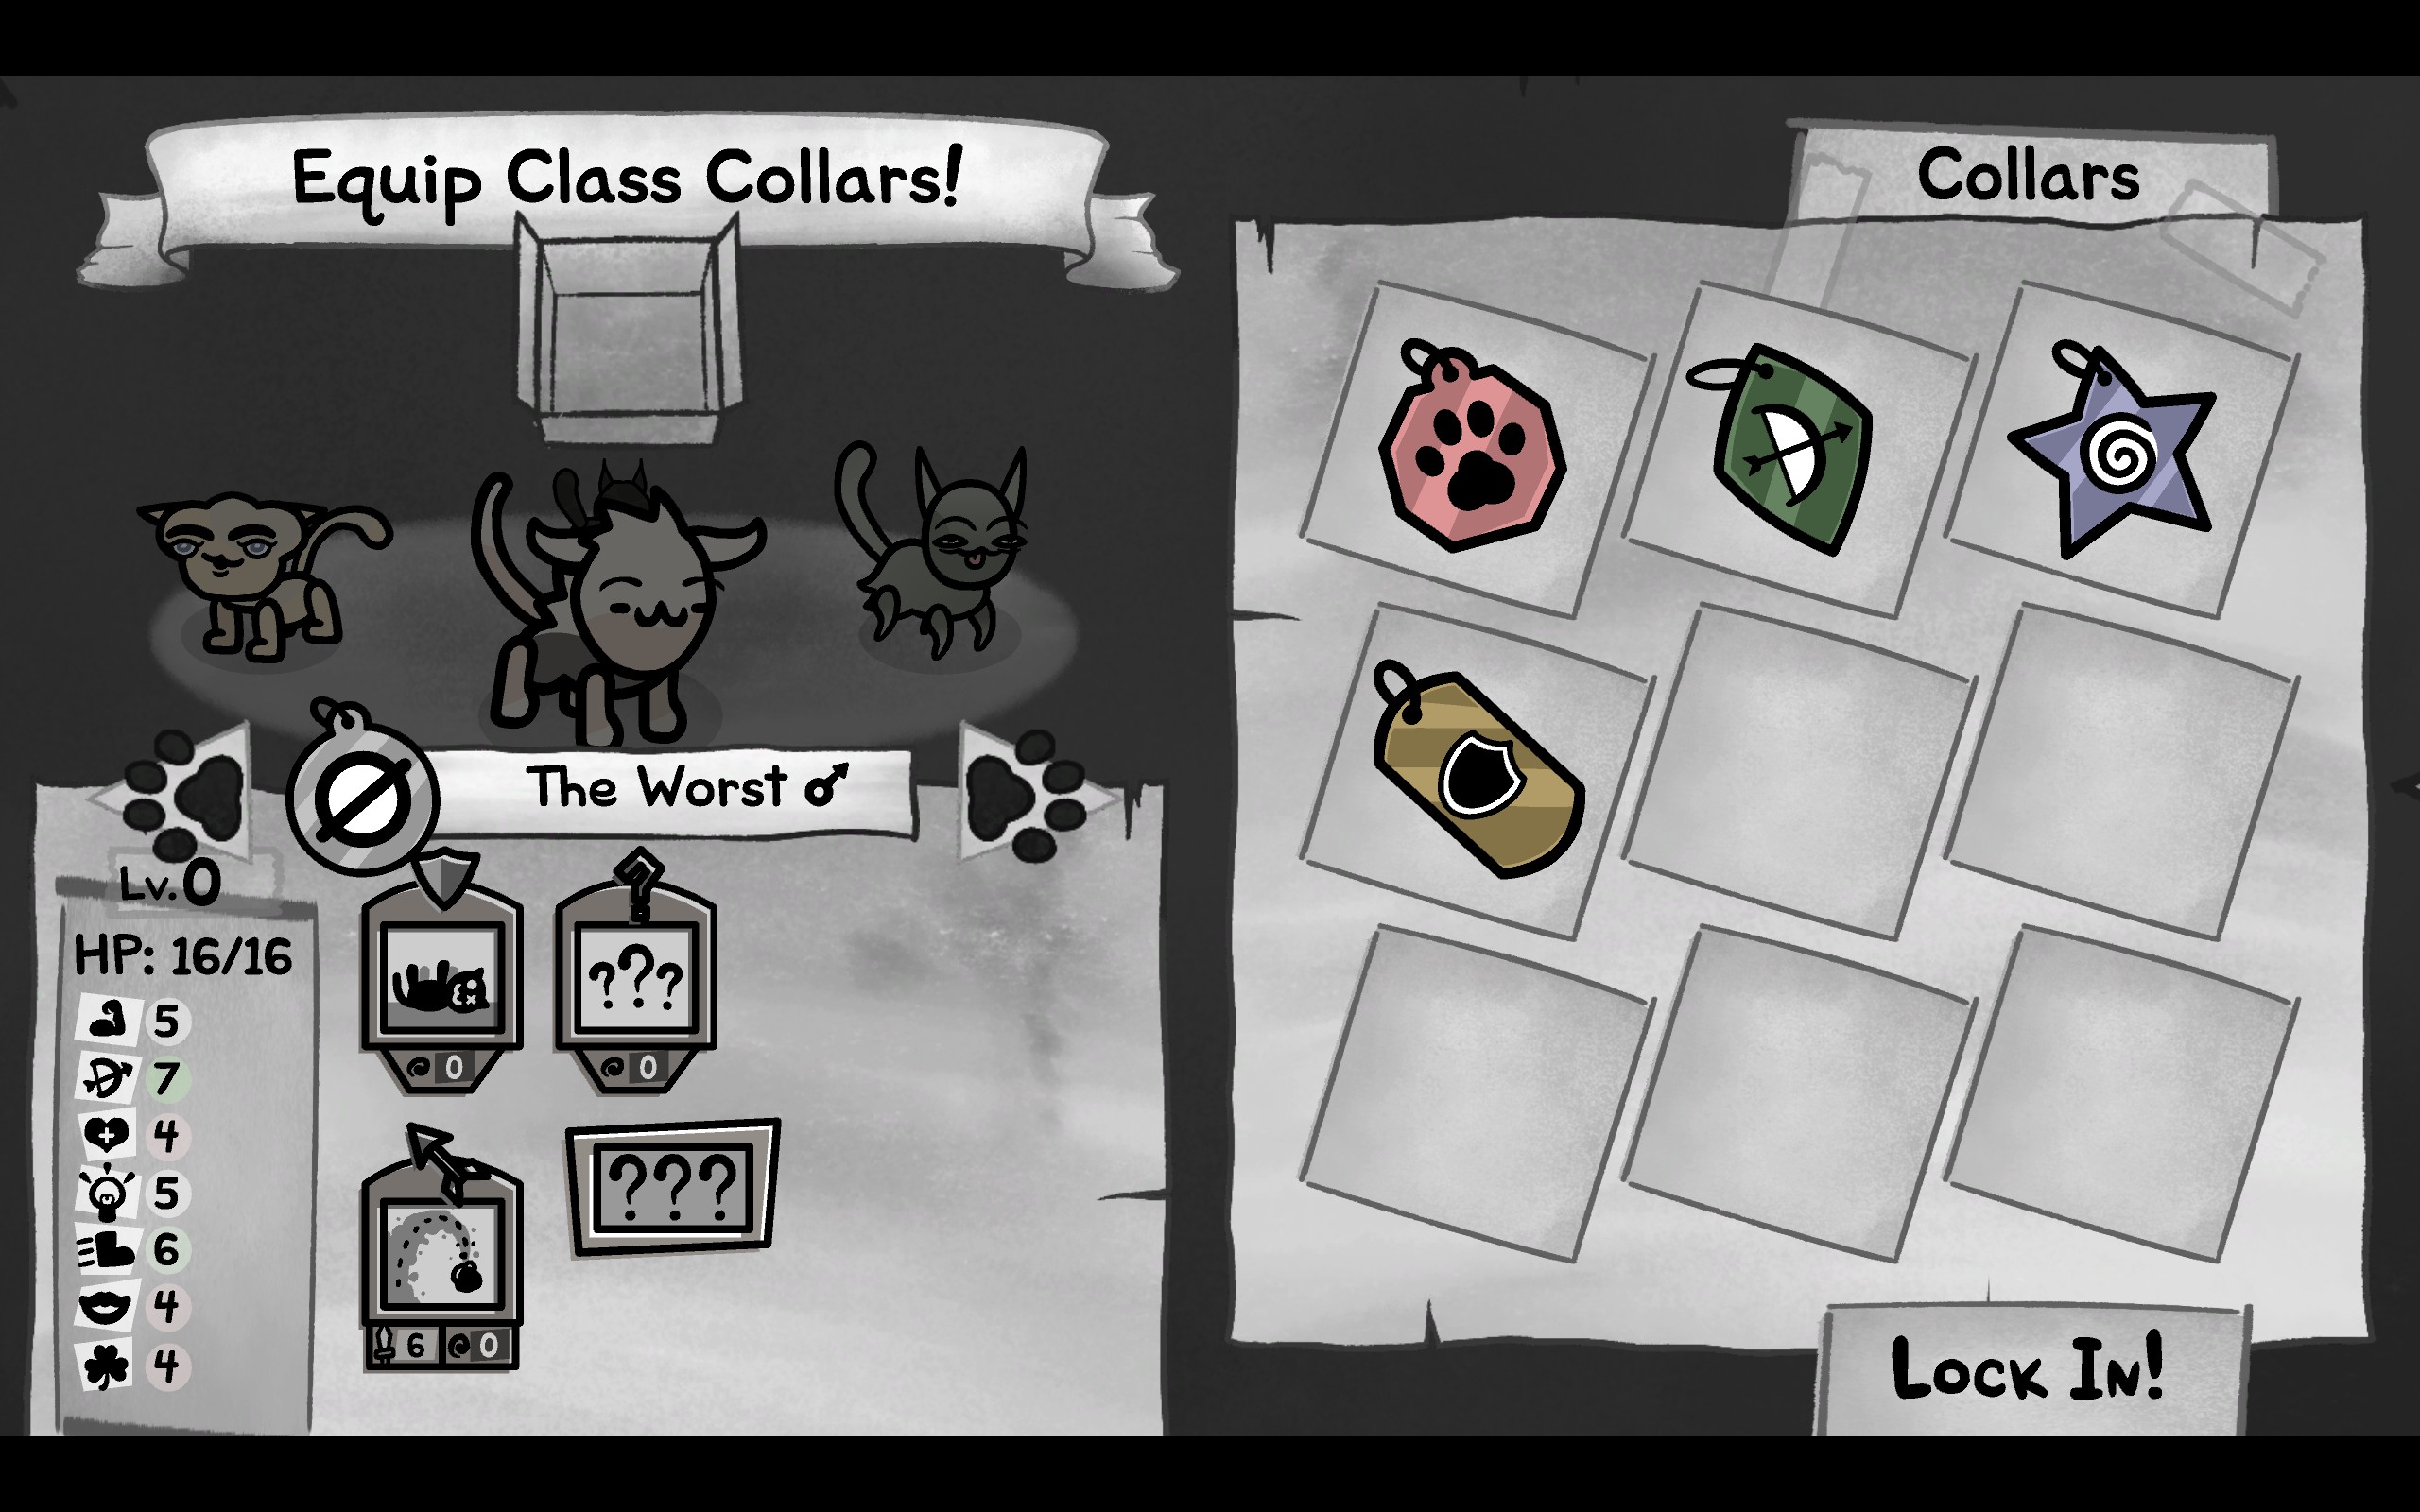

I picked “The Worst” to be my Hunter because they had the highest Dexterity stat.
Class: Mage
The important stats for a Mage are Intelligence (mana regen) and Charisma (total mana). Of these, pay particular attention to Charisma when choosing your spells at level-up. Don’t pick a spell with a mana cost higher than your actual mana pool, or that probably isn’t going to work out well for you. Low Luck might also a problem for Mages, if you happen to get spells with a Luck component.
The Mage is an inconsistent class. If luck shines on you, the Mage will gain a potent combination of spells and passive abilities. Or, more likely, it will be a fragile waste of space. You may simply not get any decent spells at level-up time. When that happens, you are left with an extremely inferior Hunter. Mages are ranged fighters, but they cannot shoot over obstacles and are much more hindered by line of sight. You want to keep your Mages far away from threats, but their poor range means you can’t hide behind cover and have to keep shuffling closer.
Because of this, one of the best level-up choices available to the Mage is Magic Missile. This transforms your basic attack into one that can target anywhere. This will make your Mage considerably less fragile and far more useful, so I recommend picking Magic Missile any time it shows up as an option.
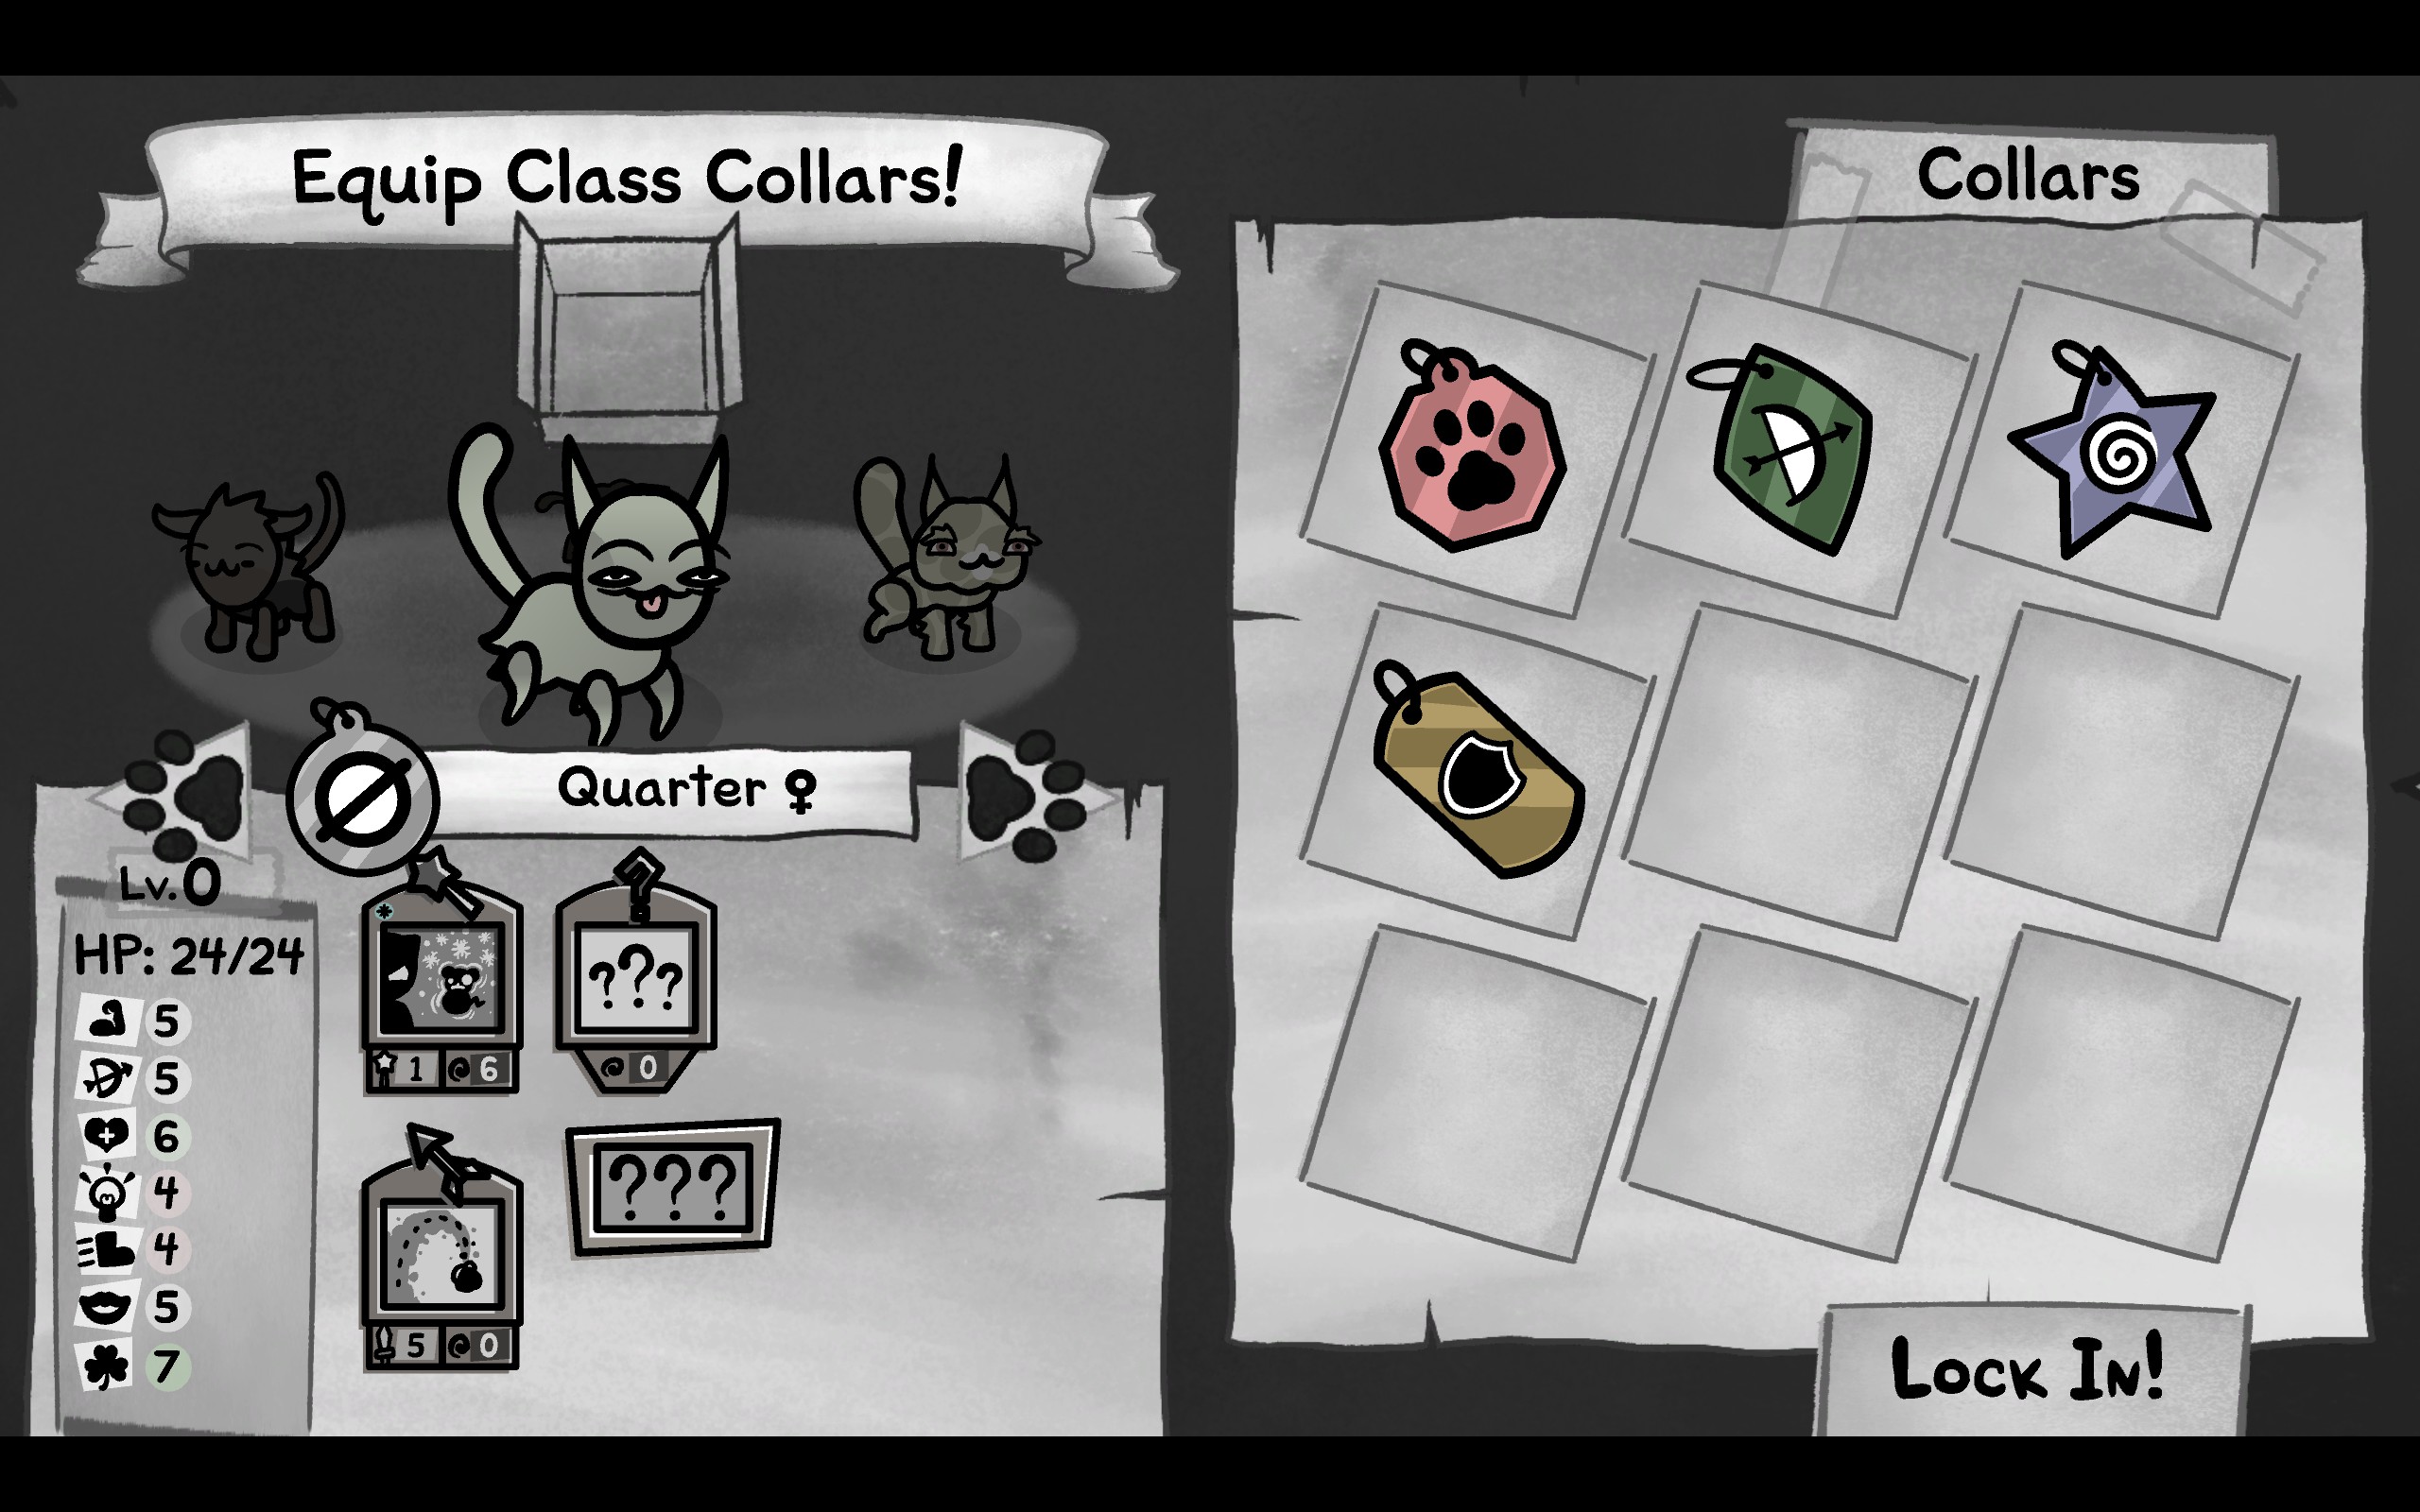
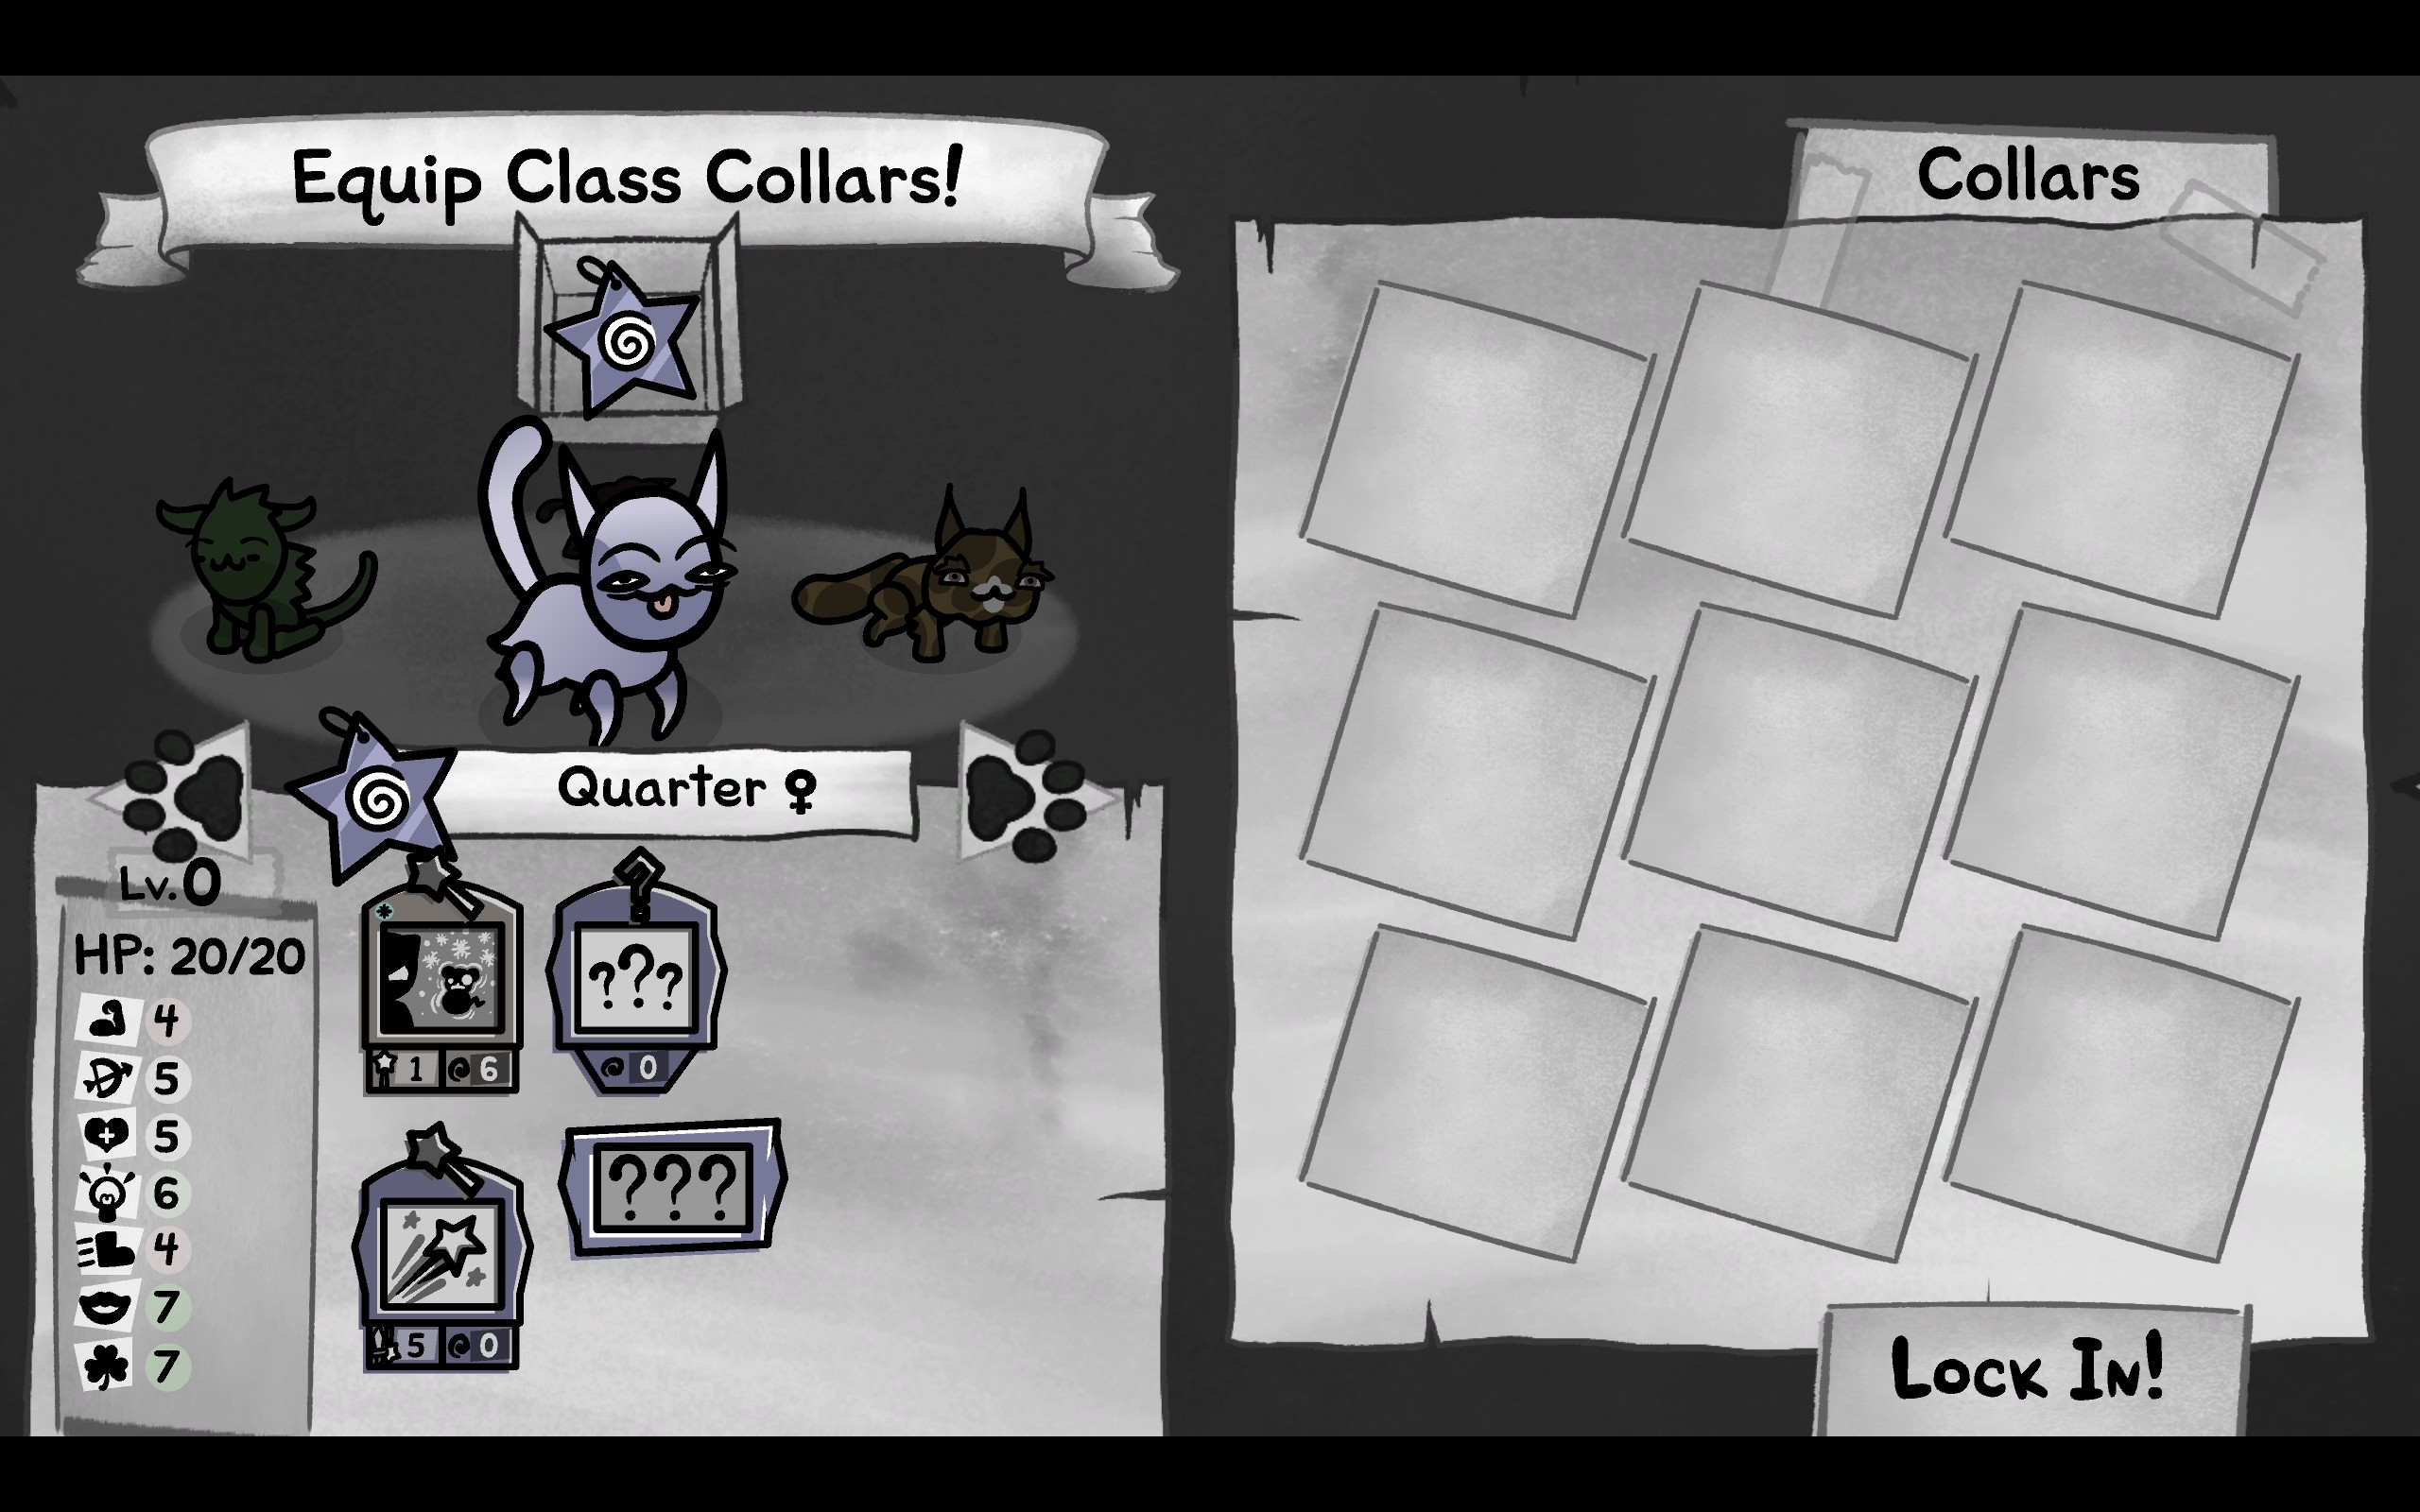
I chose “Quarter” to be my Mage, due to a good Charisma stat and also having a suitable spell (Cold Shoulder) as an Active ability.
Class: Fighter
This class is a melee fighter, as the name would suggest, and their only focus is on dealing damage. Strength is their most important stat, but don’t discount the importance of Speed. Melee fighters are useless if they can’t actually reach their target. Another critical weakness for a Fighter is having low Constitution. It’s inevitable that an in-your-face melee attacker is going to take a blow or two. A fragile Fighter is no use to anyone. Fighters often have access to multiple hit attacks, which are great, but a low Luck stat may sabotage you.
Remember that a Fighter is not a Tank. They are far more fragile. Don’t leave them in the open taking blow after blow. Consider if your Fighter can move in and score a clean one-turn kill. If not, hesitate and weigh up how much damage you can afford to take in return.
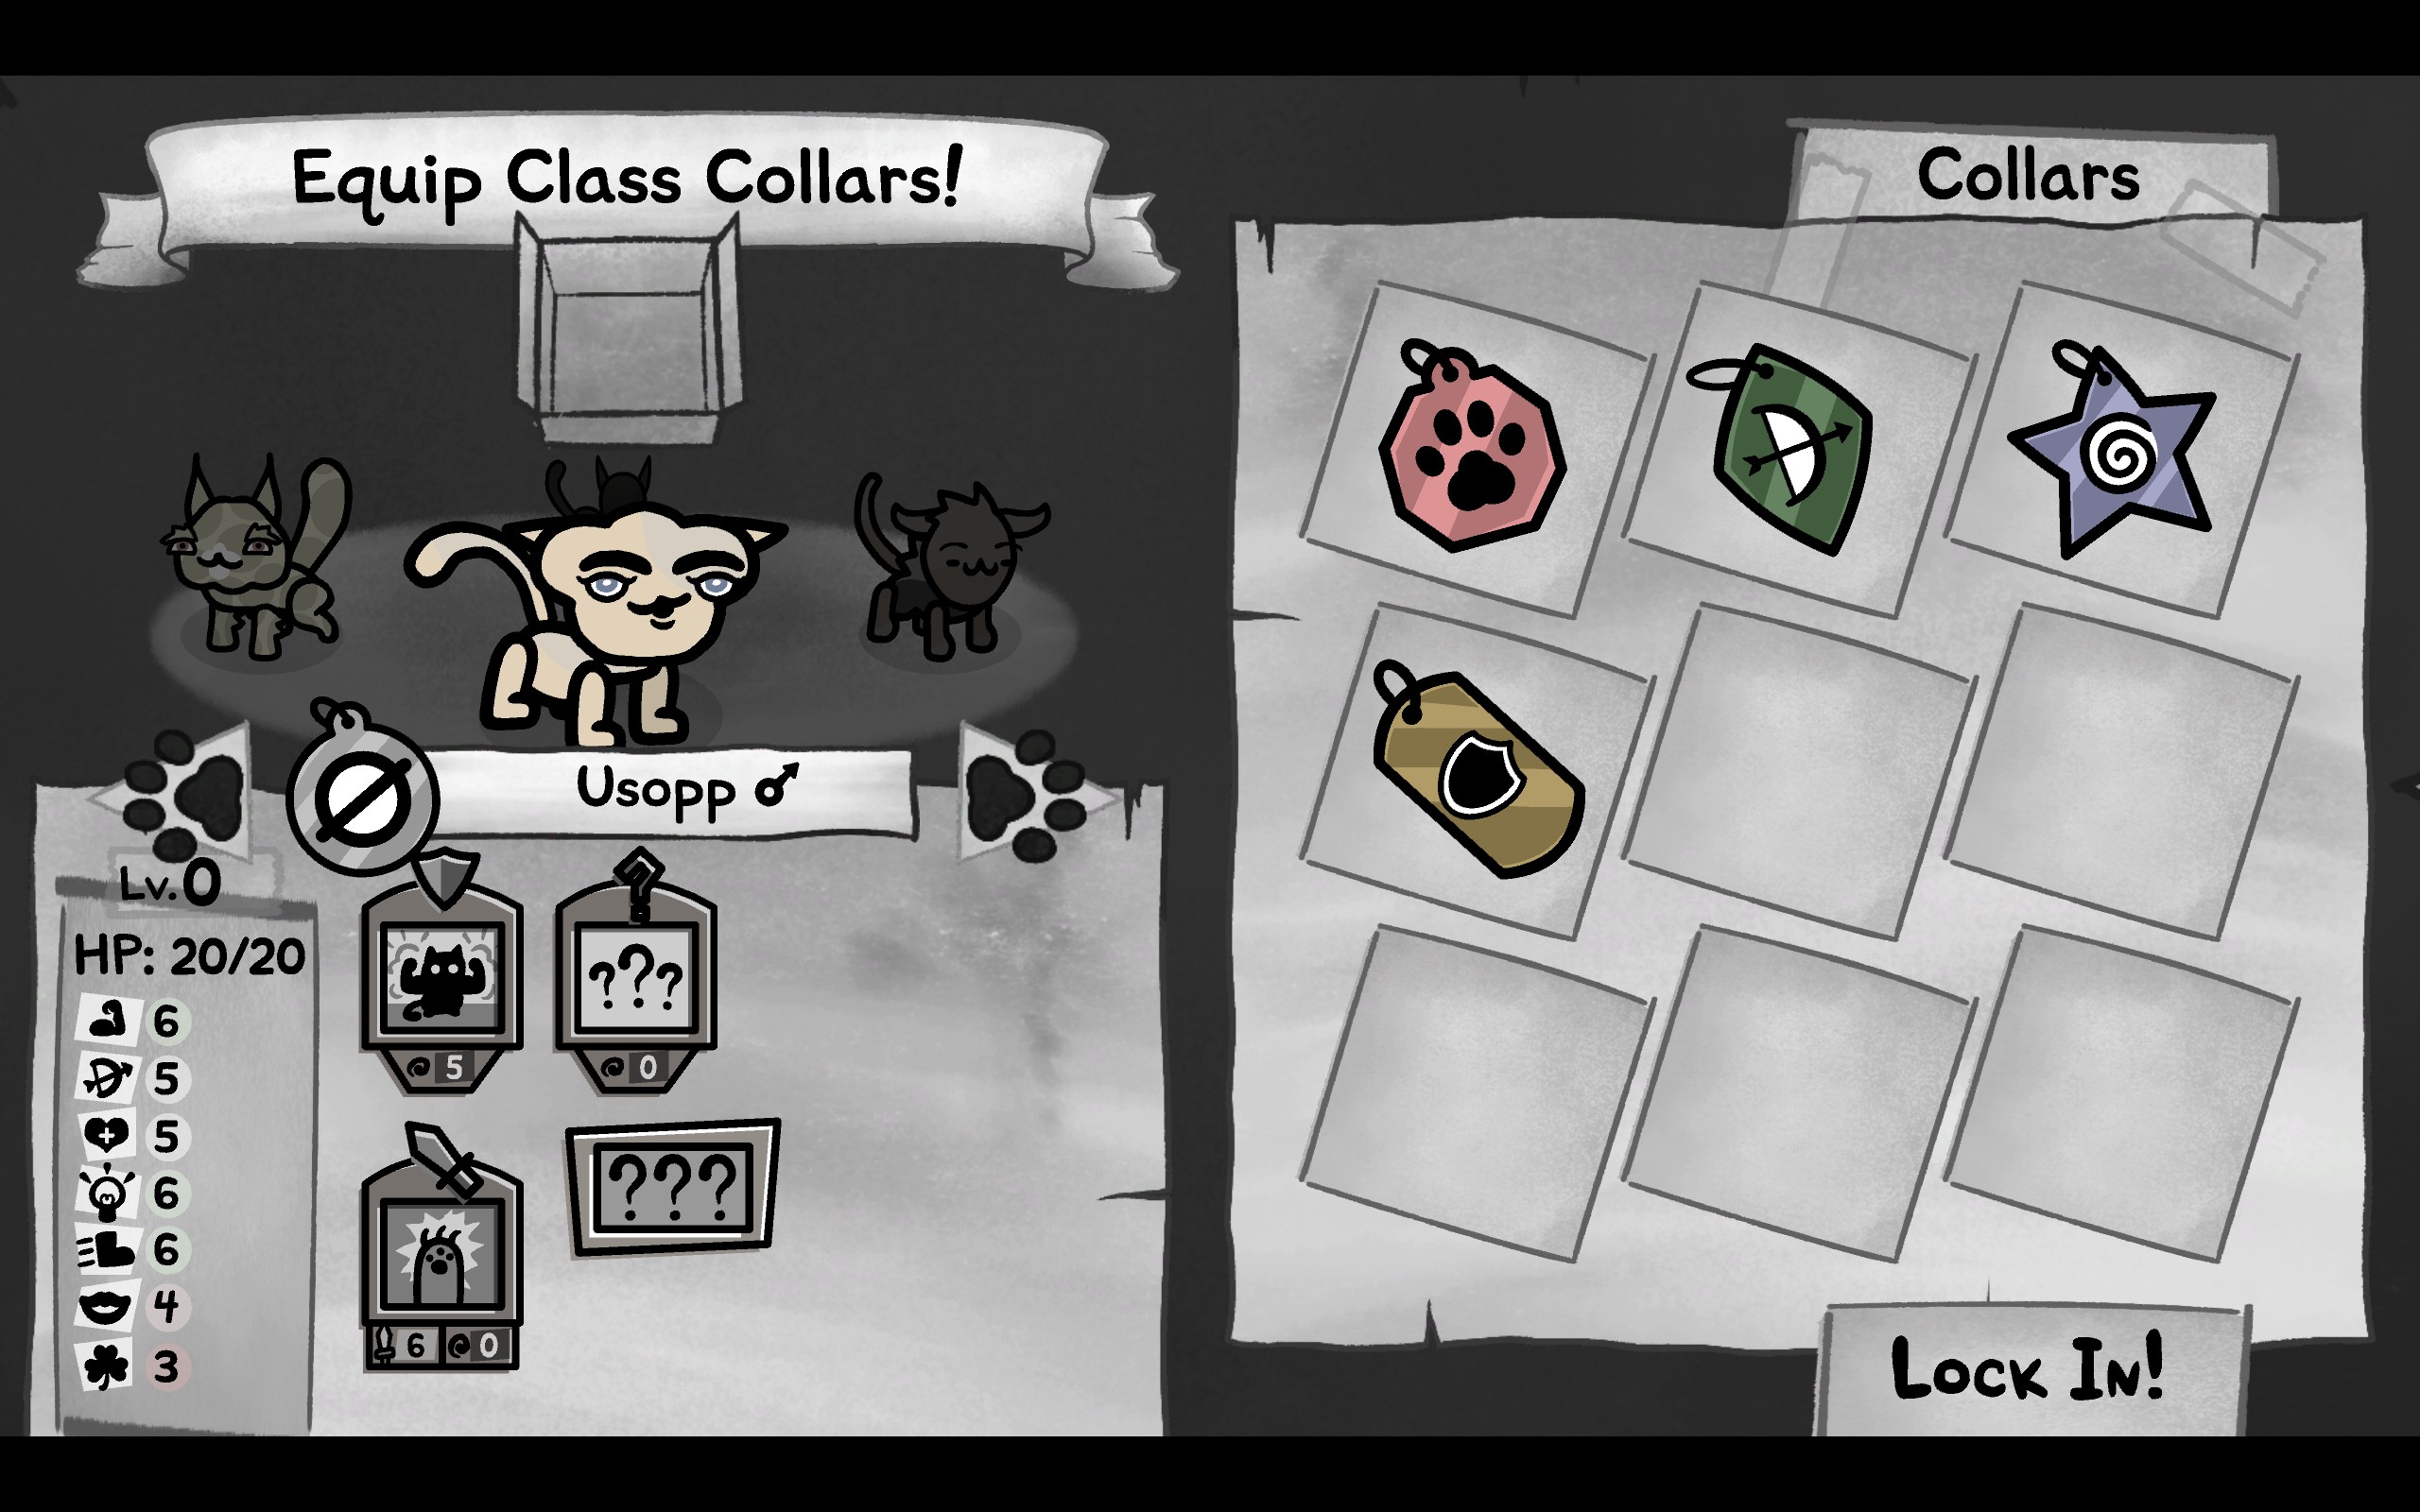

“Usopp” is my Fighter. Flex is a good ability for a Fighter, and his Strength and Speed are decent.
The Alley
We now choose items! We have only one, a simple Stick, which I give to the Fighter for the meantime. A Fighter’s role is to move in for the kill, dealing multiple blows. In the future, we might have armour to give our cats, but no such luxury for now. All they have is their fur and teeth.
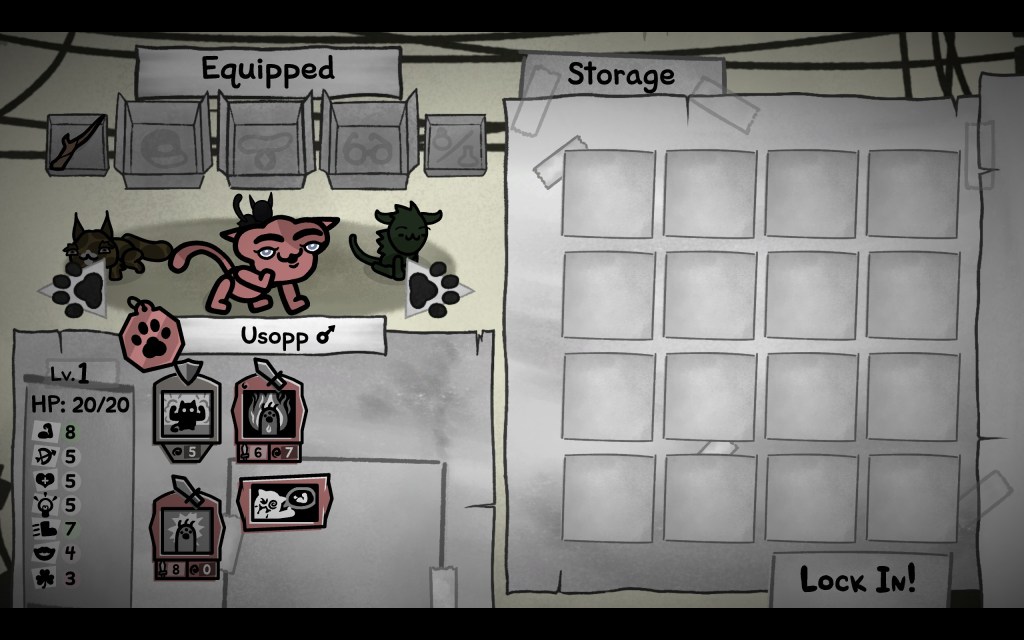
And now we embark! To the Alley!
Here’s our first battle. Remember, hold Left Control to see the Tactical View. This gives you a cleaner overview of the battlefield and it’s often the first thing you will do. It’s common for enemies to be hidden behind scenery.

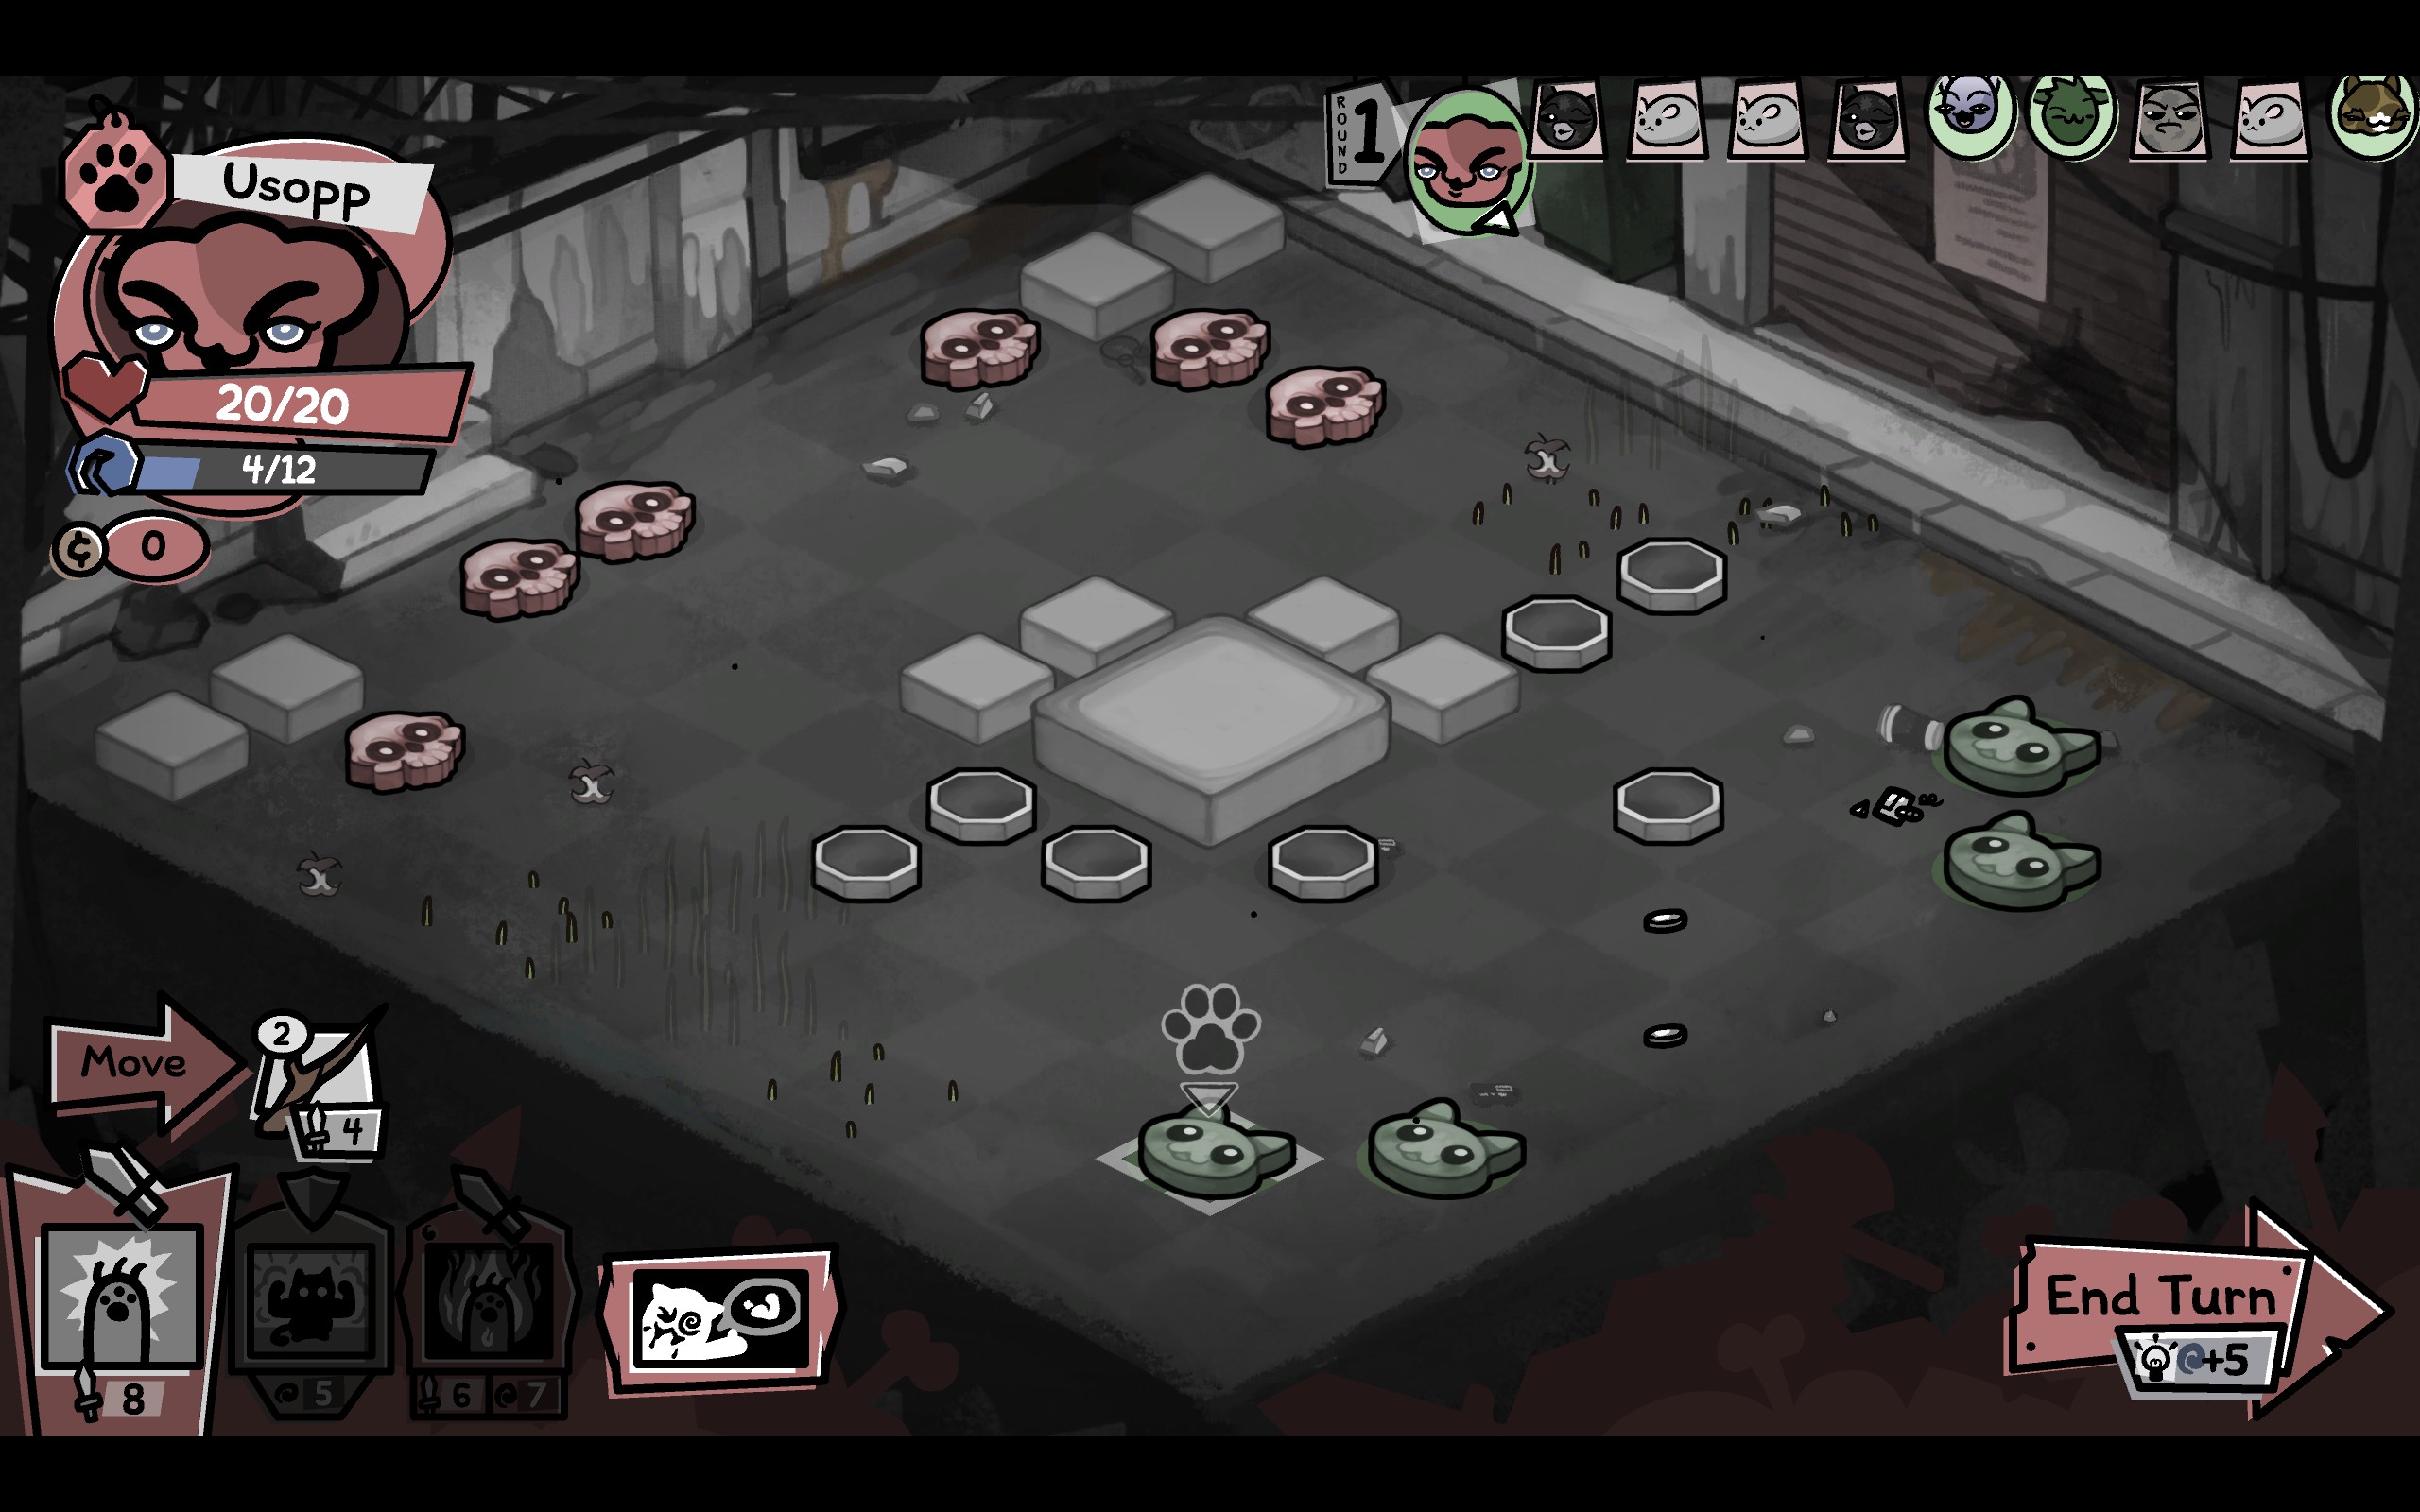
Next, turn your attention to the Turn Order at the top right of the screen. Usopp the Fighter goes first, followed by the two Cat Callers and two of the Leapers. Now, if possible, it would be great to kill one of those three enemies. That would mean the enemy team is effectively one turn down.
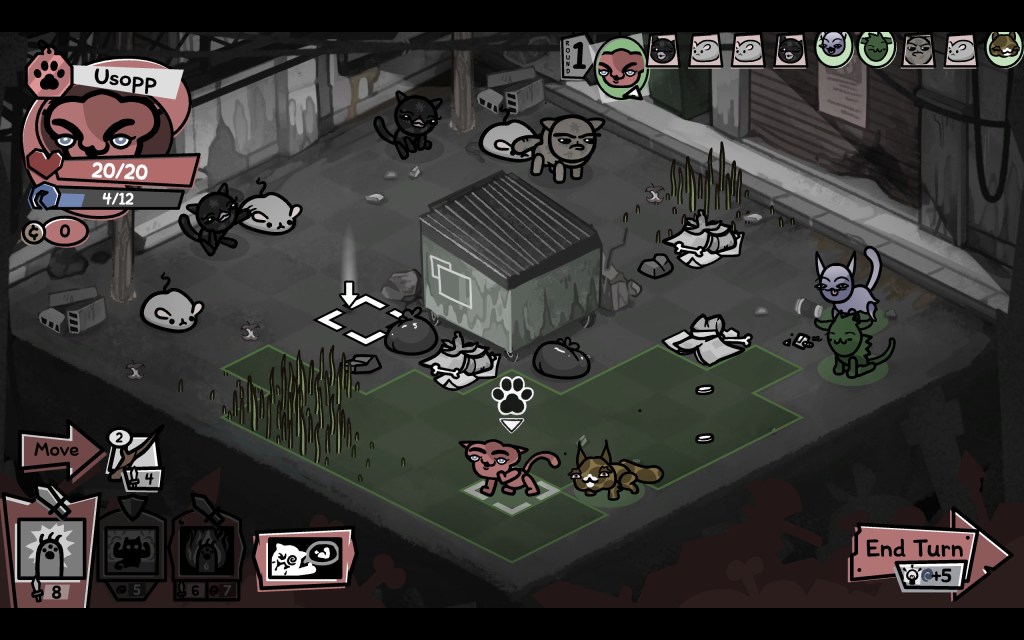
No such luck. Here I have selected “Move” for Usopp and his movement range is shown in green. He can’t reach those enemies, who are right at the back. In fact, Usopp can’t get into melee range of any enemy at the moment.
Now let’s hold the Right Mouse Button and mouse over the enemies. Their movement range shows in blue, and their potential attack range shows in red.
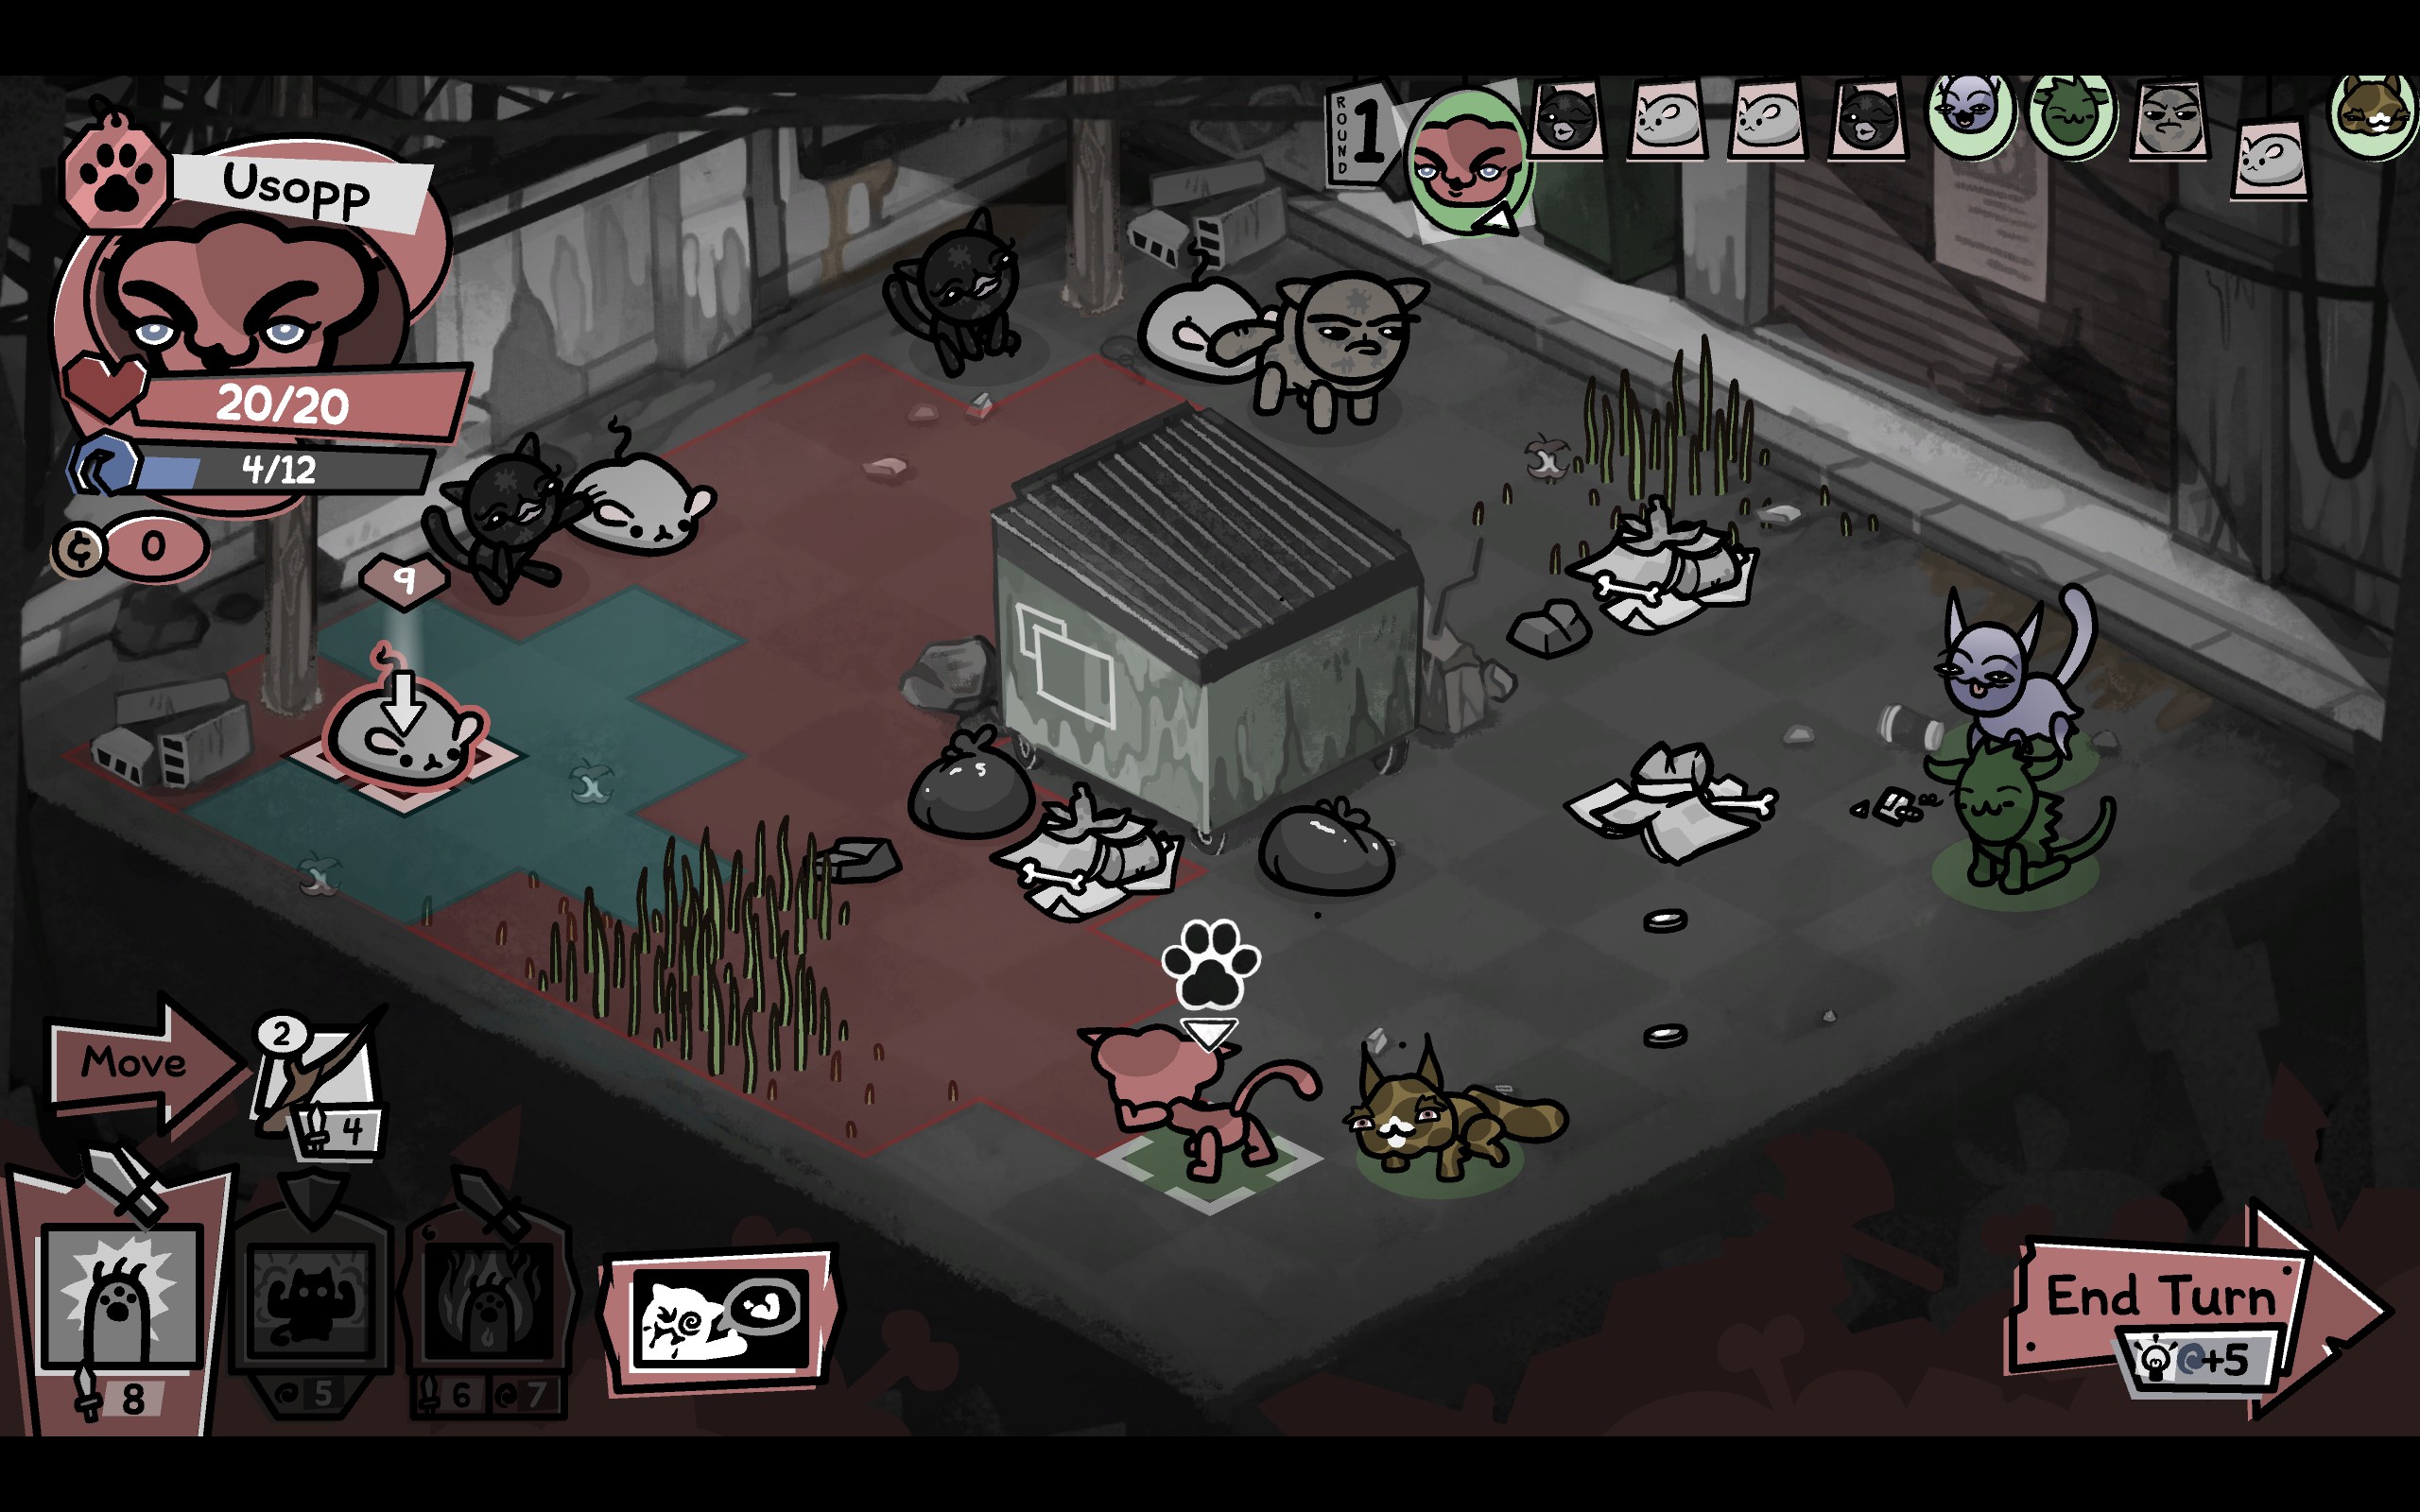
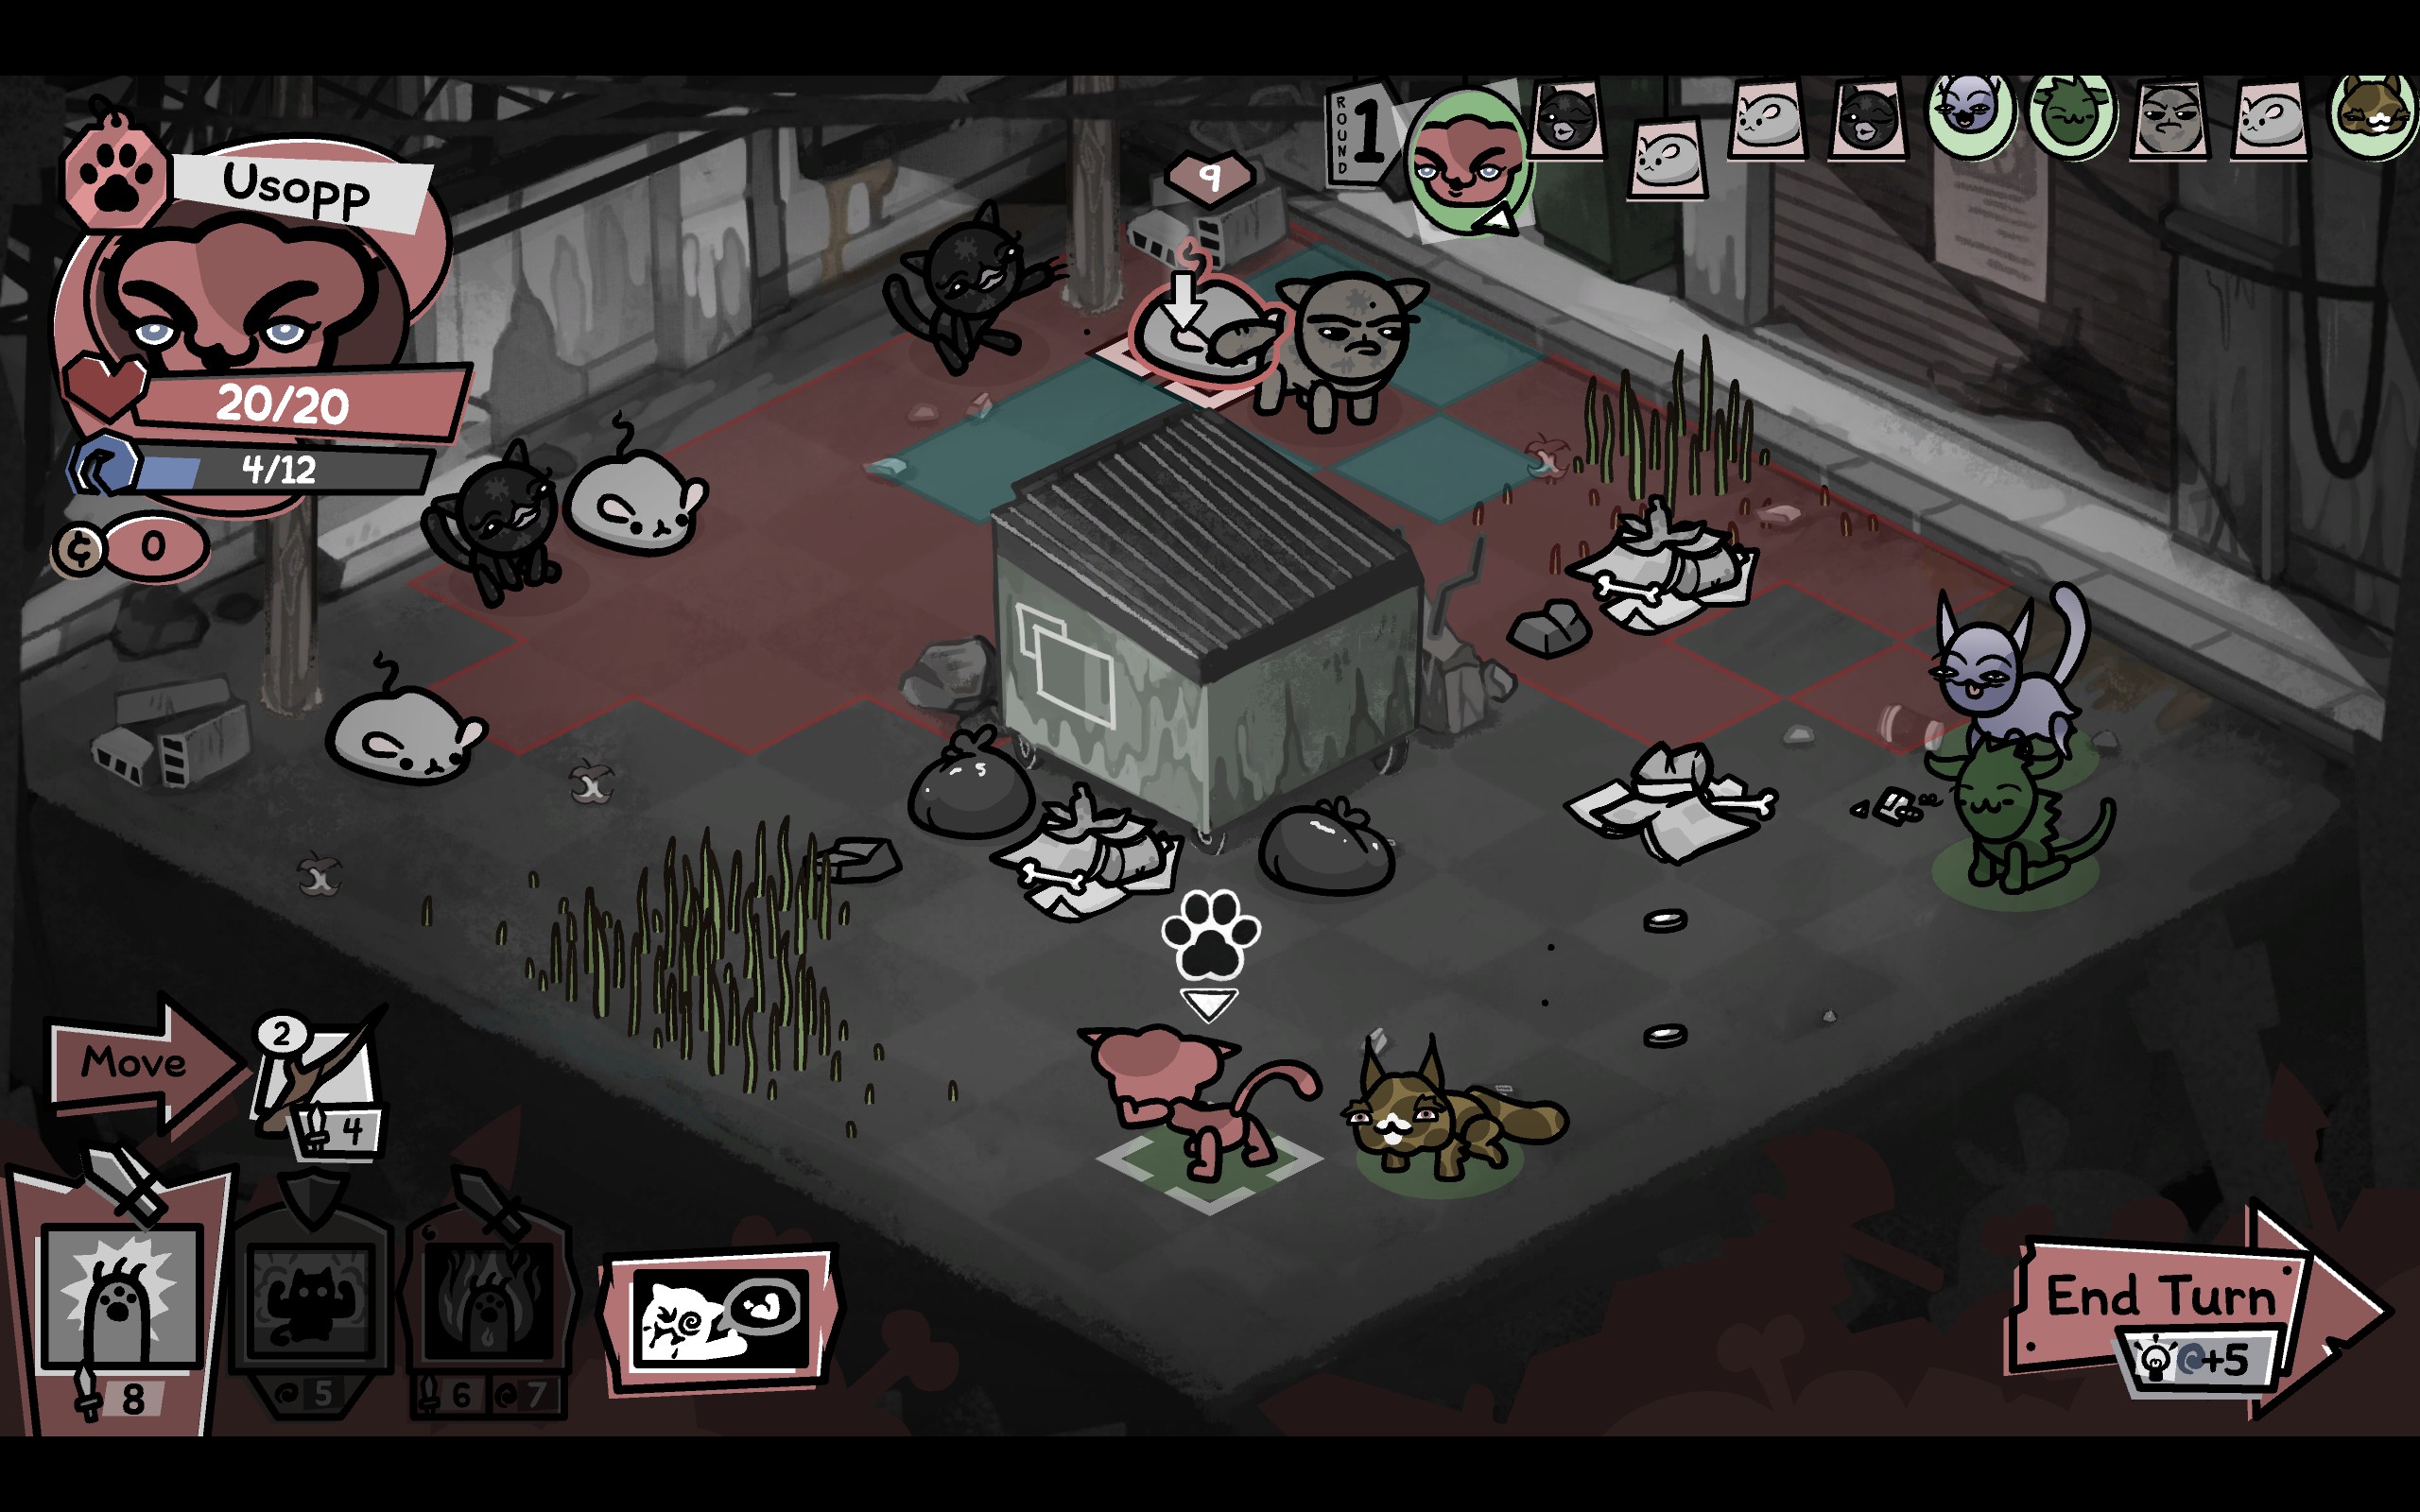
The two forward Leapers are potentially able to hit my cats on their turn. One of them can reach Usopp, the other can reach my fragile Mage. The most dangerous enemy is therefore the Leaper in the top corner. It will move after Usopp does and will probably hit the Mage. Unfortunately, I can’t prevent this.
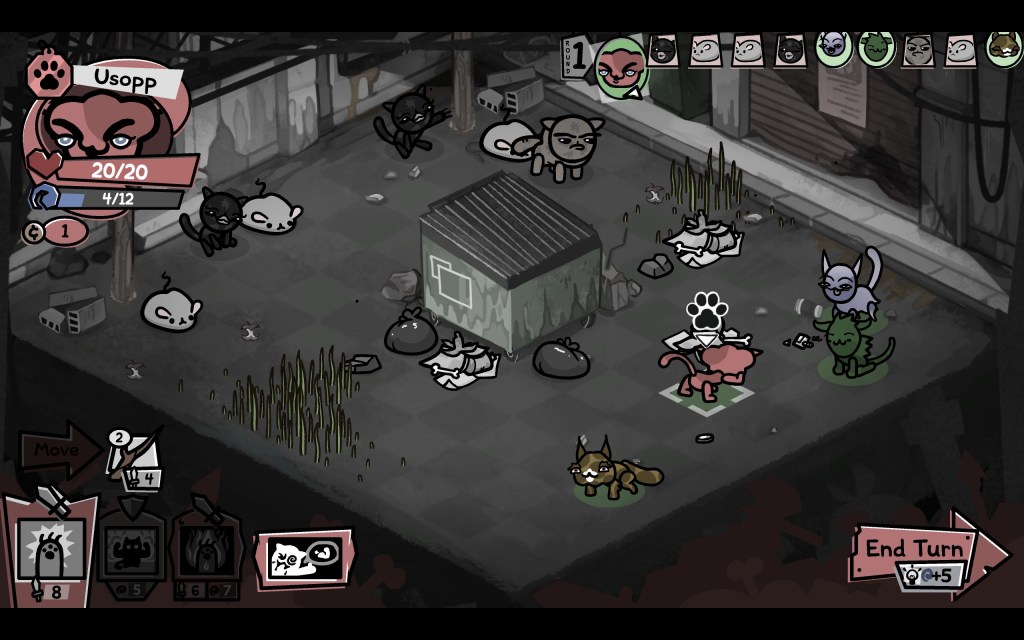
I don’t have any obviously “good” options, but what I have identified is that we are vulnerable to attack on our right side. I move Usopp over with the idea of attacking the Leaper at the next opportunity, if it does indeed go after Quarter and his juicy, weak Mage flesh. I stop Usopp on a coin, because why not. We will need money later (at least ten coins, to be specific). Usopp doesn’t have enough Mana to cast Flex on this turn, so that’s not an option.
It’s now the Mage’s turn. This is where we learn about Line of Sight, the Mage’s weak spot.

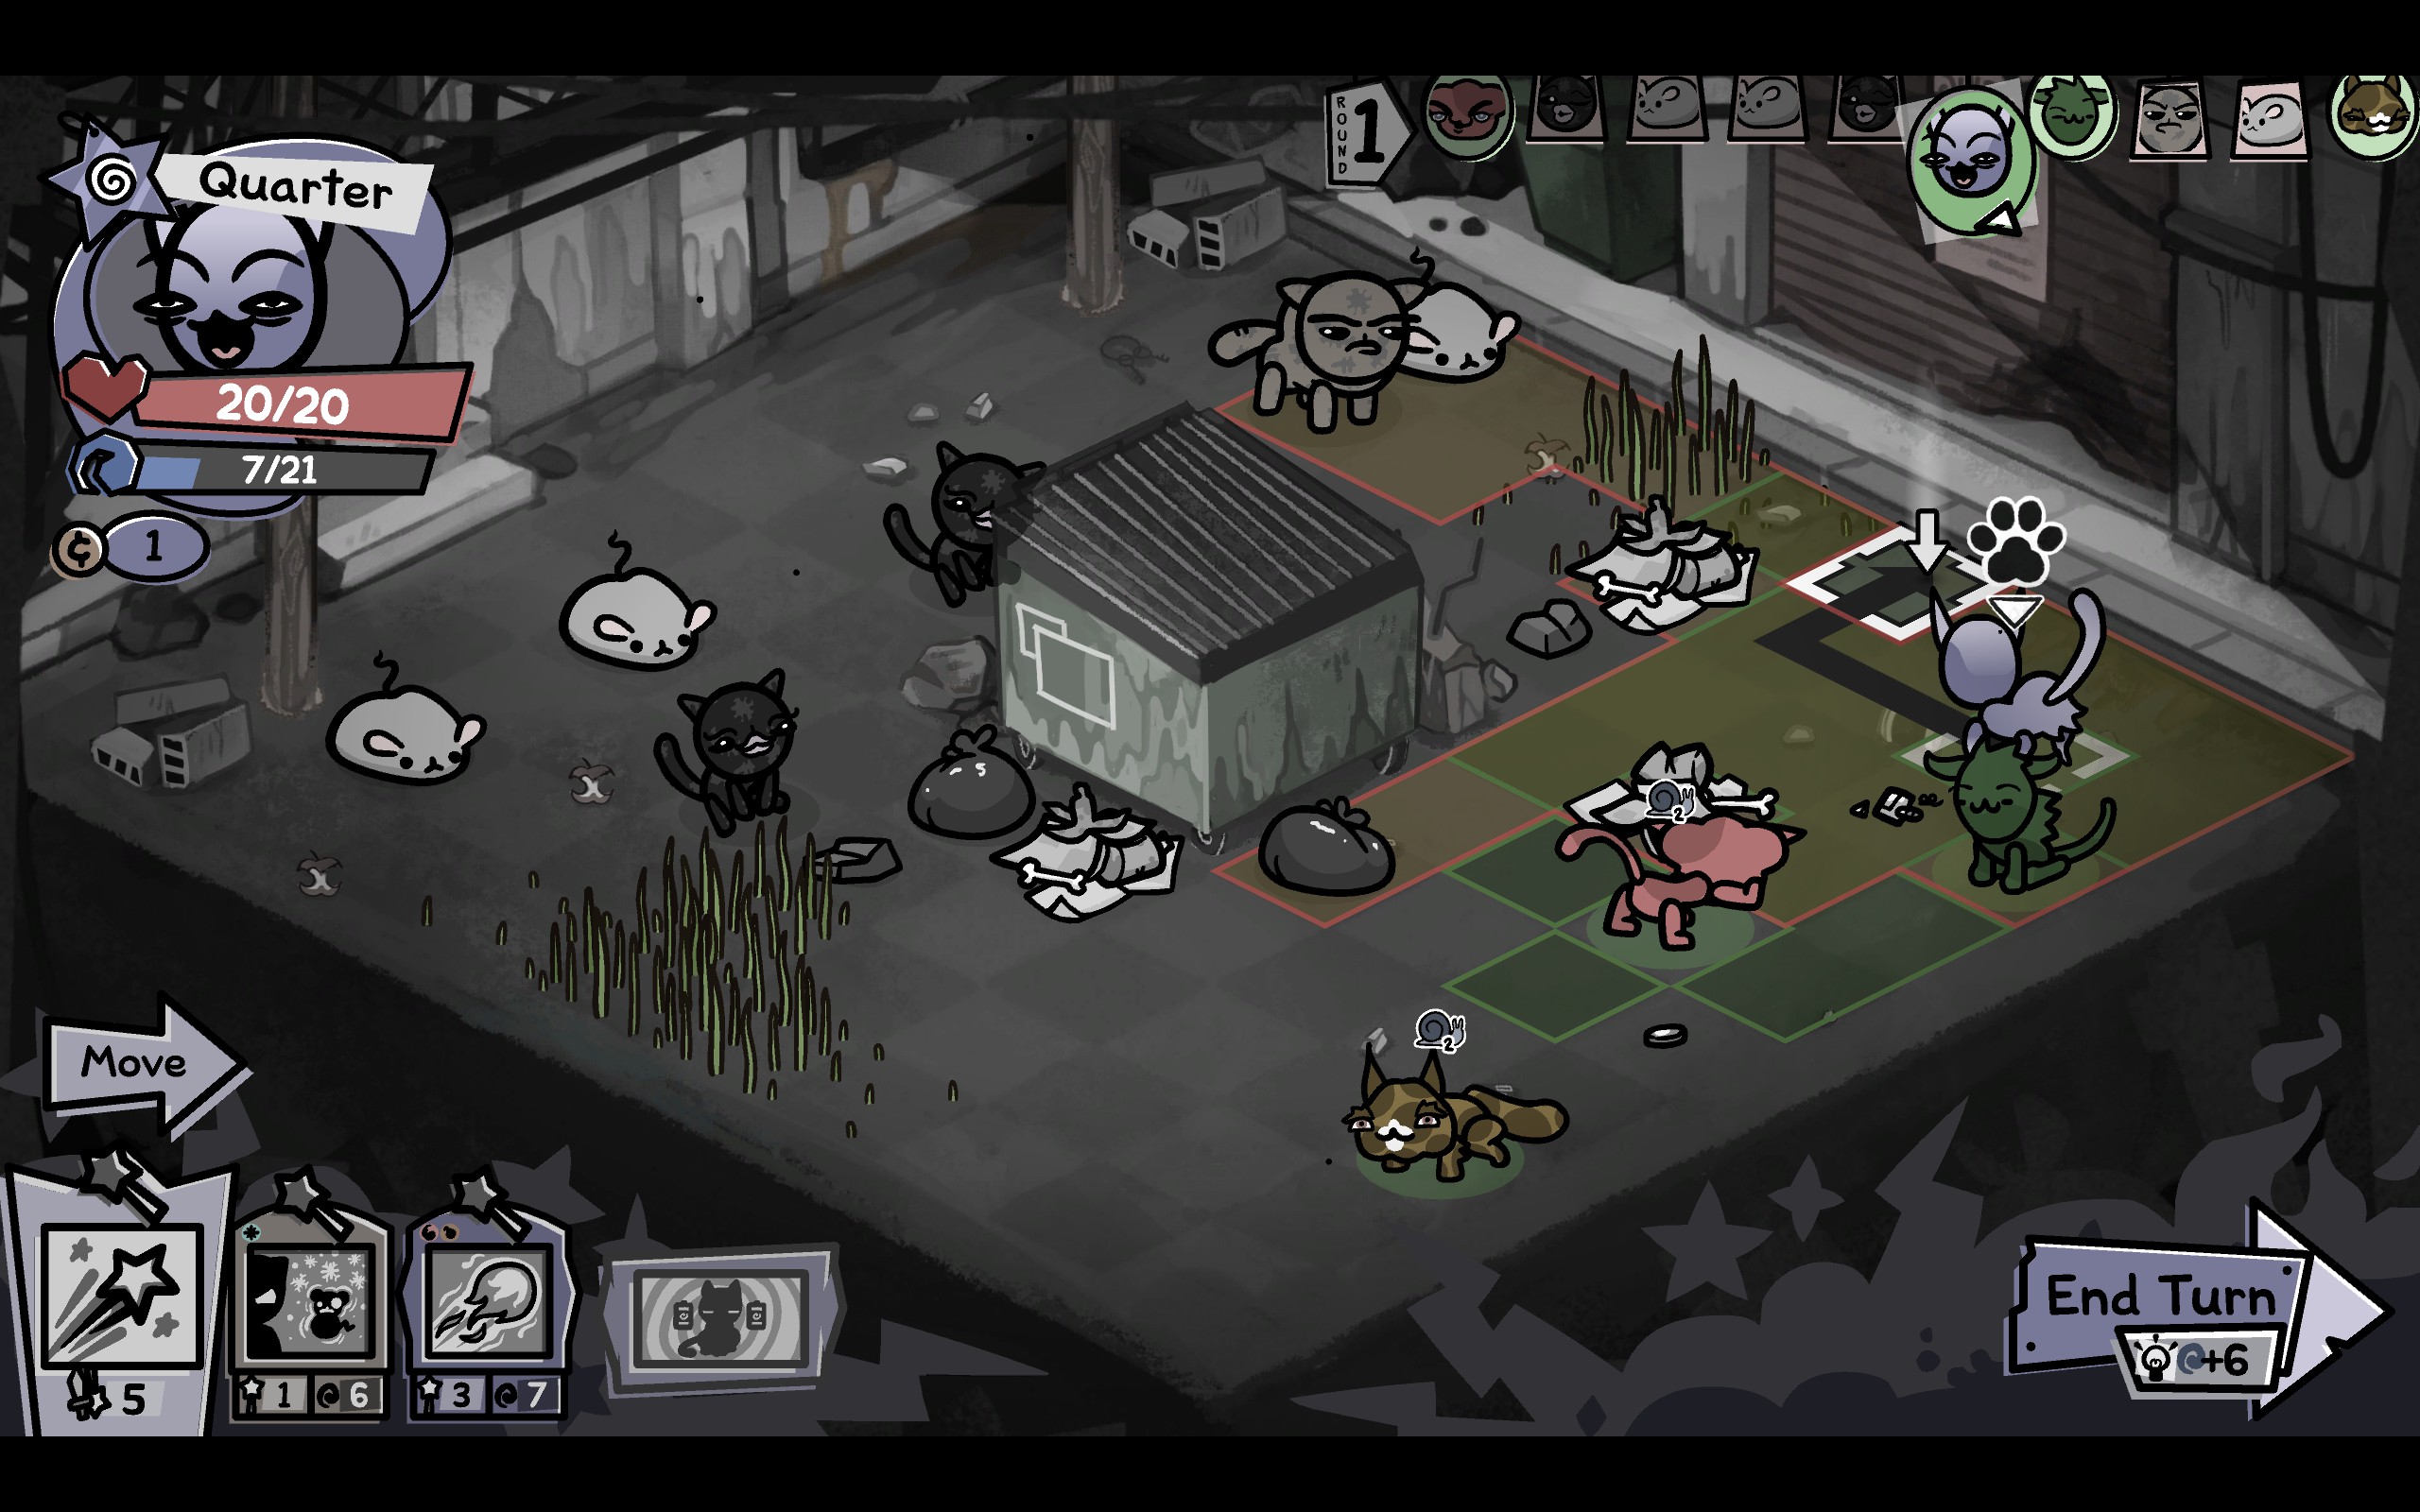
Second image: my line of sight on Magic Dart if I move to the highlighted square.
The Mage’s basic attack is Magic Dart and the Mage must have a line of sight to the enemy to hit them with it. In the first image above, I am hovering my mouse over the Magic Dart button and it is showing me the attack’s range in yellow. In the second image, I have selected Move. When I hover my mouse over a tile to move to, the game very helpfully shows me the range of my basic attack. It’s a common mistake to move a Mage, only to discover that the enemy you thought was in range, is actually outside of your Line of Sight. Even small obstacles are good at blocking Line of Sight. The lesson here, is always check before moving that the enemy you want to hit is actually in your range. If I move as shown in the second picture, I should be able to hit either the Tom Tom or the Leaper.
Now, notice that the Random Number Gods have blessed us with an offensive spell we can actually cast. Quarter has 7 mana and Fire Blast costs precisely that.

In the image above, I am hovering my mouse over Fire Blast, and again the game helpfully shows its range in yellow. I will have to move closer to get the Tom Tom and the Leaper. What’s great about Fire Blast is it is an Area of Effect spell. It can hit both side-by-side enemies. It will also leave them with a Burn status effect. That sounds like a good deal to me, so let’s do it.
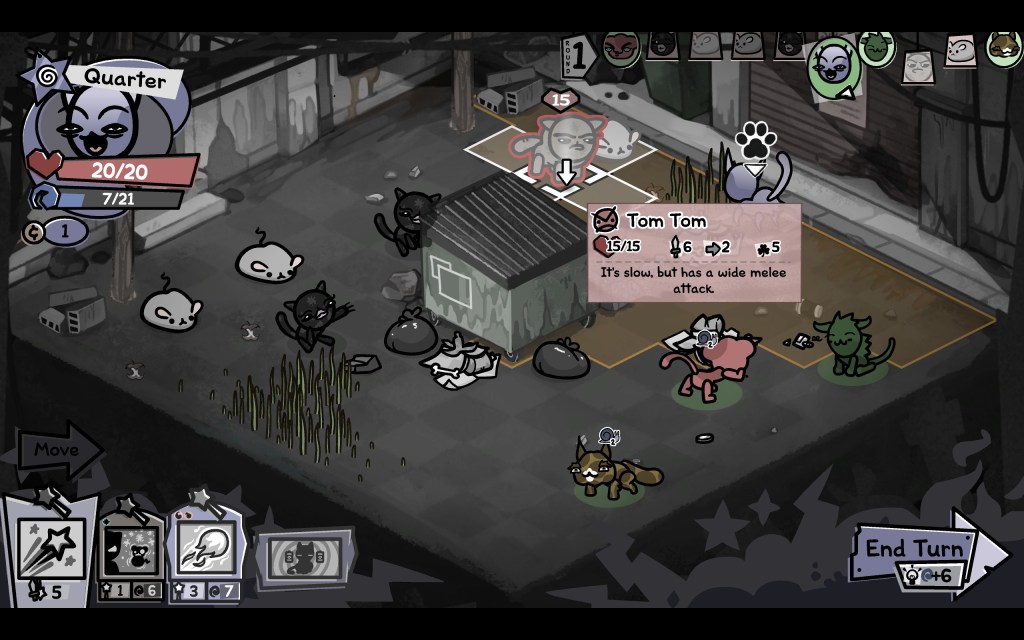
Quarter has moved and is targeting the Tom Tom with Fire Blast. The white area is its area of effect. We’re going to hit the Leaper as well. A 2-for-1 deal!
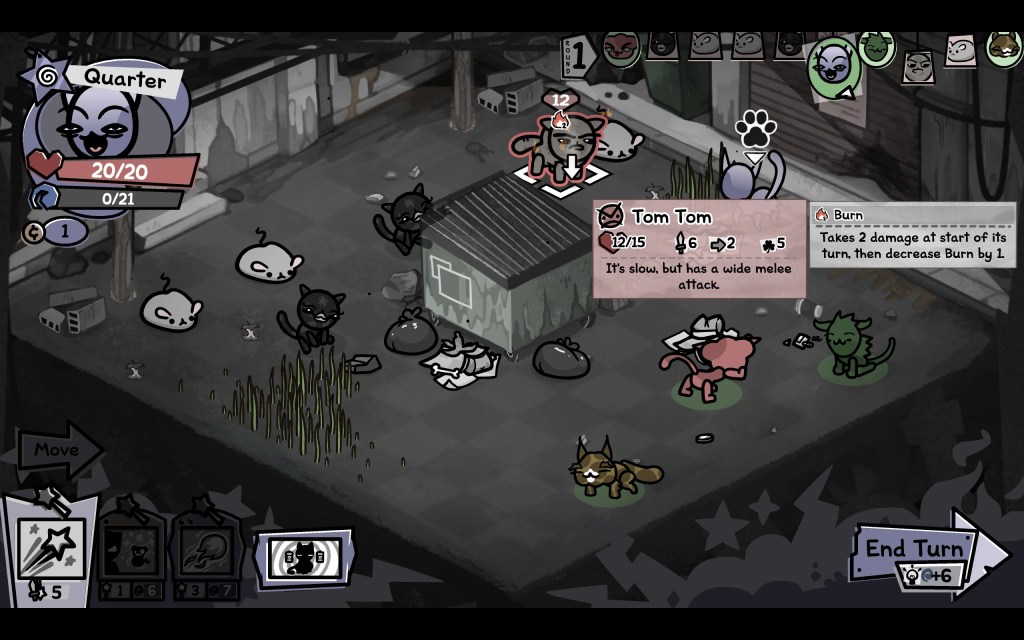
Fwoosh! Now both the Tom Tom and the Leaper have 2x Burn. In this game, a status effect lasts for one turn. So for two turns, the Tom Tom will take a bit of Burn damage. The stack of debuffs will then be extinguished.
We can also still use our basic attack, Magic Dart. The Tom Tom moves next, but he can’t actually reach us (revealed by checking with the Right Mouse Button). The Leaper is the more agile and threatening, so it’s the Leaper I target. My Mage’s Magic Dart only does 5 damage (you can see that at the bottom of its icon) so there’s no chance of me scoring a kill on either of them yet.
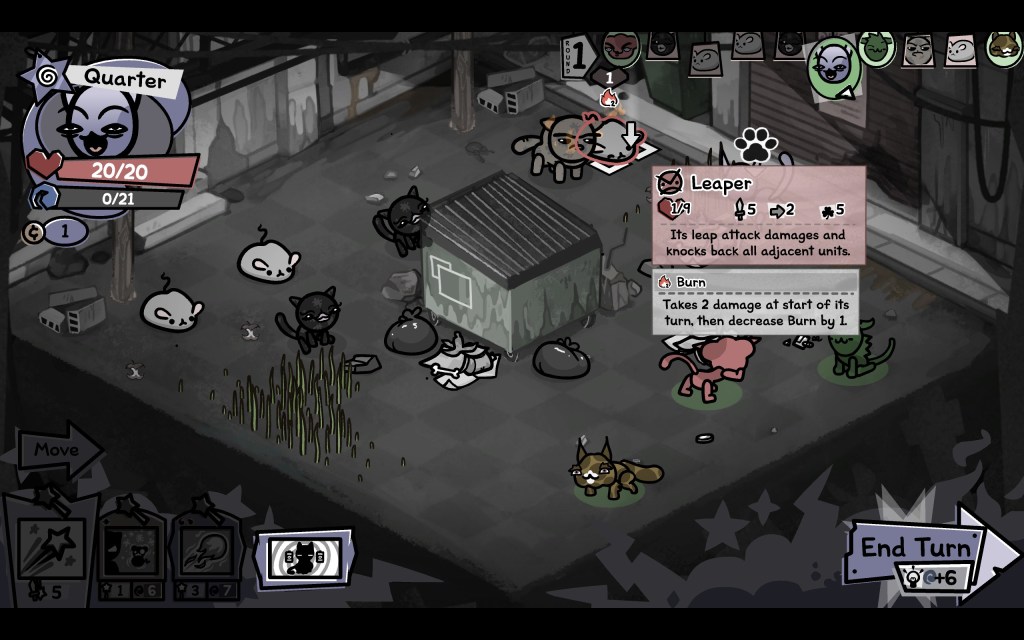
The Leaper is down to one hit point. It will die from the Burn on its next turn, which is convenient. As an added bonus, Quarter’s passive ability Charge Up has also kicked in. We ended the turn with zero mana, which means we get a free spell next turn!
It’s now the Hunter’s turn.
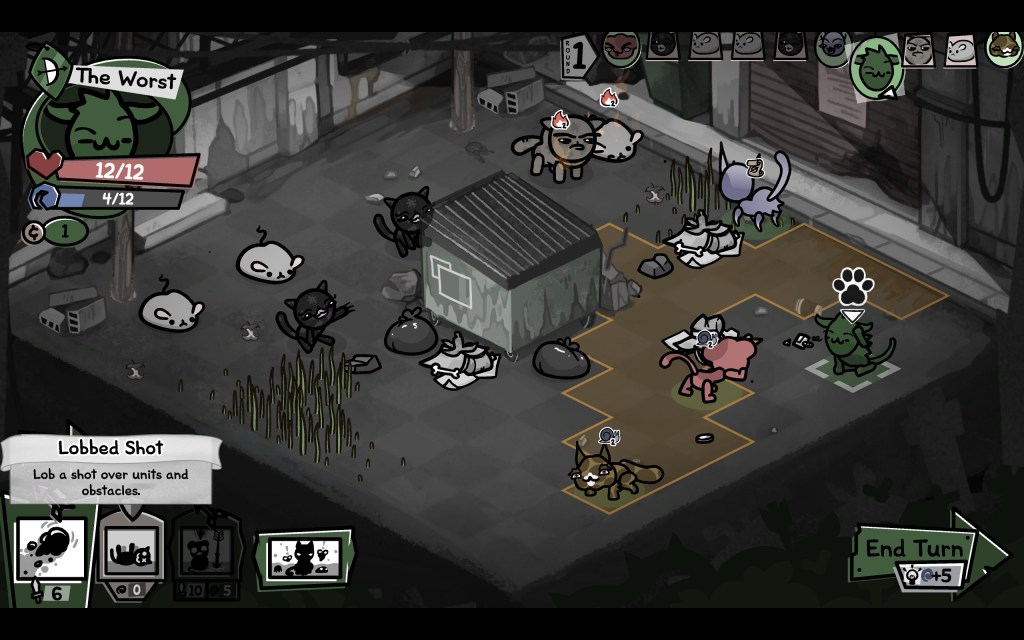
The Hunter’s basic attack is Lobbed Shot. It can shoot over obstacles, which is extremely handy, as it lets your Hunter hang back behind cover. Its weak spot however is that you can’t actually target the tiles right next to you. So enemies can move into your blind spot and melee range, and there’s nothing you can do but run away.
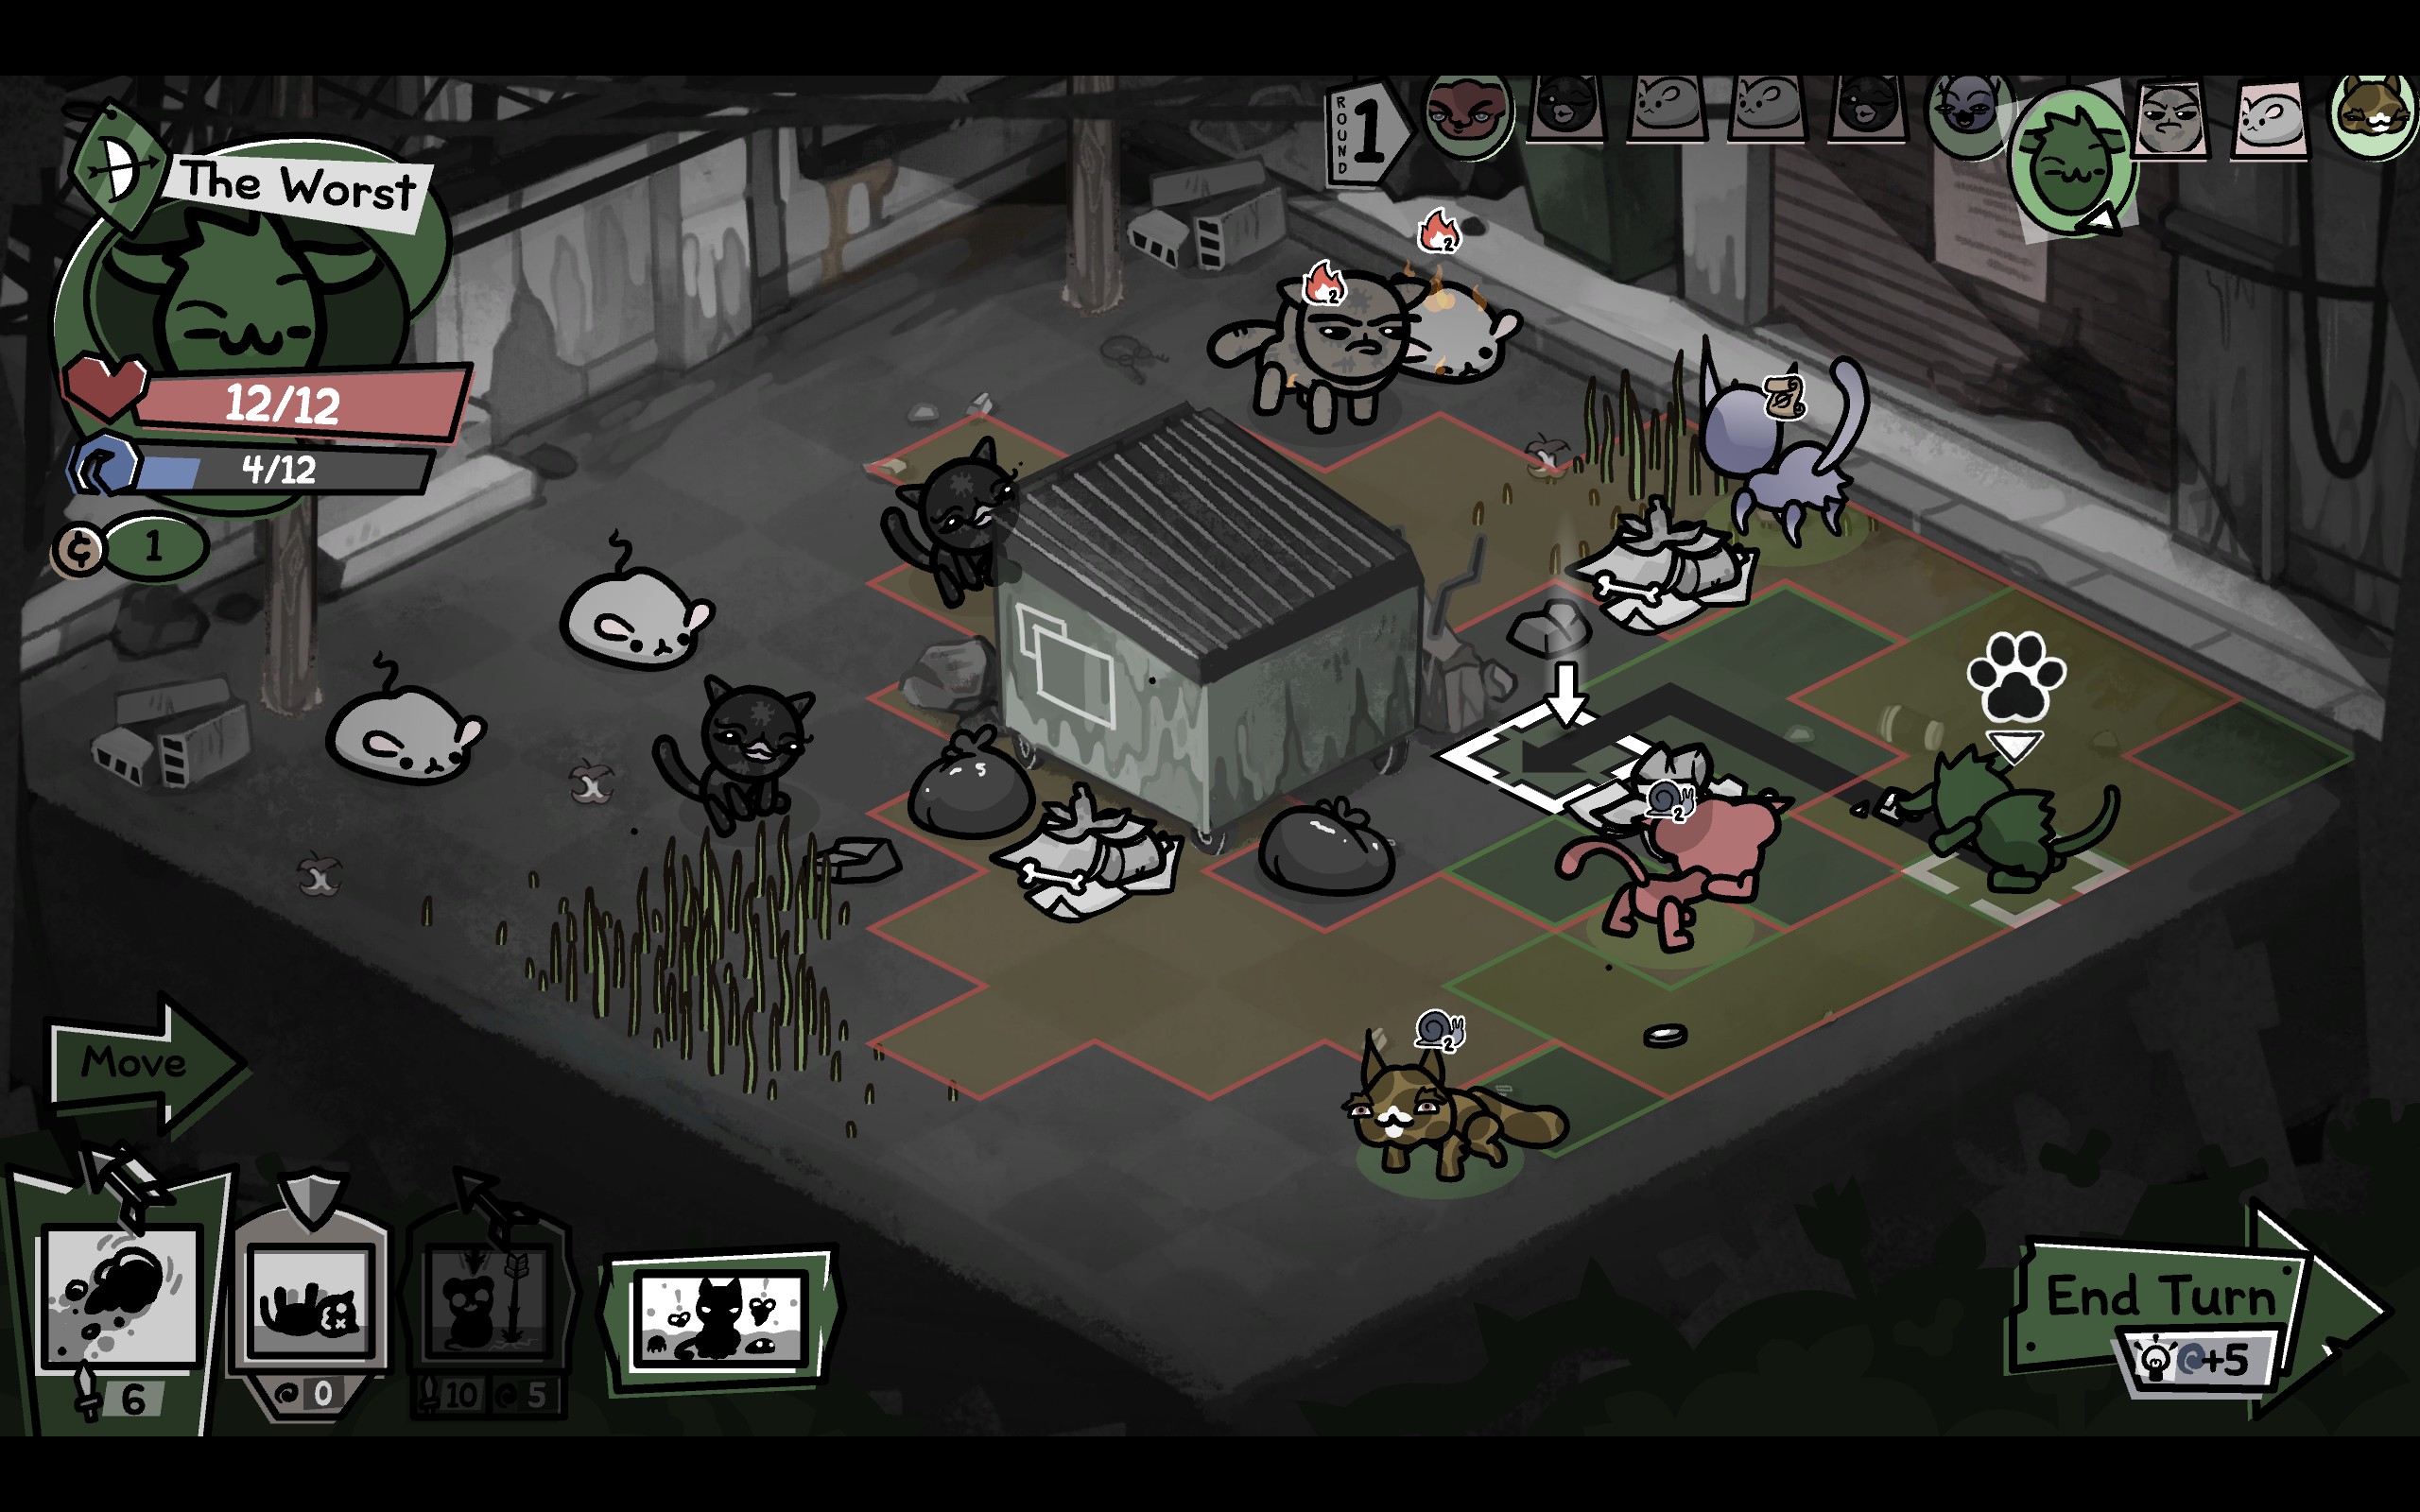

I select Move and I pay attention to which enemies are actually in range for our Hunter’s basic attack. There are three: the Tom Tom, the Leaper, and one of the Cat Callers. We can discount the Leaper because we know he will die from Burn damage. The Tom Tom can’t reach us, so he isn’t an immediate threat. The Cat Caller casts Slow debuffs and is an active menace to us. We won’t be able to score a kill however, we’re just slightly short on damage – the Cat Caller has 7 HP and our Lobbed Shot only does 6 damage.
I decide to go with the Cat Caller, chiefly because none of my other cats will be able to reach it. It’s behind the shed and well out of their range. My Hunter is the only one able to score a shot on it, whereas my Fighter is better positioned to take on the Tom Tom later.
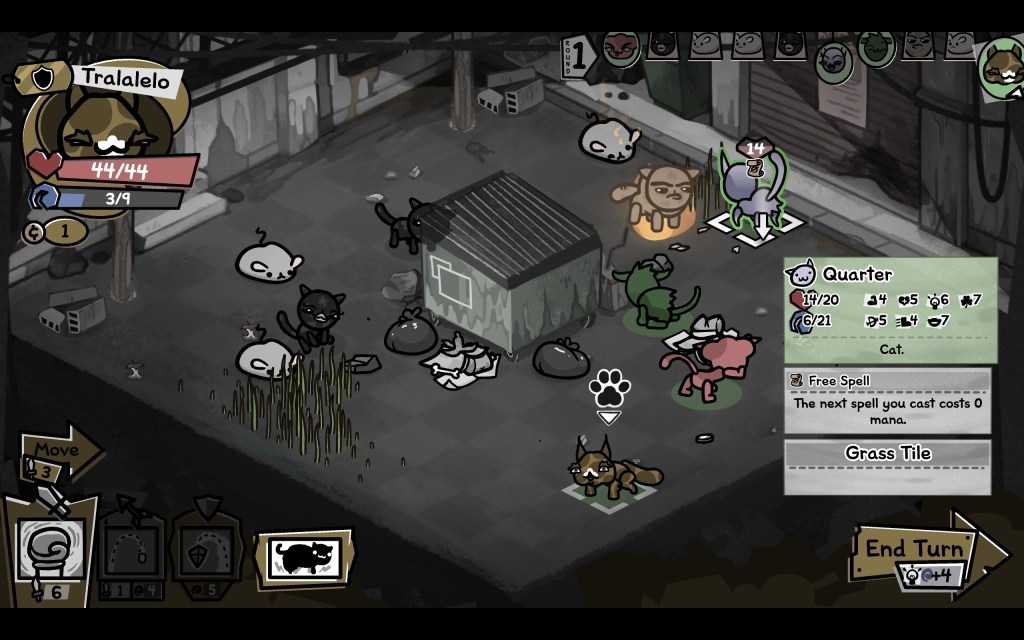
It’s now the Tank’s turn, and the end of the round. However, I had forgotten that Tom Toms have a special attack that lets him hit three tiles wide. The Tom Tom moved forward and was able to hit Quarter on the diagonal. An annoying miscalculation, because none of my cats have healing abilities. This means I need to play more conservatively than I’d like.
My Tank has Trample as a passive ability. They will deal damage to any tile they pass through. This can mean extra damage to your foes, but it can also mean friendly fire to your allies. One to bear in mind.
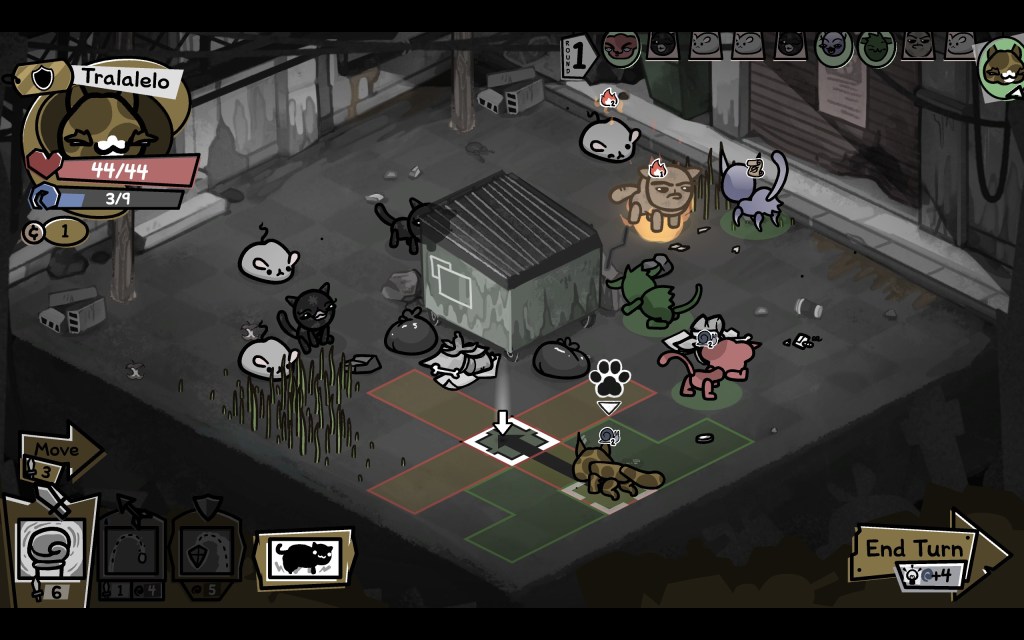
When you select a tile to move to, the game shows the path the cat will take with an arrow. This is important when there may be damaging tiles to pass through, or in this case, your cat has Trample. Note that because my Tank has a measly 3 speed, their movement range is very short.
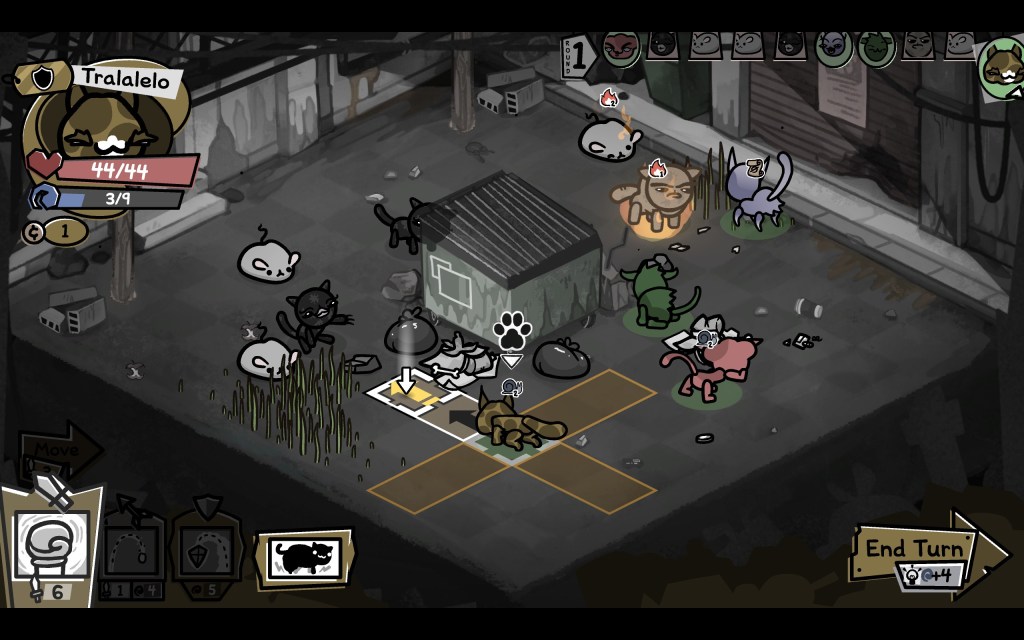
One trick a Tank has up its sleeve, is its basic attack actually includes a tile of forward movement. I can use Push Attack on the empty square in front of me and move forward one tile.
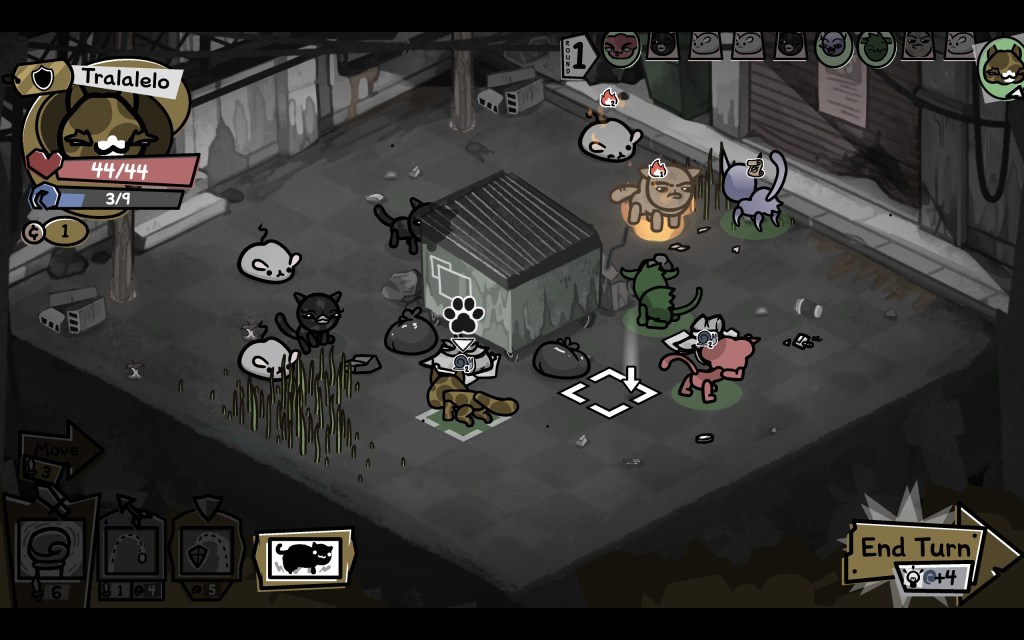
Ta-da! One extra tile of movement. My Tank has Spit as an active ability, which could hit any enemy for 1 damage. Unfortunately, it costs 4 mana and we only have 3. We will gain 4 mana when we end our turn, so it will be an option the next time around.
Because the Cat Callers cast Slow on the Hunter and Tank, the Mage goes first on the next round. The Leaper with Burn has died, as expected. The enemies have also caused some friendly fire amongst themselves by being careless.

I’m not going to make the same mistake twice! The Tom Tom is the next enemy to move and is obviously a threat to our Mage. So, we hit it with Fire Blast and Magic Dart again. Then I beat a hasty retreat, well out of its attack range.
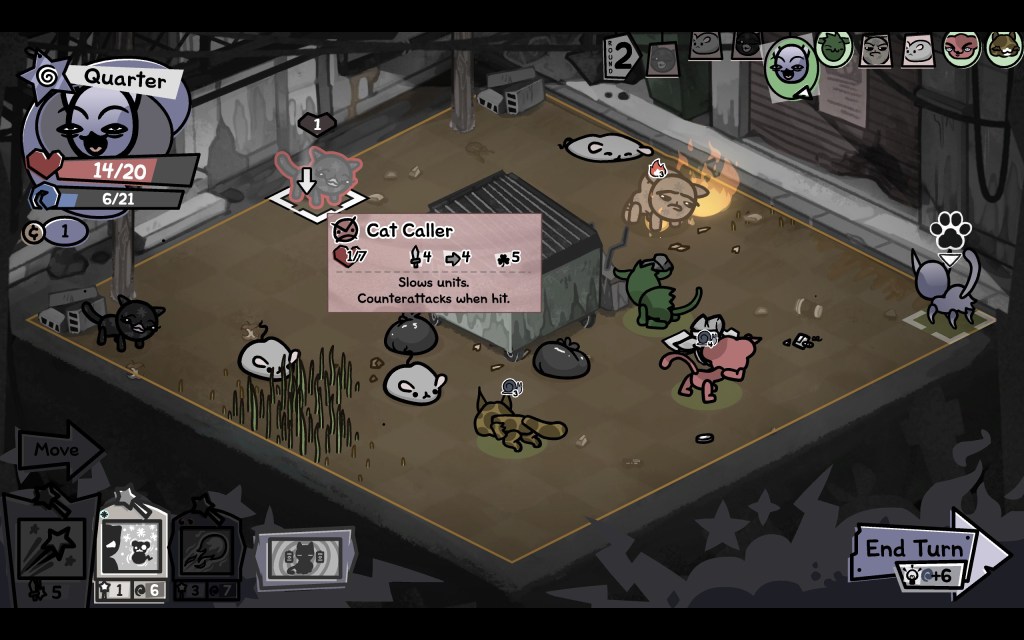
Thanks to the Mage’s passive ability Charge Up we get an extra spell to play with. I use Cold Shoulder on the Cat Caller that has just 1 HP. Cold Shoulder has infinite range and deals precisely 1 damage, so that’s perfect.
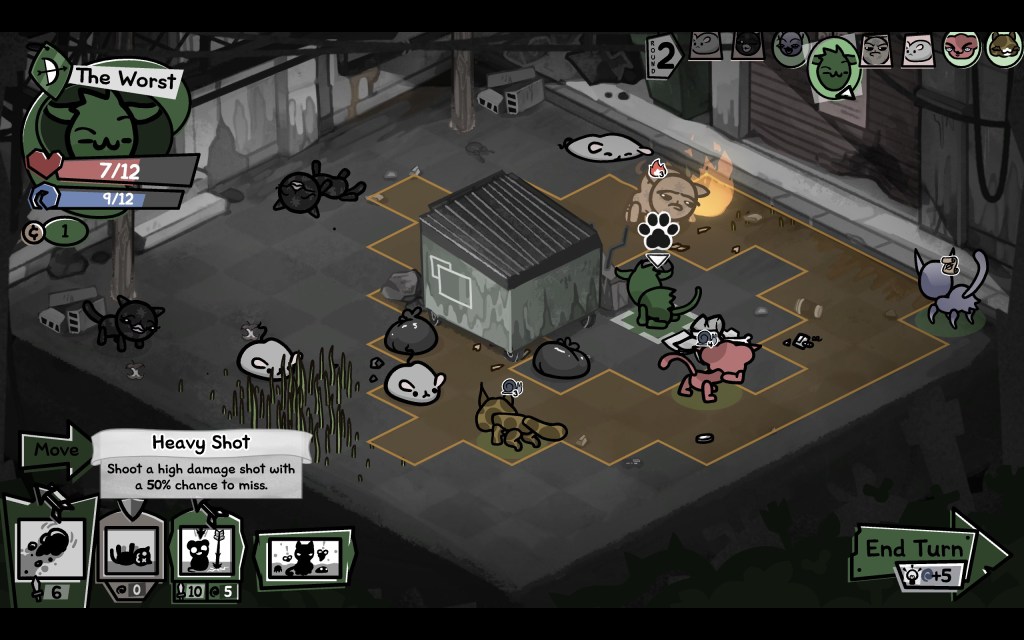
It’s now the Hunter’s turn. The Tom Tom is in range, but he is going to die from Burn damage on his next turn. So our attention instead goes to the Leaper, the other enemy within range. The Leaper only has 4 HP left, so this should be a kill.
We now have the mana to use Heavy Shot, for a whopping 10 damage, but it would be pointless to do so. We already have a kill in the bag and we don’t need to waste the mana. Note that Heavy Shot has a 50% chance to miss. This is why I mentioned previously that a Hunter needs to have a good Luck score. Many of their best abilities are luck based.
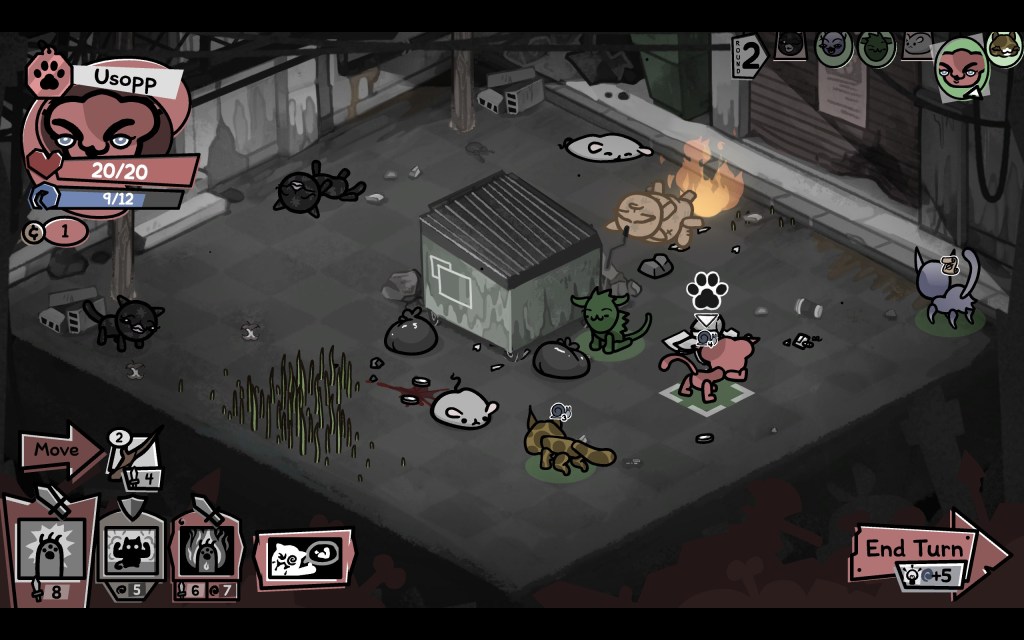
I park the Hunter behind a trash bag. The Tom Tom dies of Burn damage. We probably didn’t need to be such scaredy cats and move the Mage so far back! Now it’s the Fighter’s turn. But bless them, our other cats have been too effective, and there’s nothing in the Fighter’s range. Oh well. We can at least use Flex and get the Brace bonus, which reduces any incoming damage.
The Tank now gets a turn and can finally hit something!
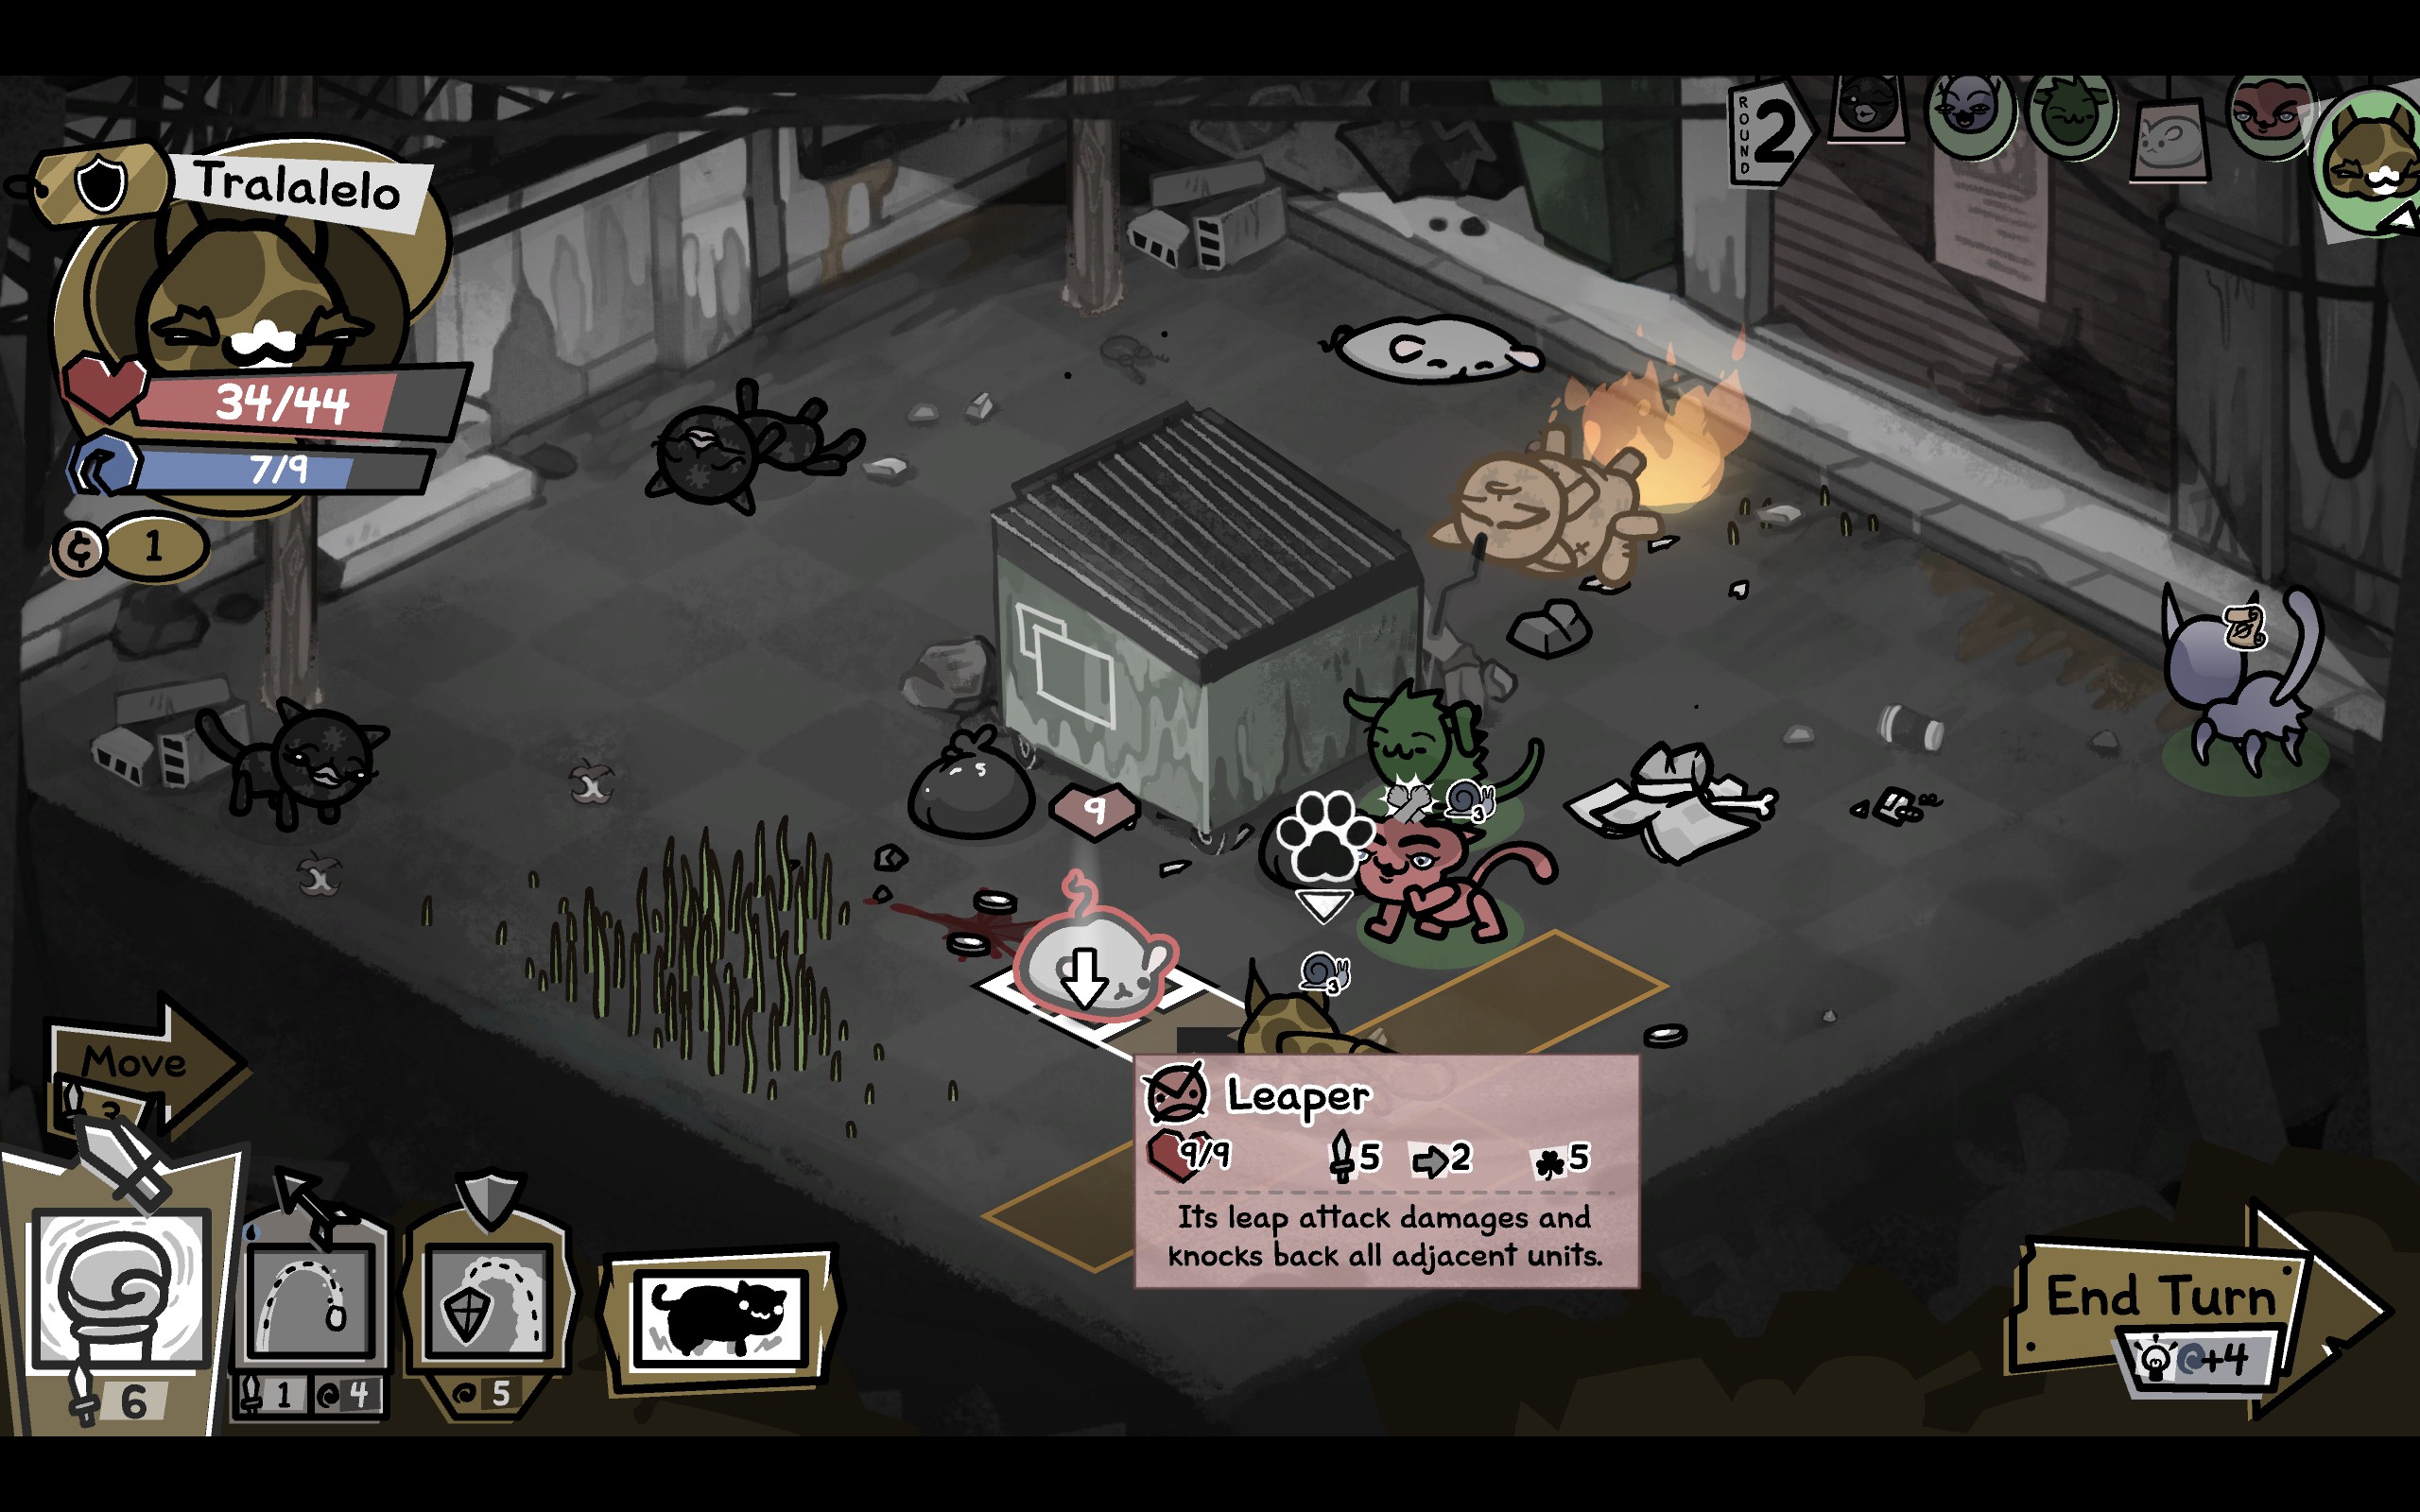
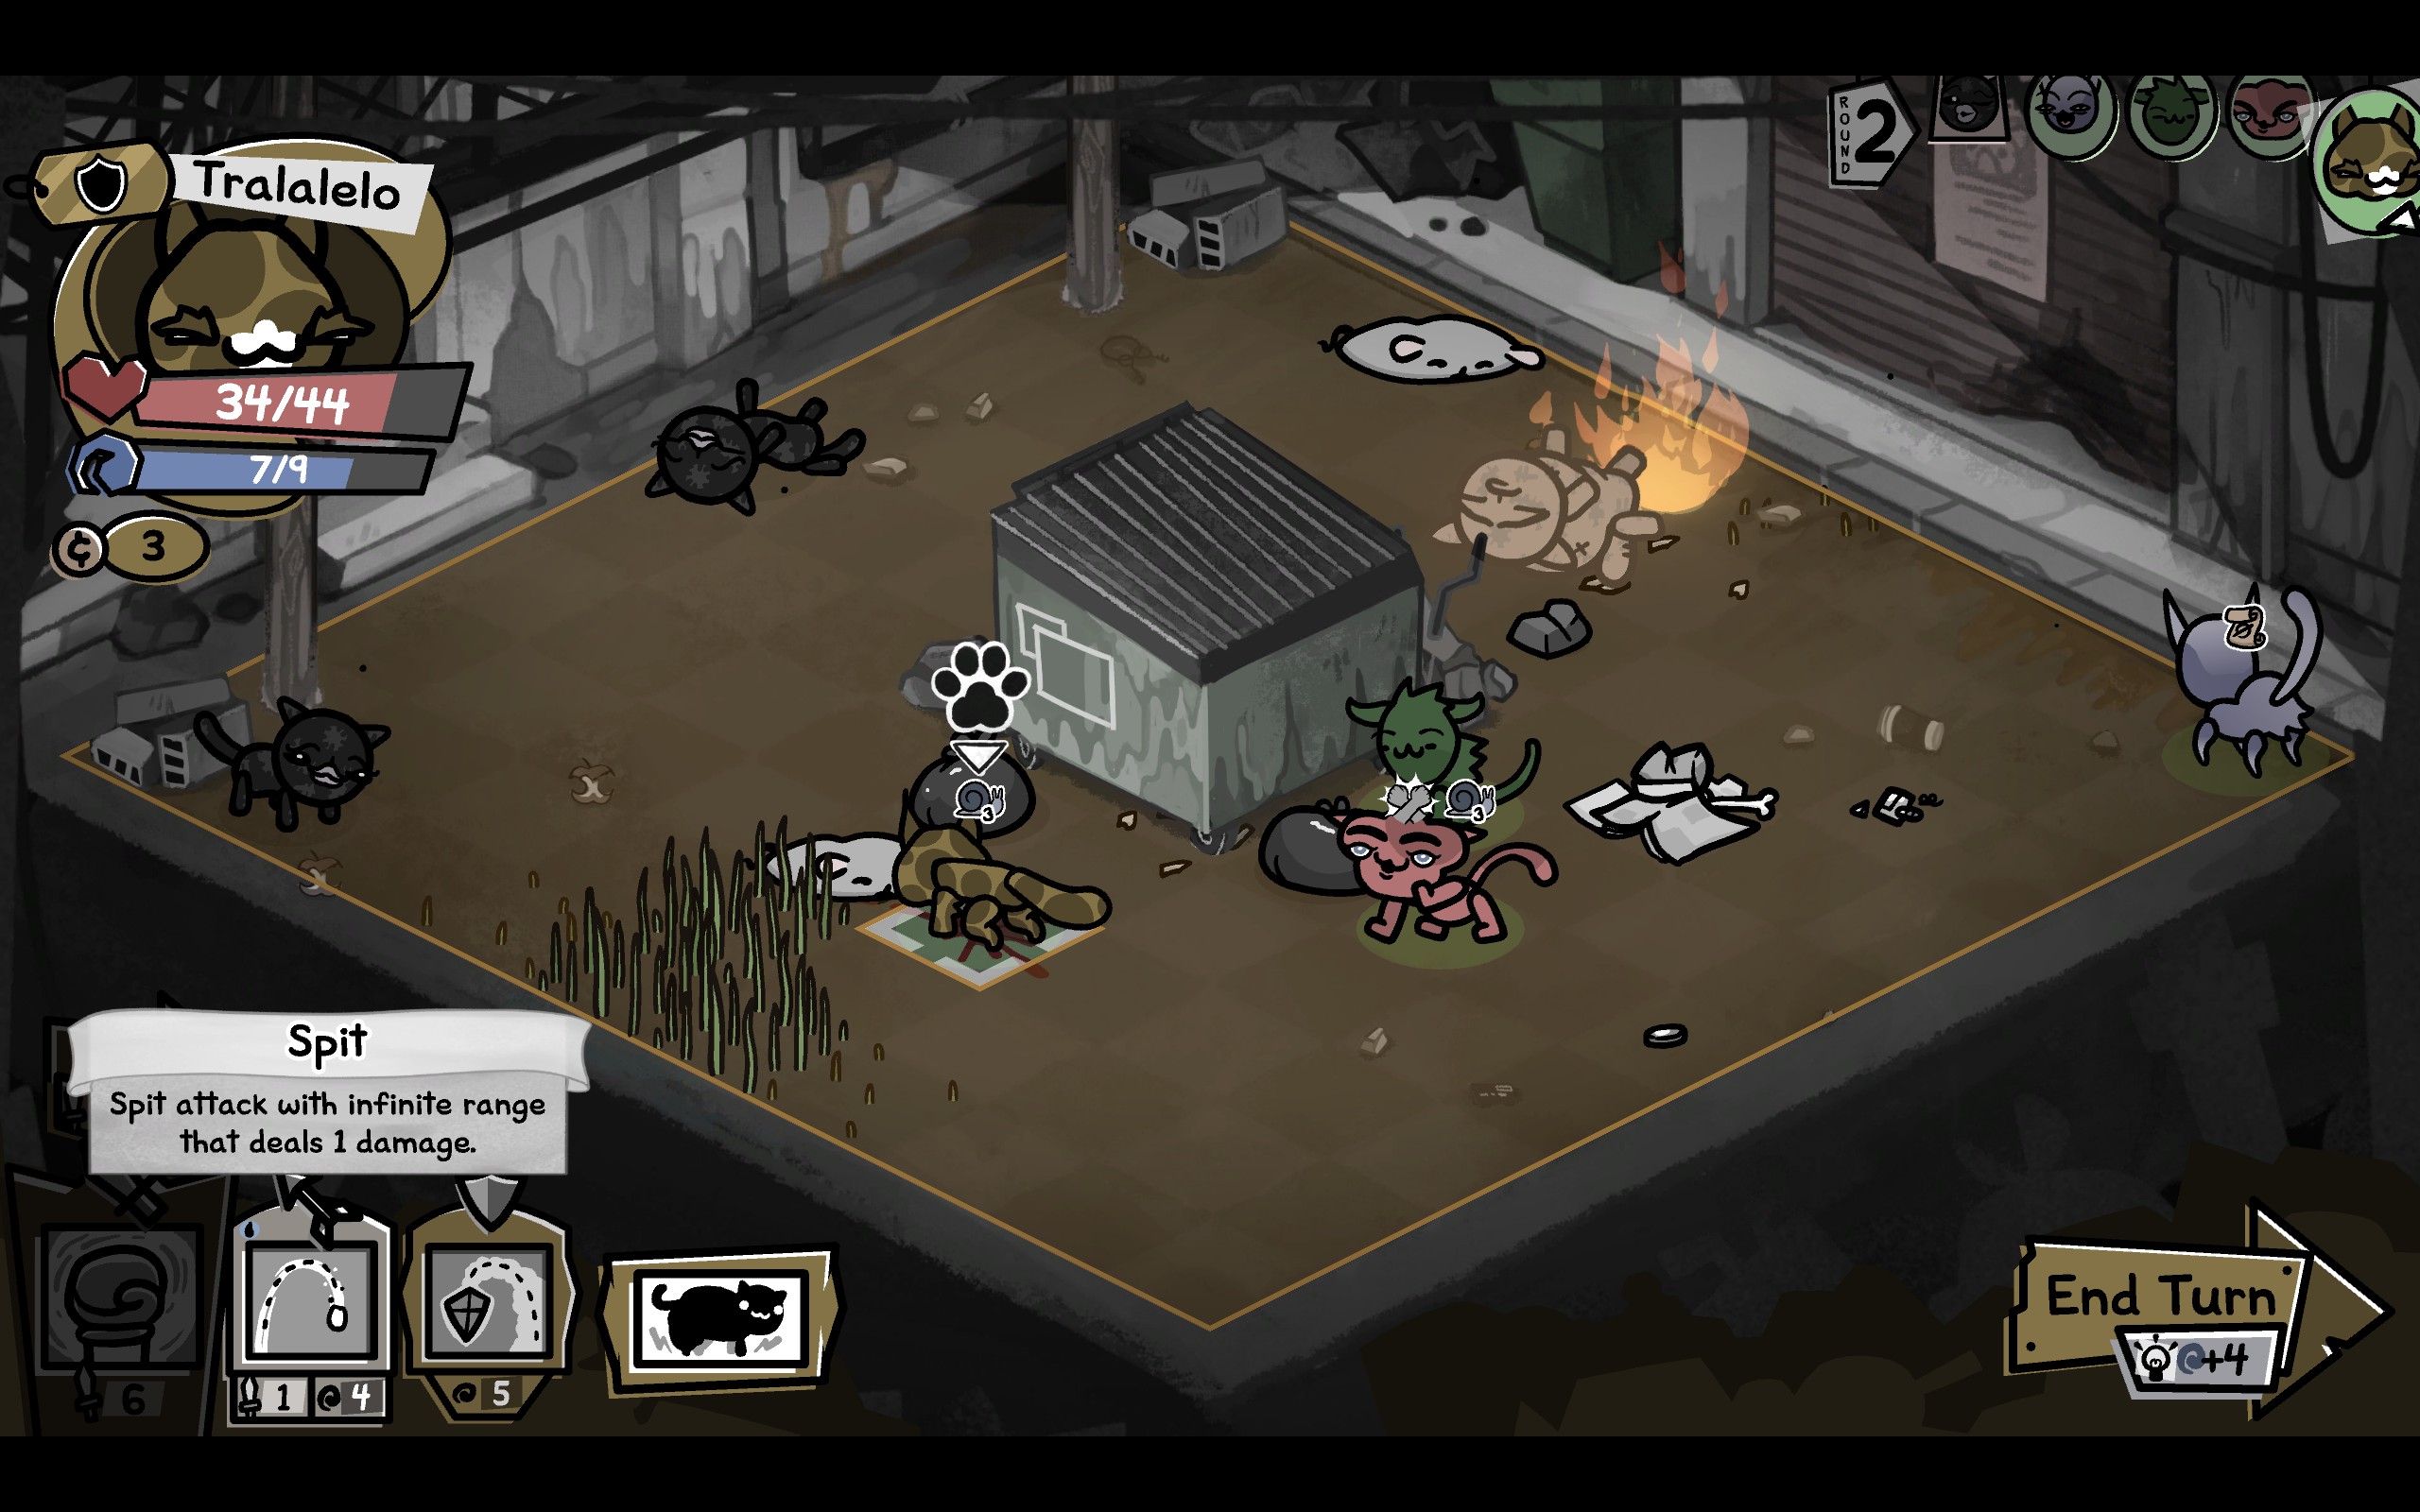
Obviously we use Push Attack on the Leaper in front of us. Because we have Trample, we can also then just walk forward and deal further damage to the Leaper. This is enough to kill it!
We now only have the Cat Caller to deal with, and it’s at just 2 HP. We have 7 mana, which means we sadly only get one Spit Shot, which costs 4 mana. Fortunately however, it hits for 2 damage and kills the Cat Caller.
Success! After every battle, one of your cats will level up.
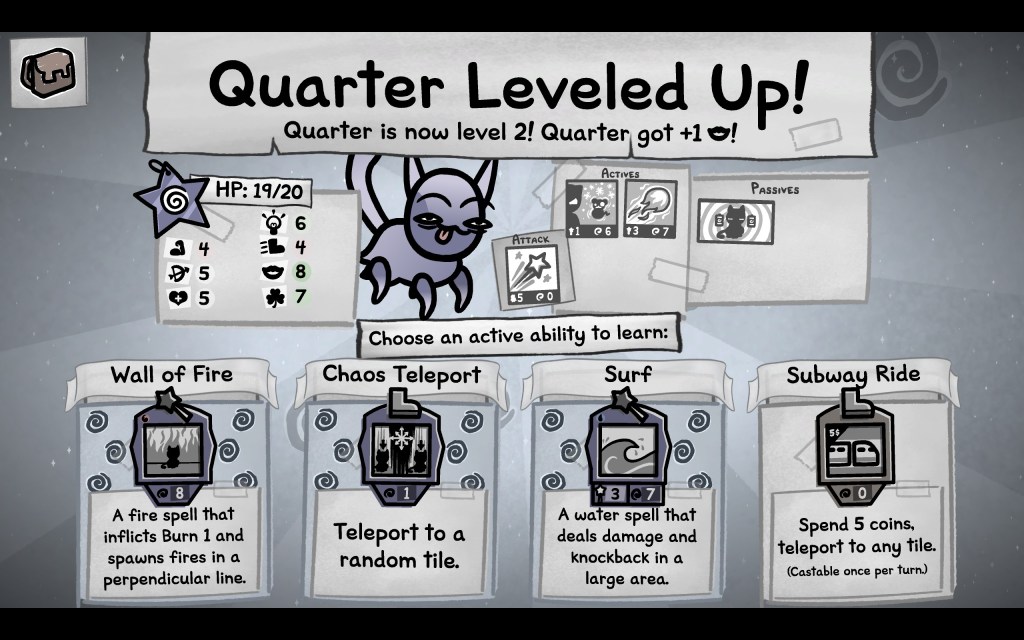
The Mage gets a level up. So that’s one additional Charisma point and a choice from four spells. Wall of Fire is a favourite pick of mine, because it can easily hit multiple enemies at range. However, we already have Fire Blast so taking Wall of Fire as well probably isn’t the best use of our slots. More mobility is always good and we have two options in that regard. Now we don’t have 5 coins and I’m not expecting us to be rich in this run. With no healing powers to our name, we are surviving rather than looting. So while it is less optimal, I think Chaos Teleport is the better choice over Subway Ride. Because we won’t have control of where we end up, Chaos Teleport is more of an emergency escape option than a strategic tool. I dismiss Surf because knockback isn’t particularly useful to us at this time.
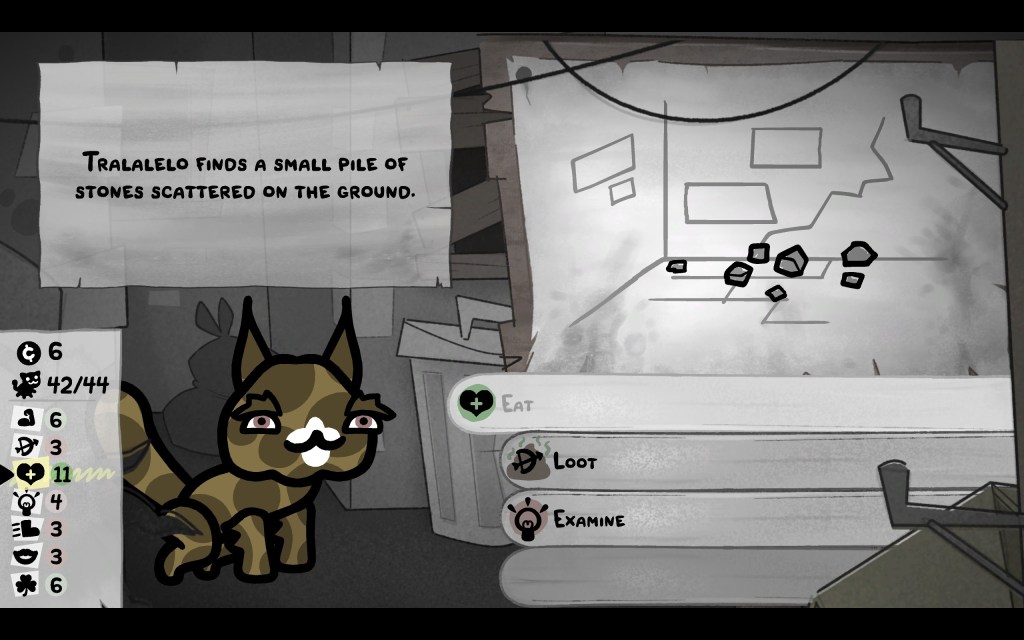
Our next stop is a “?” event. A random cat is chosen and three options presented. In this case, as you can see above, “Eat” is the obvious option. It’s a Constitution check on a Tank, after all.
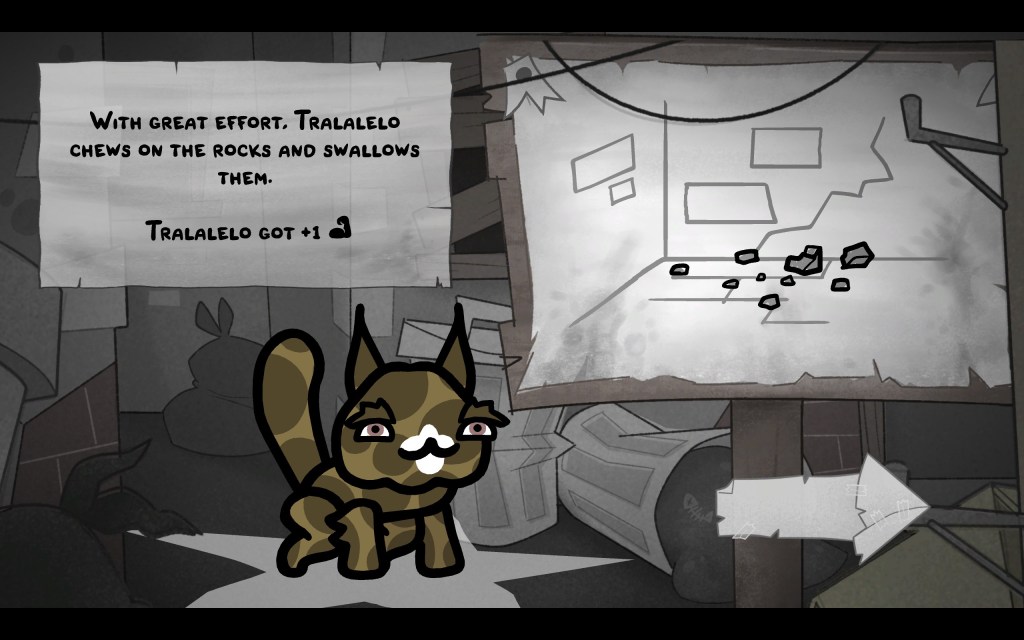
Tralalelo passes with flying colours, and frankly, I’d be writing to the manager if they didn’t.
Next up is another battle. Hopefully you have picked up on the flow of decision making now. Who moves next, who is most threatening, who is in range, etc. There is a lot to consider but you are not under a time limit.
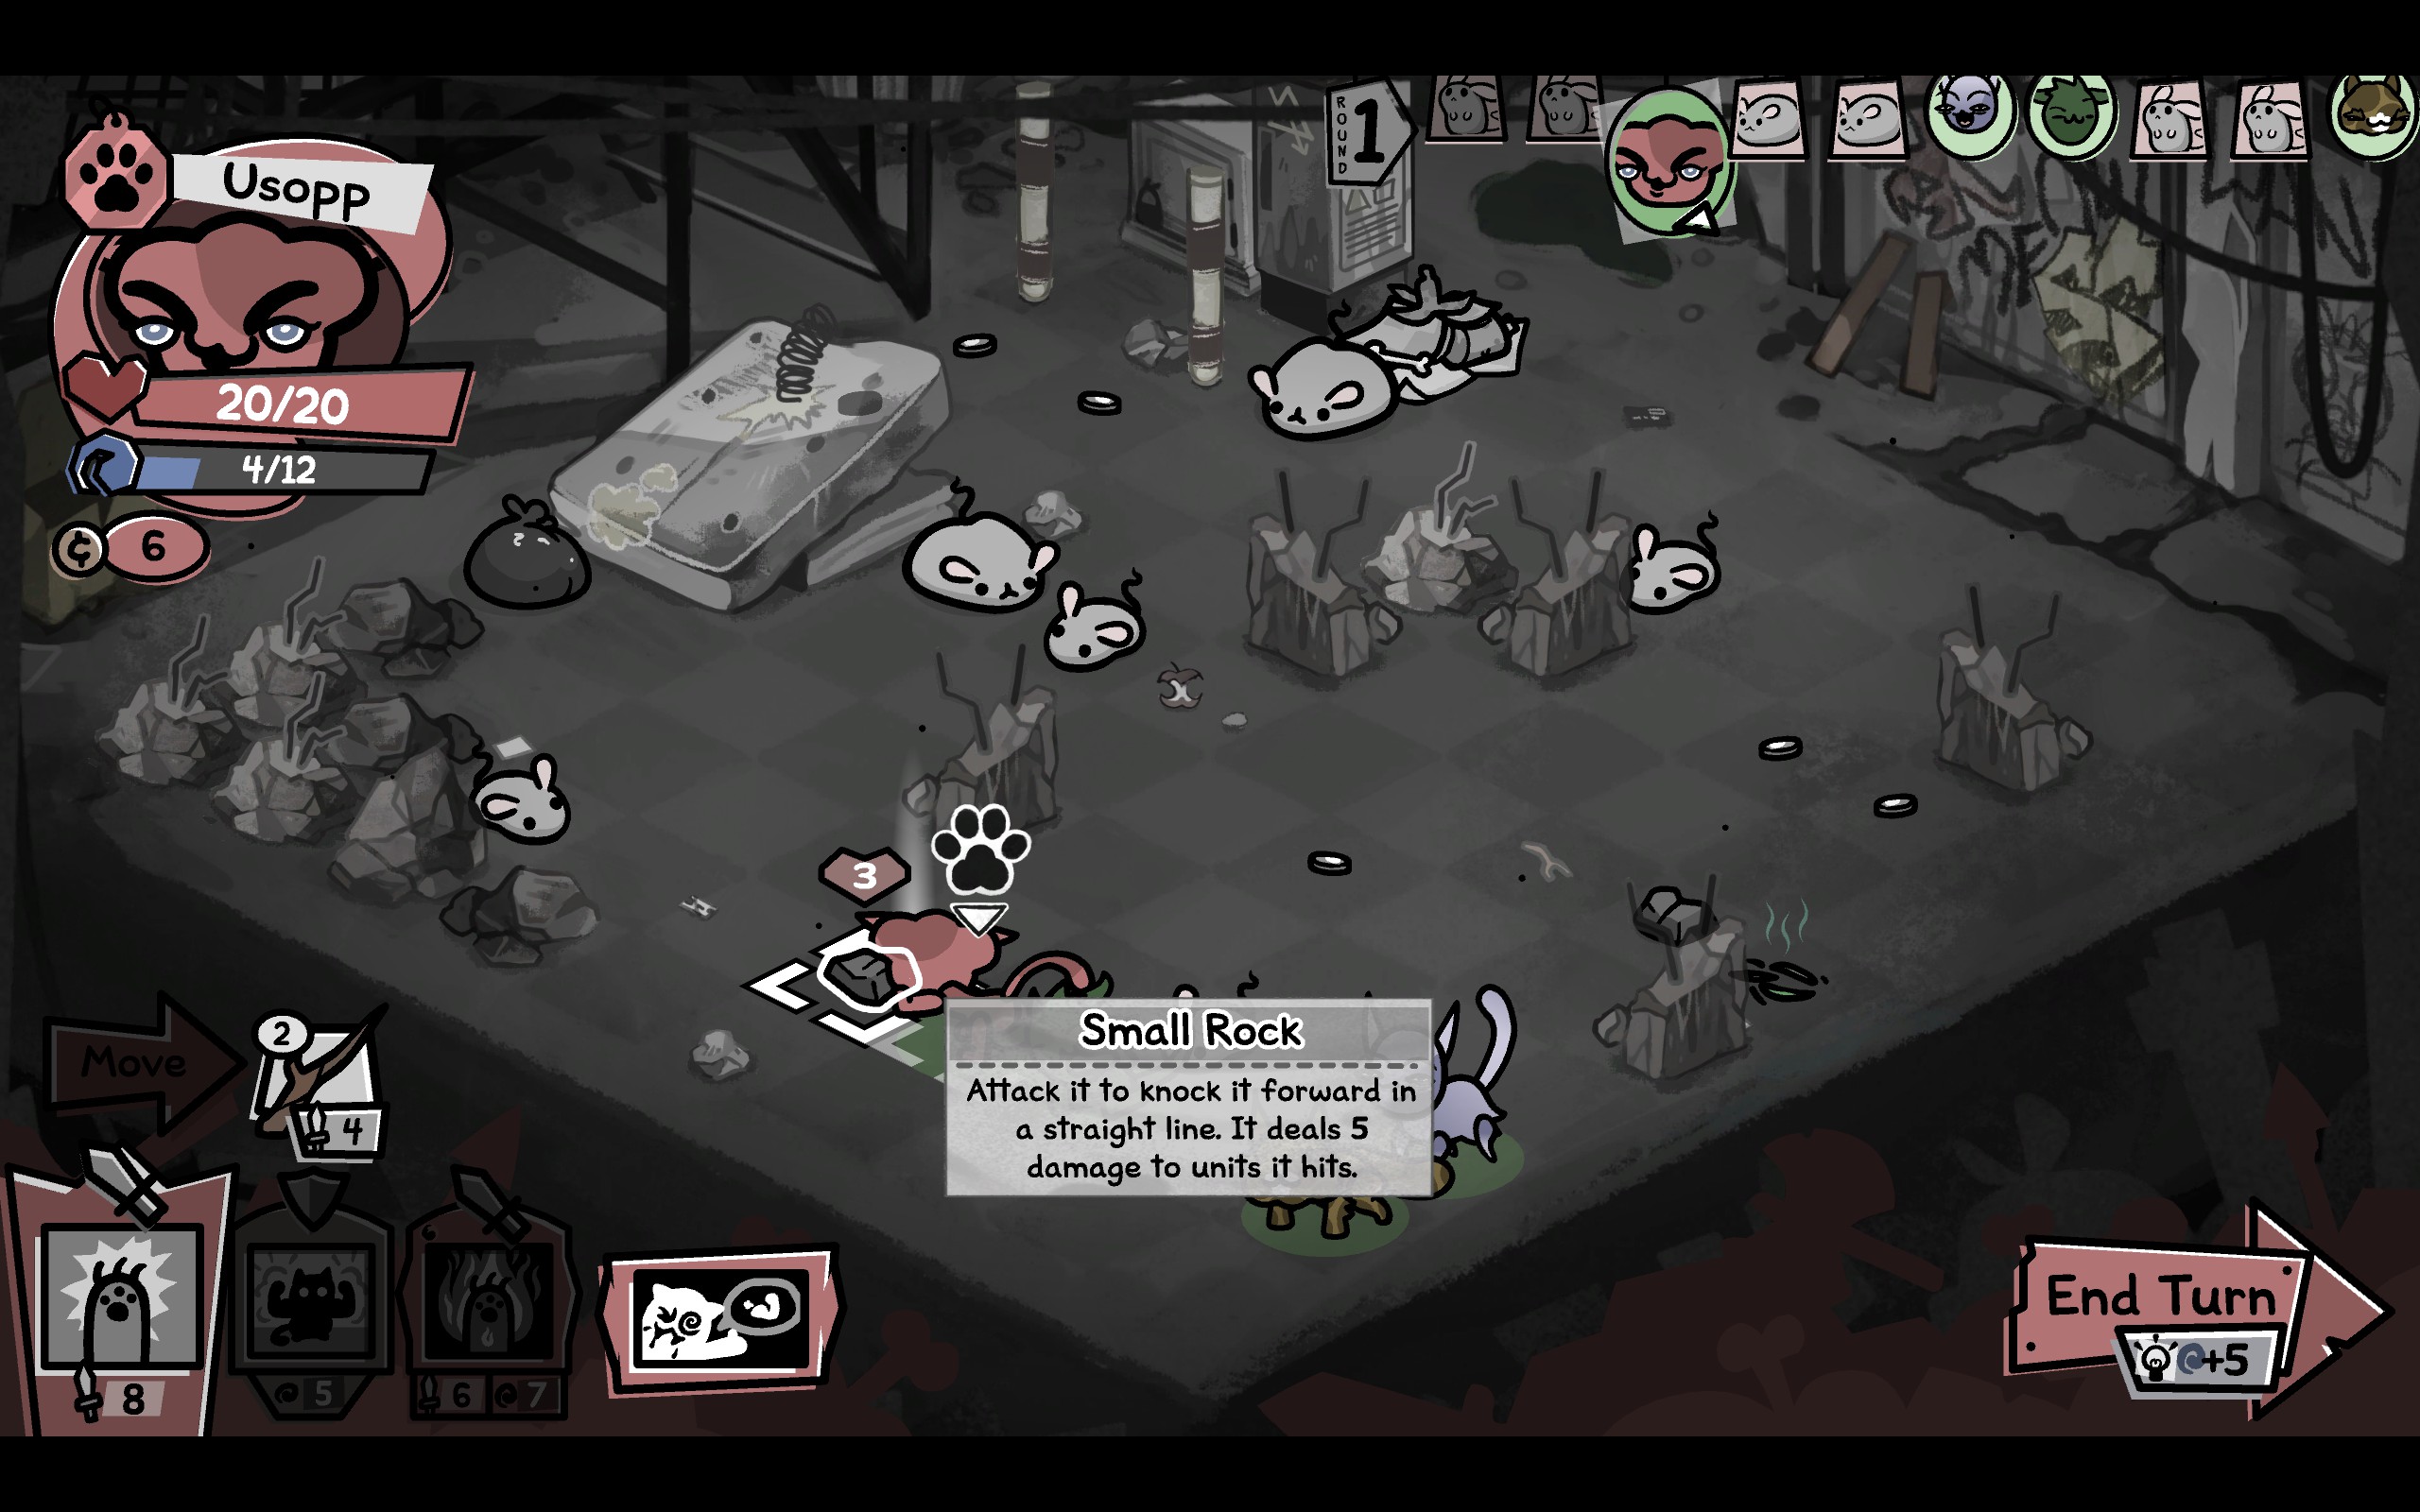

Our next lesson is using environmental objects to our advantage. Our Fighter moves first. I’ve noticed that we can use the Rock to strike the Lil’ Rat to our left. So, as you can see in the image above, I move Usopp into position and attack the rock. The rock goes flying into the rat and kills it.
The Lil’ Rats are fragile, so they go down in one hit. Because of that, I just prioritize hitting whichever one of them goes next in the turn order. This denies the enemy team any opportunity to do damage.
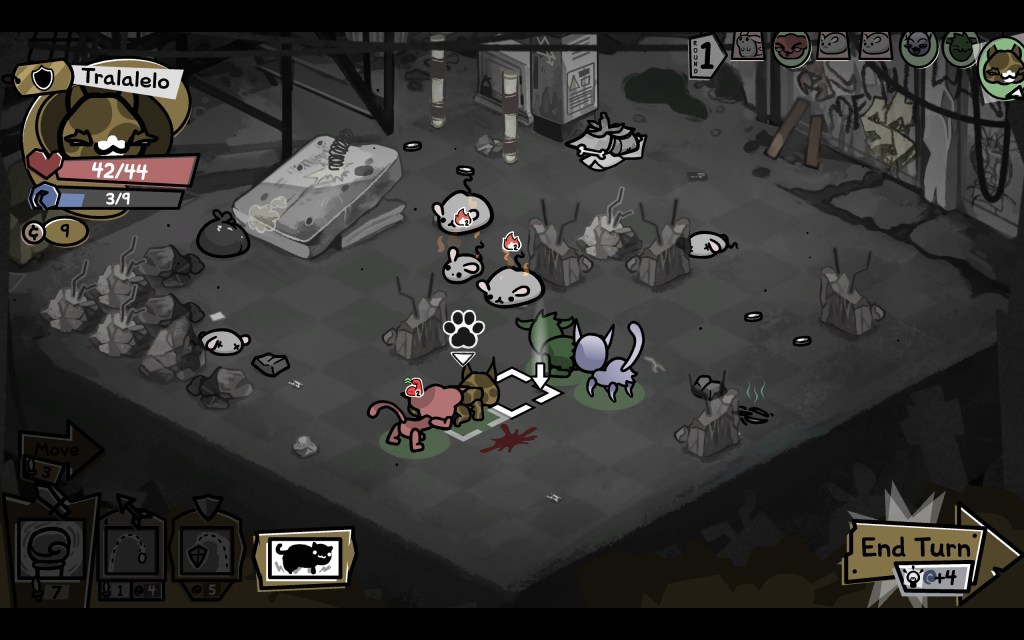
When it is time to end your turn, always orientate your cat. Left click to get your cat to turn in that direction. Remember, backstabs do more damage. So when I end my Tank’s turn, I point their bum at the Fighter. Unless my Fighter takes offence and goes rogue, my Tank is safe from backstabs, thanks to their teammate occupying that tile. If you are paranoid about protecting your butt, then being up against the edge of the field, or a sturdy piece of scenery, is the preferred strategy.
This is an easy battle. However, we still take some damage. This is worrying since we have no healing spells and no healing items. We recover some HP at the end of every battle, but watch out for damage accumulating over time.
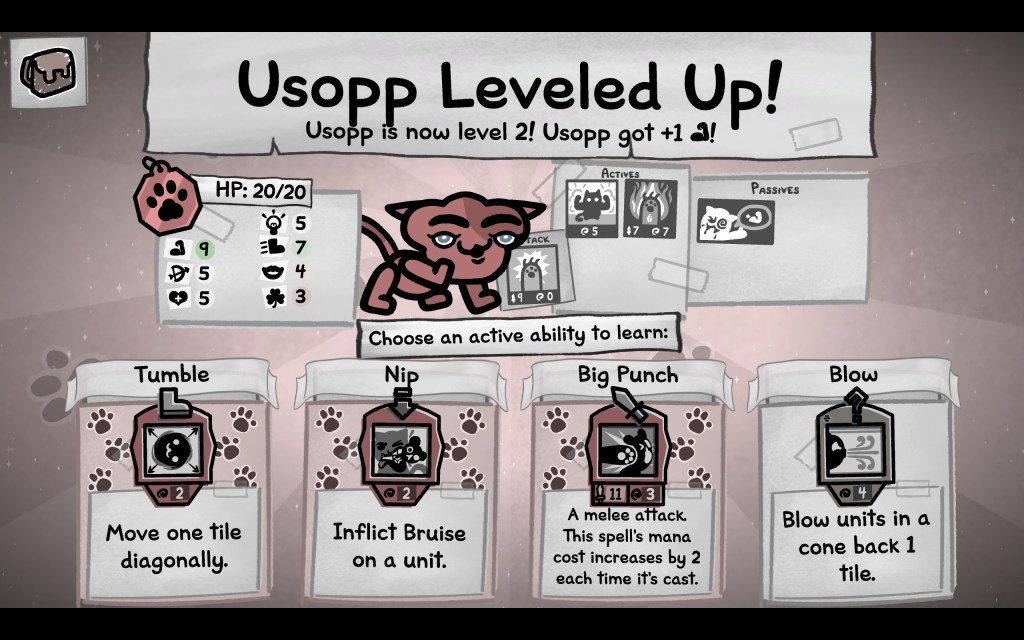
It’s the Fighter who gets to level up now. I am torn between choosing Tumble and Big Punch. Obviously, 11 damage for 3 mana is a steal. But with melee combatants, actually getting into range to hit your opponent can be the hardest part of the equation. I go for Big Punch and hope I won’t regret it.
Miniboss: Maisie, the Tank
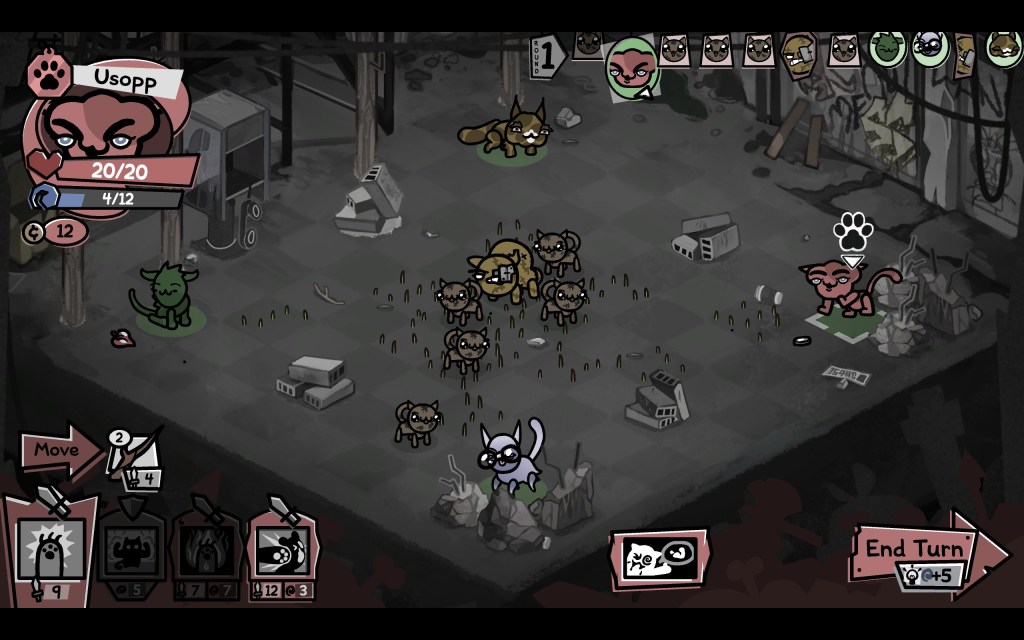
Miniboss time! There are four minibosses the game might throw at you here. Here we are up against Maisie, who is a Tank build. I will discuss the other potential three later on.
The most important thing to remember is that Maisie herself isn’t the threat. She will almost never attack you. Instead, the kittens deal the damage. When you attack a kitten, Maisie swaps places with it and takes the blow.
You can use this gimmick to your advantage in many ways. But I’m going to assume you don’t have many tricks to your name at this point. We’re sticking to bread-and-butter strategy.
Keep your vulnerable cats away from packs of kittens. A singular kitten doesn’t do much harm. Four of them will likely kill a Mage. Try to keep them from ganging up on you.
When it’s time to go on the offensive, whichever kitten you target becomes Maisie. Killing Maisie will have to come first, unless you are fortunate enough to have large area of effect spells that can actually pick off the kittens. So ask yourself, do you want Maisie to move? If yes, then attack a kitten and she moves there. If no, attack her where she is and don’t hit a kitten.
Do you need to get a kitten away from your ever-vulnerable Mage? Go ahead and hit the kitten. Maisie will swap with it and Maisie almost never attacks. She will instead buff and heal the kittens, if she has the opportunity. If you get in the situation where a single kitten has been buffed to the point of actually being a threat, bring out any area of effect spells you might have. If the circumstances allow, target a neighbouring kitten, have that one get swapped, and still hit your actual target.
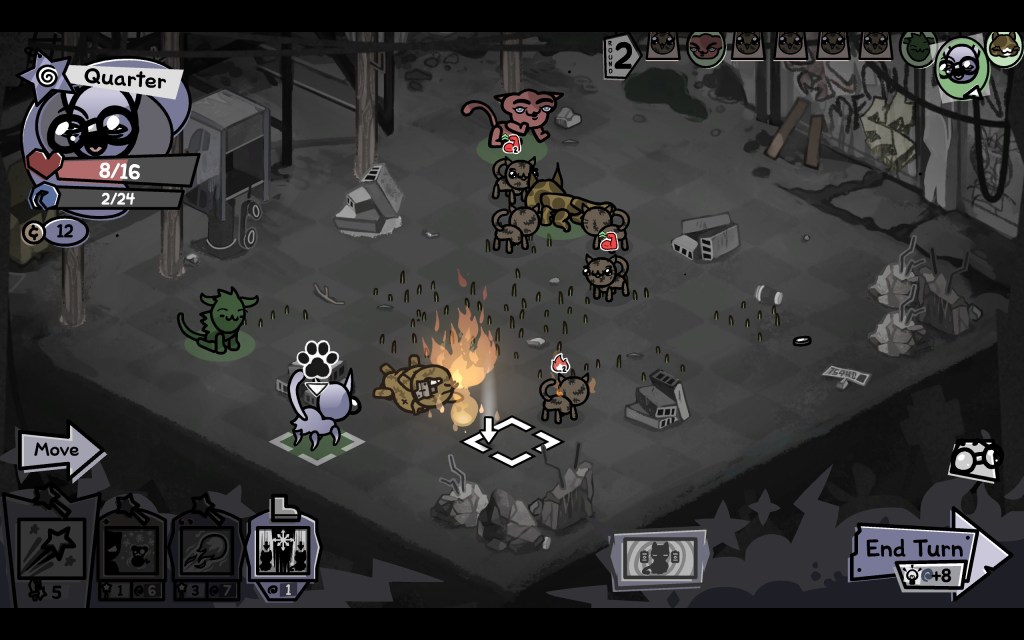
Kittens will flee from battle on their next turn after Maisie has died, with rare exceptions (if the AI thinks it can score a kill on you, it might take that option rather than flee). Use this time to mop up any heals or coins on the field.
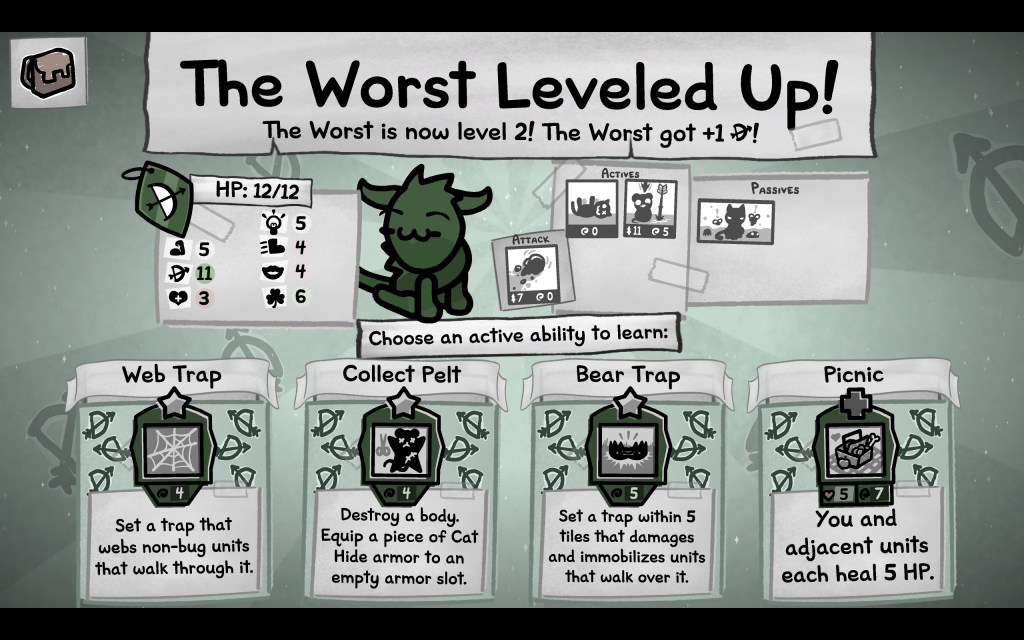
My Hunter levels up next. There really is no choice among these four options, it has to be Picnic. This is the only healing option at my disposal currently. You probably won’t be surprised to hear, that the difference between having zero healing options and one healing option is enormous. Among healing spells, Picnic is more than decent. Your cats typically start a battle clustered together, so spending the first turn bunched up and healing is a common strategy.
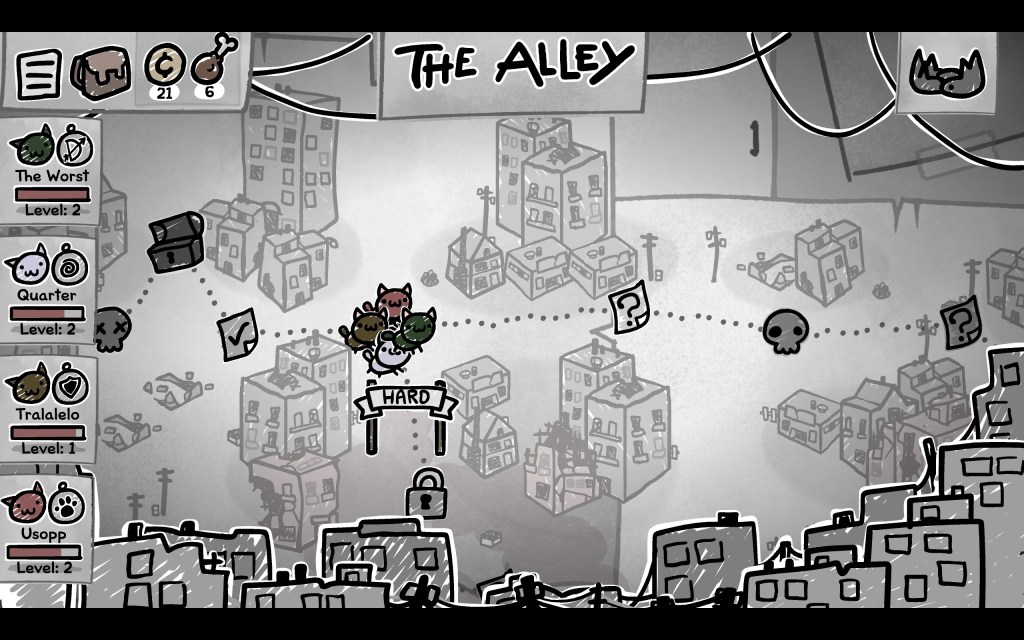
Every area has a Hard Route but it is currently closed to us. Not that we’d be taking it anyway. Although we’ve done well, we’re hardly elite purebred fighting stock.

At the next “?” my Fighter picks up a Parasite. This permanently occupies an armour/item slot. Fortunately, since we had no armour to begin with, it has not displaced anything vital.
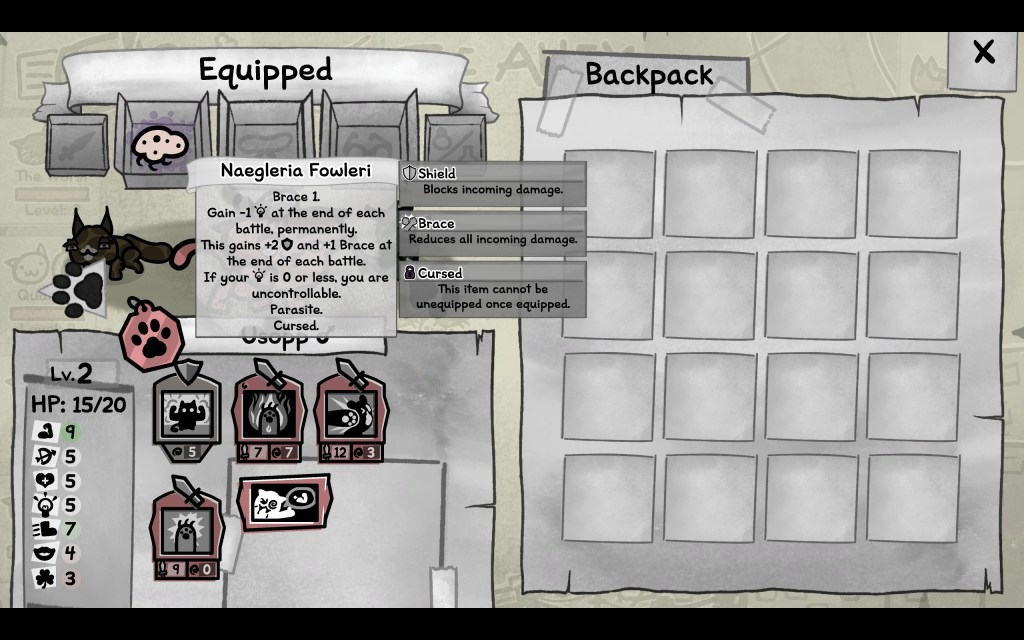
Parasites can be ugly, they can be bad, and once in a while they can be beneficial. “Naegleria Fowleri” is better known as the brain-eating amoeba and is indeed a real world parasite. It will reduce our Intelligence by one, permanently, at the end of each battle. At zero Intelligence we can’t control our cat anymore. But on the flip side, this cat is a Fighter. The parasite also gives us Brace and Shield, which is arguably a more important to a Fighter than Intelligence. We definitely have the potential to work this to our advantage. Our Fighter has 5 Intelligence currently, which will easily see us to the end of the Alley without a problem.
The next battle is trivial and I come out in profit. With the benefit of Picnic, I’m able to undo the damage we took from the Maisie fight. We will be entering the final Boss Battle at full health. When there is a hard battle coming up, go ahead and delay ending a battle if it allows you to heal up your party. The maggots can wait.
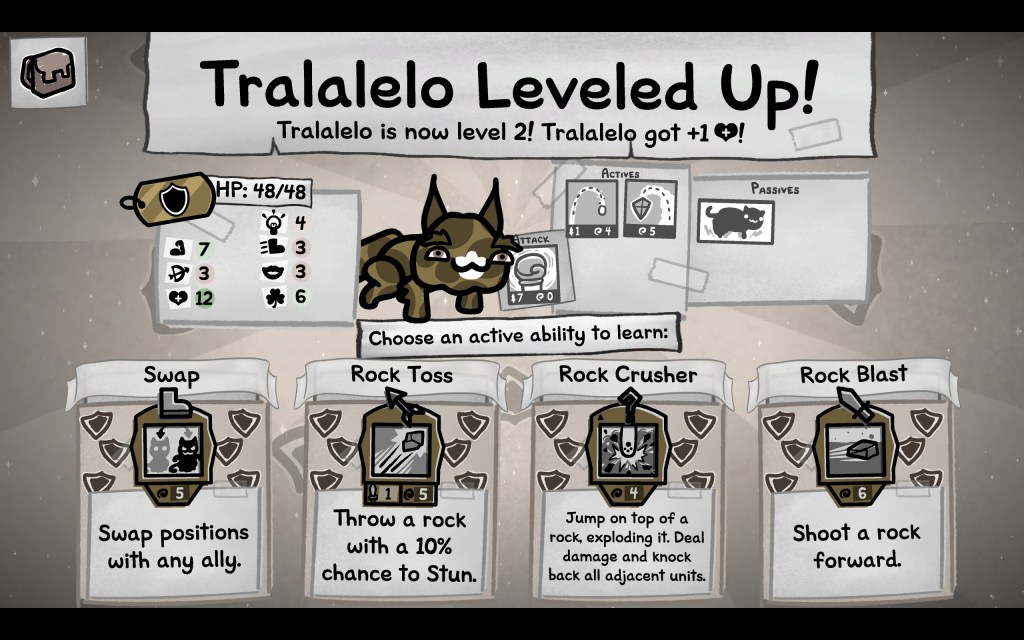
It’s the Tank’s turn to level up. The Tank class has a strong affinity with the Rock type. One of their most useful abilities is Rock Eater, which does damage to rock-type enemies. They can also turn enemies into rocks, and I’m sure you see where that’s going…
However, Tralalelo isn’t really set up to take advantage of type effects in that way. Instead, the stand out option here is definitely Swap. Our Tank’s Speed stat is absolutely pitiful. With Swap, we can get our Tank into the middle of the battle, while also swapping our feeble Mage out of it. This solves two problems, so it is a wise pick.
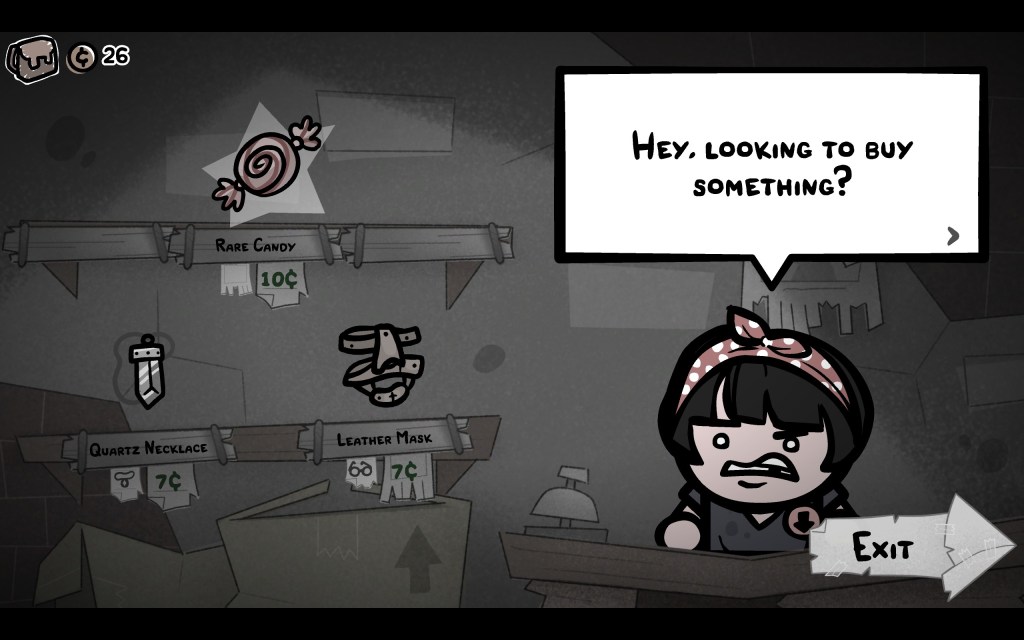
We make it to the Shop. Here you can see why my next advice is to always get 10 coins no matter what. There is nothing more useful to you than a level up. Mop up coins on the battlefield in the closing turns, when you have the situation under control.
Obviously, the Rare Candy is the most valuable item here. I also grab the Leather Mask because why not.
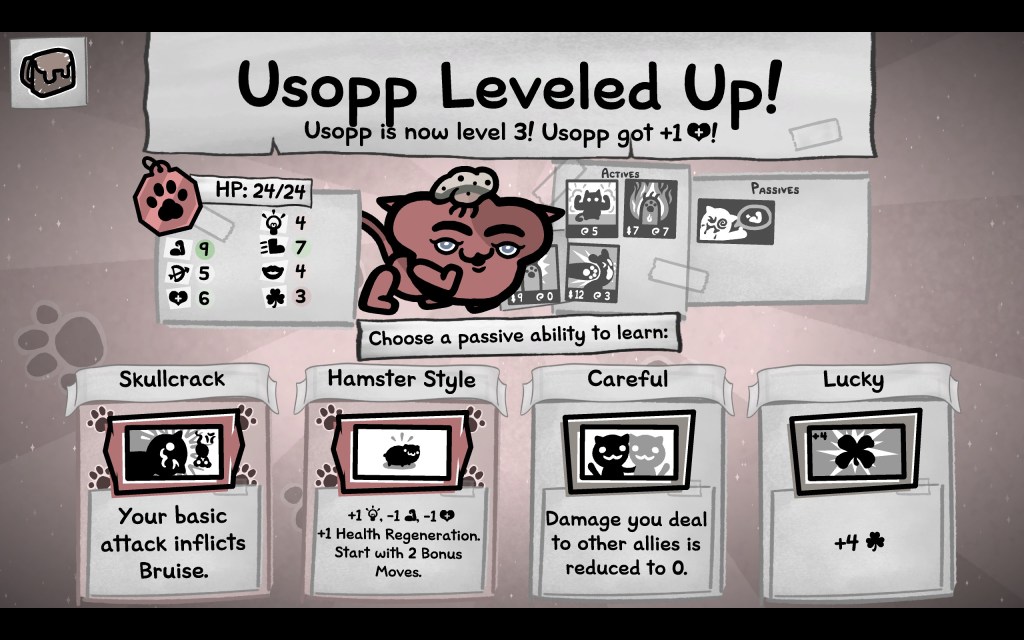
The Fighter levels up and gains a Passive Ability. Unlike Active Abilities, your Passives don’t cost mana and run in the background.
The choices of interest here are Skullcrack and Hamster Style. Because of our situation with our brain-eating amoeba, I think Hamster Style is the more interesting option. It grants us +1 Intelligence and even more Brace. Also, Bonus Moves on a Fighter are always welcome. A Fighter always seeks to do the most damage possible in a single turn. Then run away screaming, because they are not a Tank. I need to keep reminding them of this.
Boss: Radical Rat
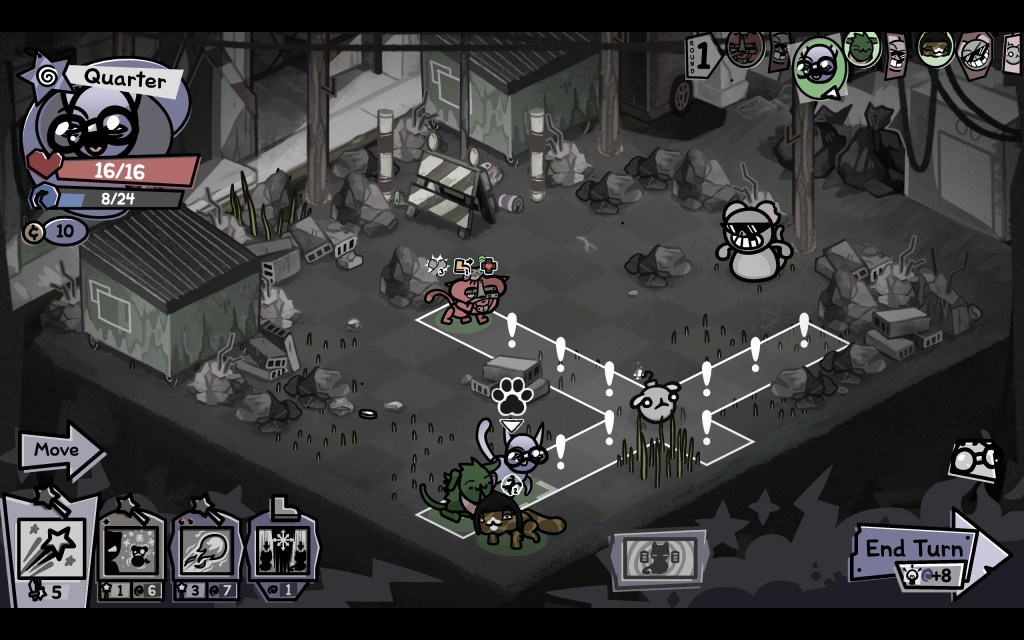
The boss you meet on your first run will always be Radical Rat. The first important note is the Rat itself can’t really hurt you. It’s the bombs that are doing the damage.
Any attack will wipe out a bomb. In the image above, the obvious play is simply to have my Mage hit the bomb with their basic attack. Job done. Ignoring bombs and sidestepping them is sub-optimal, because the Rat will keep adding more to the battlefield. Bombs can chain easily, so you want to keep their numbers down.
Note that when the Rat uses its “Turtle” attack, it will activate all bombs on the field. Pay attention to the turn order, so you won’t get caught out.
When this battle gets dangerous, is when it’s combined with a nasty environmental effect. The absolute worst Weather effect you could get right now is Firestorm or the similar Wildfire. Bombs landing on a fire tile will be exploding everywhere before you have time to act. Conversely, a Heavy Rain will extinguish bombs immediately, making this battle trivial. In my case, I have bear traps on the field due to Hunting Season. These are a very minor hindrance and in fact the Rat walks into a trap on his turn, giving me an advantage. In the event you do have a forest fire raging… well… Losing is part of the game.

It’s an easy victory for me. The Tank levels up. I am tempted by Death Boon, but opt for Thorns. Thorns is a natural pick for a Tank, which does have a tendency to stand there and absorb hits. With the Thorns buff, enemies that hit you will take some damage themselves.
Back Home
Congratulations on your first successful run! I hope… If you did lose, don’t worry about it. That’s just natural selection in action. One of your friendly neighbours will pick up the dismembered pieces and return a few of them to you. Your cats will gradually grow stronger over time. And more inbred, but we will worry about that later.
You bring back the spoils of Food as well as coins and items. The more cats you have, the more food you will need. Keep an eye on your reserves.
Your neighbours will have stuff to say to you. Make sure you visit Butch and grab the Cleric collar.
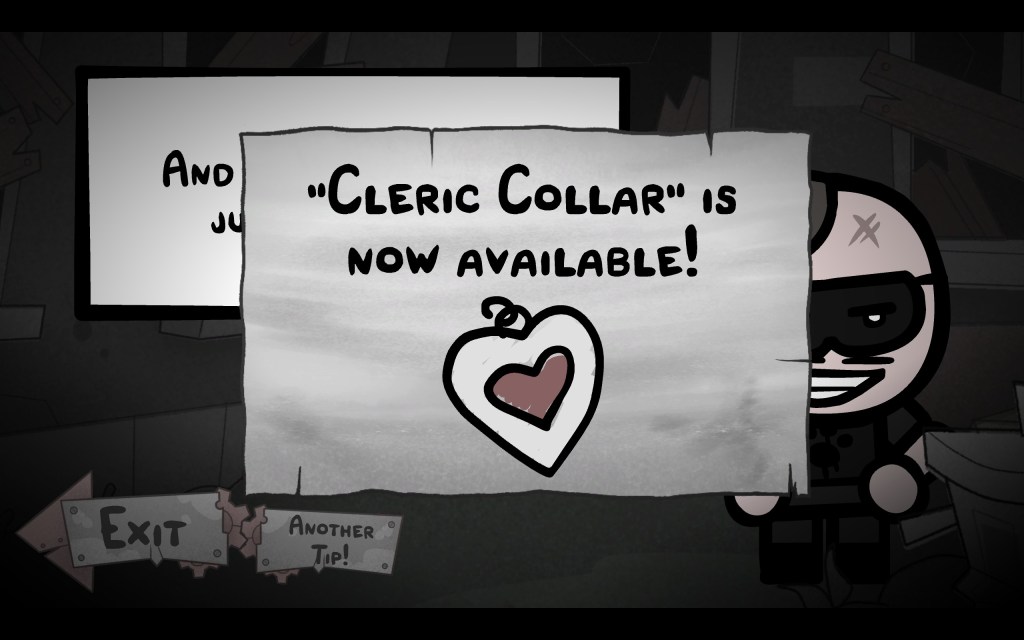
The Cleric is a very important class and one you will be taking with you on almost all runs. My recommendation for all future runs will be a Cleric-Hunter-Tank backbone, with the fourth slot taken up by a class of your choice. For now though, take a breather.

