
Walkthrough: Part 2
In this part, we will look at the Alley bosses we haven’t addressed yet. We have a new class to look at and a lot of characters introducing themselves.
- Walkthrough: Part 2
- The Alley – Overview
- The Neighbours
- Class: The Cleric
- Miniboss: Magnus, the Fighter
- Miniboss: Fenrir, the Hunter
- Miniboss: Lucy, the Mage
- Boss: Queen Hippo
The Alley – Overview
You will unlock the next area, the Sewers, once you have beaten Radical Rat. But we’re not ready to go charging ahead just yet. There is still stuff we need to learn in the Alley.
The Alley has no extremely threatening enemies. Nothing here has an insta-kill attack. Besides the mini-bosses, there are only two enemies I would consider tricky to deal with.
Cat Caller
This enemy will cast the debuff Slow on your cats every turn it gets. If Slow starts stacking, your cats will get bogged down. If they are surrounded by enemies they won’t have the mobility to escape. If enemies are agile then you won’t be able to get in range and attack.
Cat Callers deliberately hang back, out of your range. Target them with your long distance spells if possible. If you let a Cat Caller stay on the field for too long, you might end up in trouble.
Cat Callers flee when they are the only type of enemy left on the field. So instead of chasing them down, go pick up some coins.
Mangy
What makes Mangies annoying is that every time they take a hit, they spawn a maggot. This is a tactic employed by a lot of the tougher enemies in the game, which you will meet later.
If you remember, one of our cats had Spit as an ability. This is an infinite range, 1 damage attack. That’s perfect for picking off a stray maggot. What you never want to do is hit a Mangy with it. Unless the Mangy has only 1 hit point left, you will come off worse in this trade. All you have done is increase the number of enemies on the field!
Spawner enemies like this can get out of control if you keep hitting them with weak attacks. Just make sure you hit them hard, or else don’t bother hitting them at all. If you have the Sparkle effect as a bonus, spawner enemies like this are essentially the counter to that.
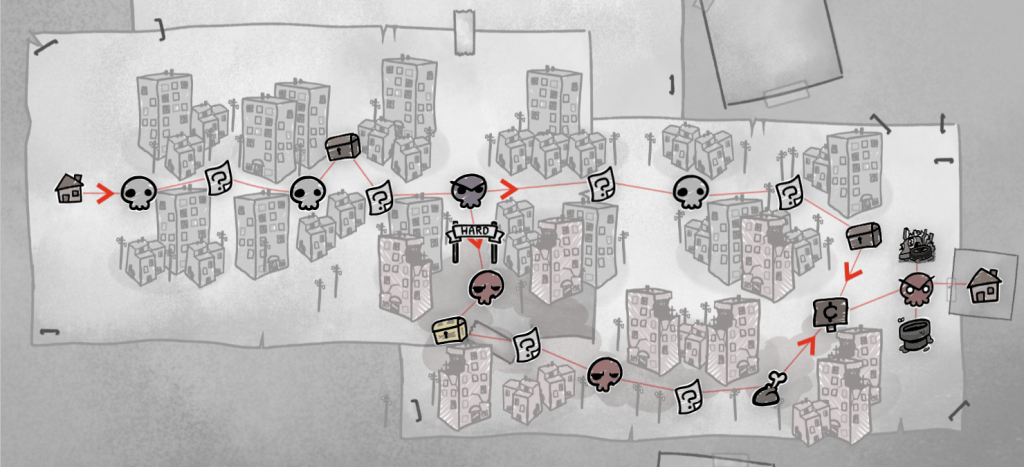
The Hard Path
The Alley’s Hard Path unlocks when you’ve completed the Sewers once. (I believe this is the pattern for all, or most, of the areas. Defeating the next area unlocks the Hard Path for the previous one.) Taking the Hard Path rewards you with one extra battle, more food and a better quality rewards chest.
Why is an extra battle a good thing? It’s an extra level up. If your cats can handle it, then they will come out better prepared for a run at the Sewers next. But if you are licking your wounds, don’t worry, just stick to the easy route. The Hard Path battles have more enemies with stacked stats. How good of a “synergy” does your team have? If they have useful abilities and are working well as a team, try for the Hard Path. Remember, failure is part of the game.
The Neighbours
Your neighbours will introduce themselves over the coming days. What they all want is some sort of cat. Tink wants kittens, Frank wants retired cats. Butch wants cats that have progressed to a certain point on an Adventure. As you give each of them more cats, you will gain more rewards from them.
Start with Frank because this is how you will gain a new room for your house. Why is this important? Because it lets you control which cats breed with each other. If they aren’t in the same room, they won’t be getting it on at night. You can now put your best two cats aside and leave them to make babies.
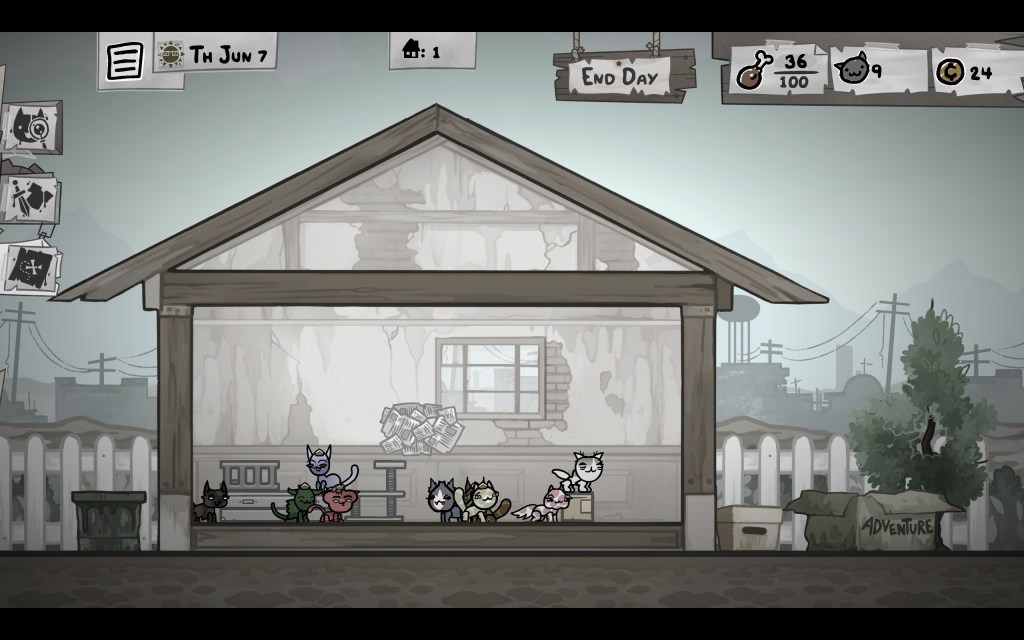
Butch will increase how many items you can keep in storage. Tink‘s upgrades show more details about your cats, which allow you to make better decisions when pairing up cats for breeding. (Although his very first present, a pink bow, is of no use to us…)
Breeding is going to be a whole section. We don’t have the tools to go in depth right now, that’s why we need those Tink upgrades. As a general rule, pair up your best two cats. Cats can be male, female or “?”, which is commonly known as “ditto” (after the Pokemon). Ditto cats can breed with either males or females, or other dittos. Note also that cats can be gay, which will throw a spanner into the works when you are trying to pair them off. Dittos can solve that problem too.
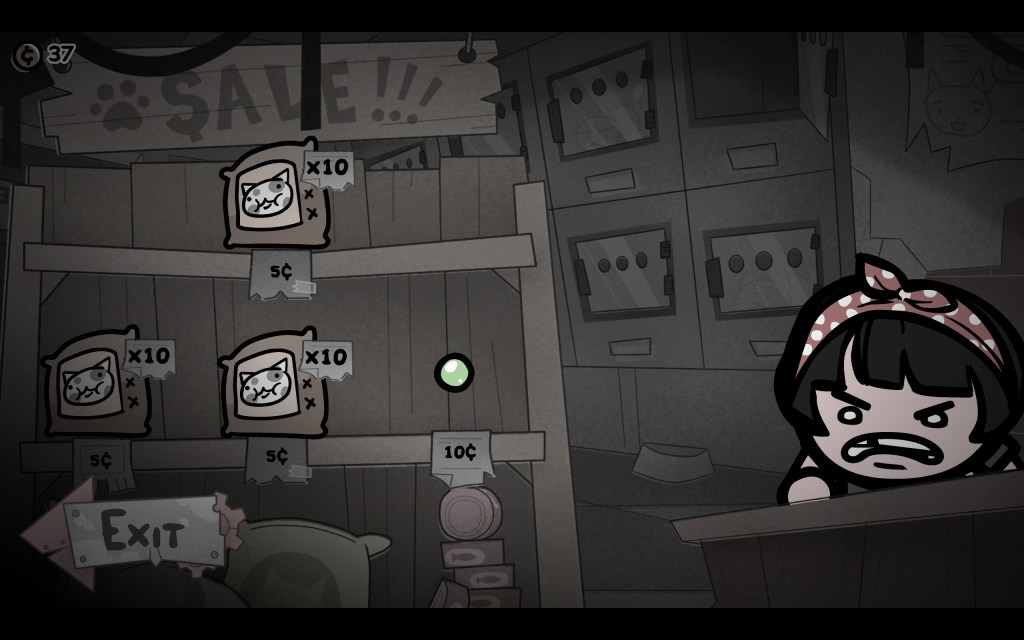
After your second run, you should unlock the local corner store, run by the delightful Tracy. This is where you can exchange coin for cat feed, if you are running low. You will collect food on your Adventures, but it can be rather random. Make sure you come home with some coin to spare.
Sending old cats to Tracy will unlock more food storage. Later on, she also gives you furniture for your house.
Introduction to Items
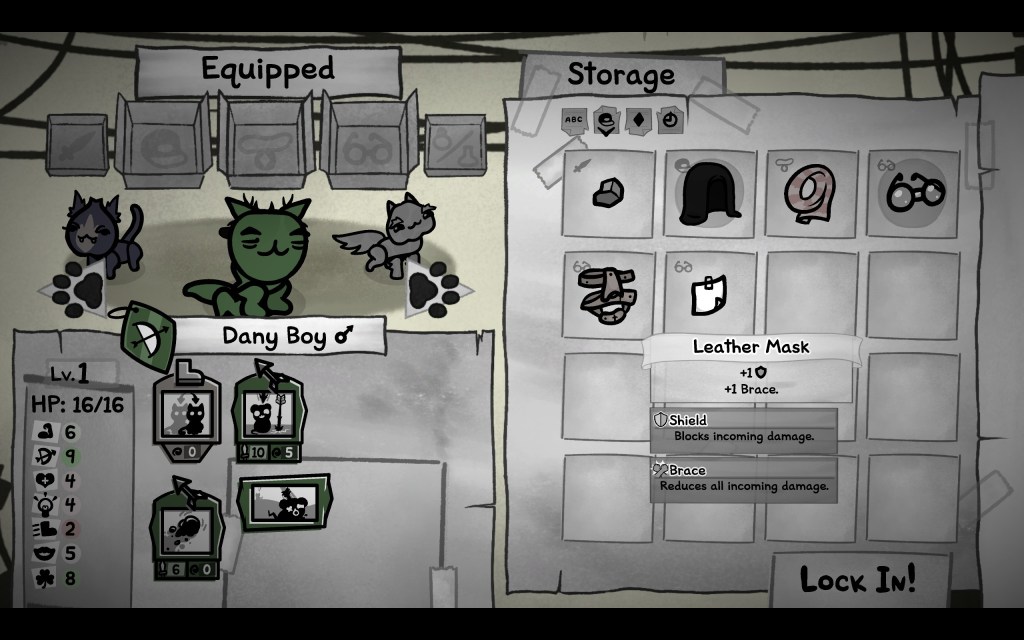
With any luck, you’ve acquired some weapons, armour and trinkets. If you are running out of storage, give Butch some cats. The majority of items you can equip are strictly beneficial. Use them to cover your weaknesses. A squishy Mage will do well with some Shield. A Tank is a good choice for items with Thorns.
Watch out for any Cursed items. You can’t get rid of these once equipped. There are also items that have negative effects. Sometimes you can spin these to your advantage if they synergise with a special Passive ability.
If you want to have an item available to you into your run, but don’t necessarily want to use it, then equip it on this screen. Then unequip it as soon as you enter the Adventure. It will be in your party inventory, but won’t get the Worn effect.
Worn items have a chance to break at the end of a run. This is an anti-hoarding measure. Items are there to be used. Unless you are saving up for an ultra-specific setup, just use the items you have, when you have them.
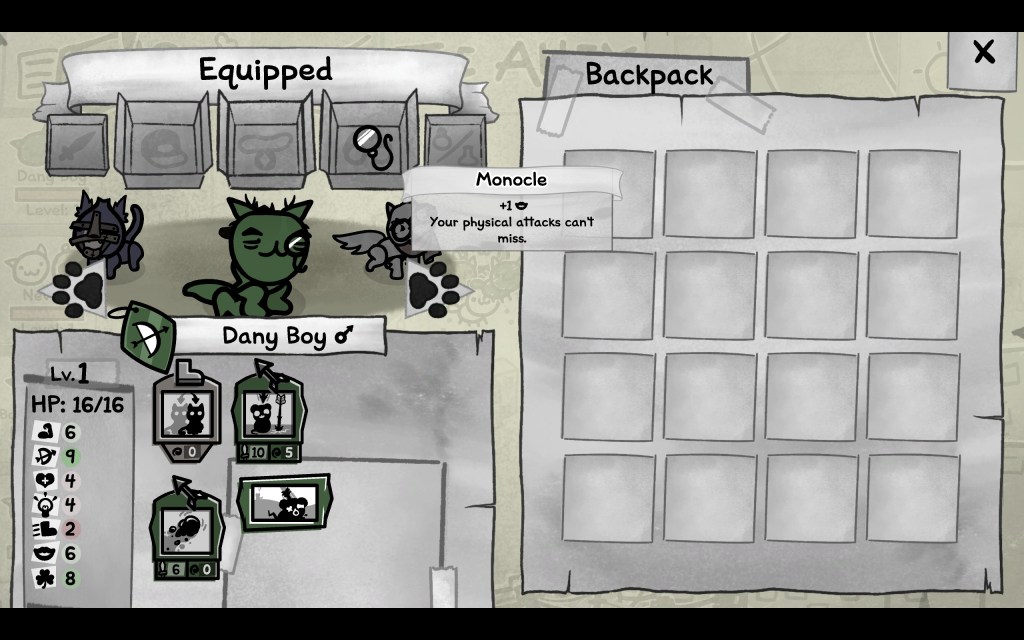
Always be on the lookout for items that boost your abilities. Here I have equipped a Monocle on a Ranger who has Heavy Shot. This is perfect, because this negates the 50% chance that Heavy Shot will miss. I now have a powerful 10 damage ranged attack with zero downside.
Class: The Cleric
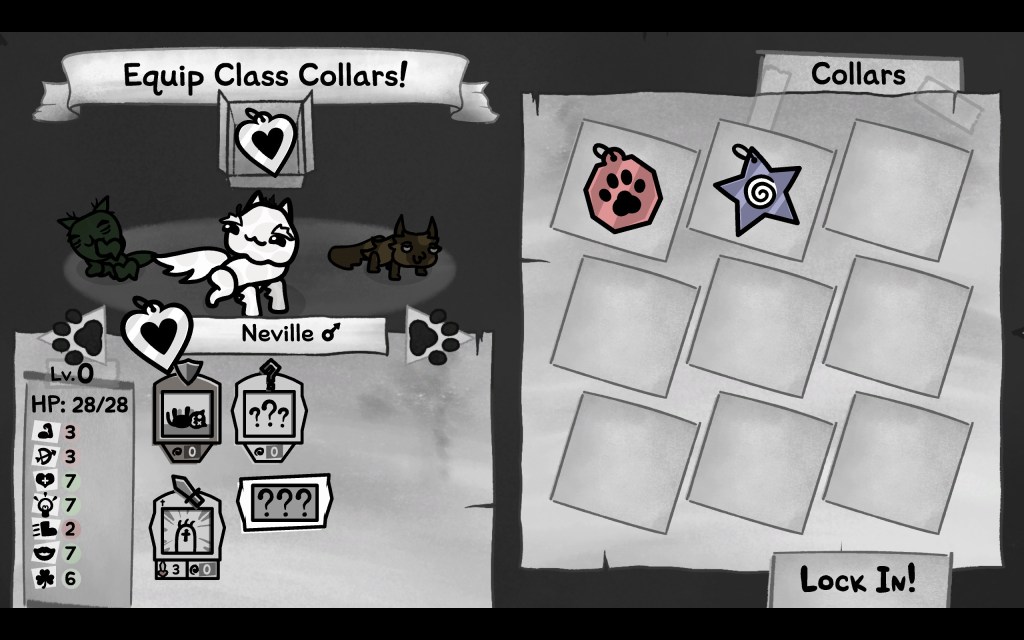
One of the most useful classes there is and a regular feature in your party from now on. The game emphasizes Charisma for Clerics, but I say watch out for Speed. Right now, the only healing mechanism you have is the basic attack. This will hurt enemies but heal allies, depending who you hit with it. But you won’t be doing either of those things unless you can actually get into melee range. Clerics will gain access to ranged healing spells at level up, as well as a set of mobility spells. But to begin with, they are stuck at melee range and that’s an issue. If you have items to buff their Speed, use them! Charisma is important for Clerics because it means they quickly have access to their spells. Intelligence is appreciated for the same reason. For the perfect Cleric, you also want a high Strength stat. They are melee combatants, should you be surrounded by enemies. You will be in trouble if your only healer has low Constitution and is too dead to be of help.
For your second run, I recommend setting out with a Cleric, a Tank and a Hunter. For the fourth slot, take whatever you feel like. Clerics and Tanks specialise in staying alive, something they do very well when teaming up together. Hunters can huddle behind them and lob shots over their heads. This classic team combo is a good one to rely on.
Miniboss: Magnus, the Fighter

Magnus doesn’t have a “gimmick” per se, but his chain dash will strike multiple units and gives him very high mobility. He can hit three of your cats and end up at the opposite end of the field to when he started. Mobility is a very important factor in battle, especially when your cats are low level. If you have any ranged weapons, or bear traps, they are especially helpful here.
I have a Hunter and a Mage in this battle, who have the range necessary to hit Magnus even if he’s relatively far. Keep your Cleric close to your weaker party members. My Tank is serving as bait and has the advantage of Backflip in this battle. Thorns would also work well. My Mage has Sparkles, which will hit the boss for extra damage every single turn.
Magnus can do a lot of damage, so taking him out quickly is preferred. If you have access to it, try to inflict the status Stun. Charm can perform the same role of making him skip his turn.
If you have the mobility advantage (unlikely) then remember to go for the backstab when you can, for extra damage. Keep your cats’ butts pointed towards safety.
Miniboss: Fenrir, the Hunter
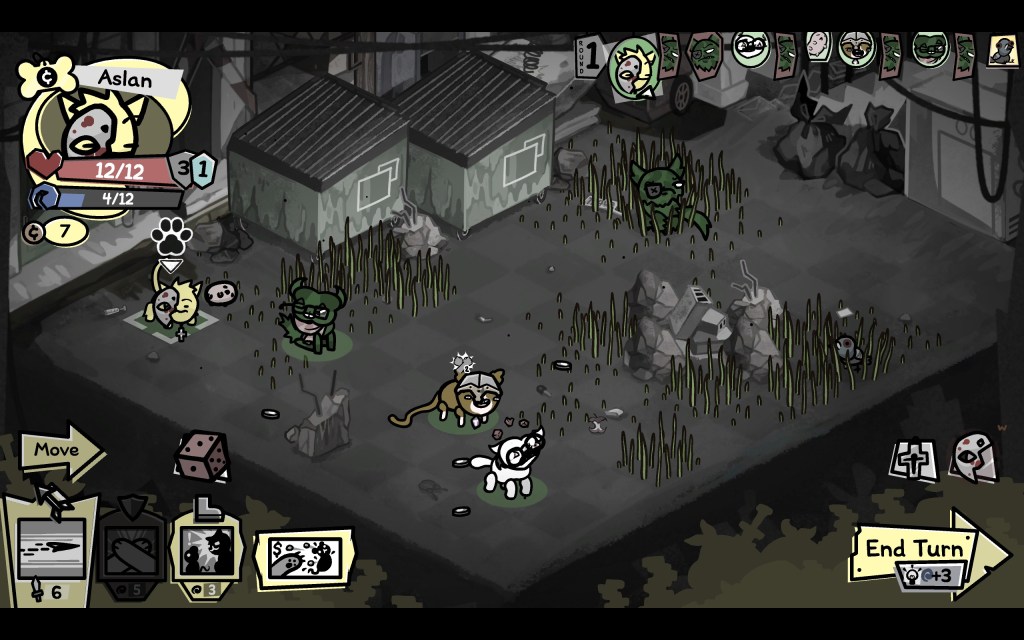
Fenrir is styled as a sniper battle. He shrugs off melee attacks, meaning your Hunters and Mages are most useful here. He lays bear traps, but is prone to walking into them himself. He also hangs out in tall grass, where he gets an evasion bonus.
Your Tanks and Fighters will have to get inventive. They are not actually helpless. The Tank can still reliably hit Fenrir if they charge from one tile away, making use of the fact their attack travels. You can also shove him into his own traps for extra fun. Any other “reaching” melee attack will also work, so weapons that have a longer reach (such as the Kebab) should do the trick. That said, your Mages, Hunters and Thieves will of course have an easier time of it.
Miniboss: Lucy, the Mage
Lucy rotates between three elemental spells. Her pattern is Ice – Fire – Lightning. Stay mobile and you will have no issues avoiding her very telegraphed patterns.
Enemies with Freeze abilities can be especially annoying, because they can stunlock you for multiple turns quite easily. Try not to get trapped in a corner.
Burn can be removed by water, as well as your typical debuff removal options. It may be easier and cheaper to just get wet.
Anything that denies Lucy the opportunity to move or take a turn will be especially useful. That means Stun, Charm, bear traps and Slow.
Boss: Queen Hippo
Once you’ve conquered Radical Rat, the second boss of the Alley will start to show up.

Queen Hippo has a lot of health compared to your damage output at this stage of the game. However, there is a sneaky secret. You only need to survive, not win. Queen Hippo starts with a stack of 4 Brace. When these are extinguished, she dies.
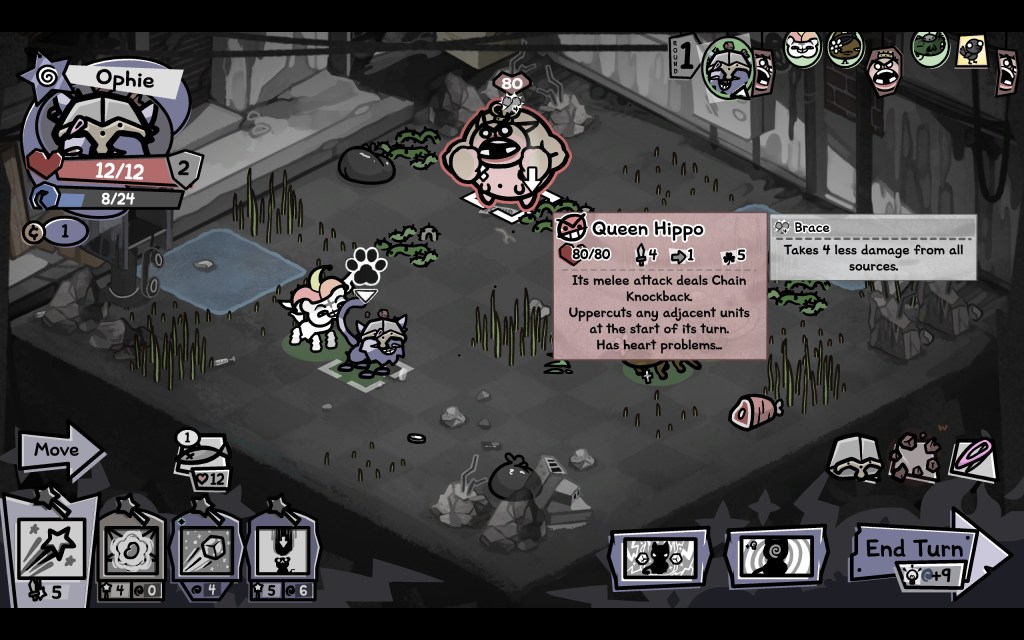
For the first two turns, simply run away. She has low movement speed and likely can’t reach you. However, her movement goes up every turn, so she will chase you down eventually.
One of the best methods is to distract her with familiars. Summon a bunch of pooters, maggots, fleas, etc. and let her waste time on them. Traps work too.
If you happen to have Knockback resistance, give it to your Tank and take up position. Queen Hippo’s attacks will fling your cats back, aiming to hit them together with her chain knockback. Thorns and Sparkles are good for retribution. But if you are squishy and fragile, just get out of there.

